 |
| 3 | ||
| | ||
| Teachers’ Toolkit: Mathematics for All (M4ALL) The publication is created within the European project "SEN Power", which includes five organizations: Prosveta-Sofia Foundation, Instituto Politecnico de Santarém (Portugal), Agrupamento de Escolas Cidade do Entroncamento-Escola Secundaria com 3º Ciclo do Entroncamento (Portugal), National Association of Resource Teachers NART (Bulgaria) and Antalya Provincial Directorate of National Education (APDNE). The project is implemented within the Erasmus program according to Grant Agreement No. 2022-1-BG01-KA220-SCH-00085065 with Human Resources Development Center, the Erasmus National Agency for in Bulgaria. Authors: © Nevena Chardakova (for Prosveta-Sofia Foundation) © Ana Torres, Bento Cavadas, José Maurício Dias e Nelson Mestrinho (for Instituto Politecnico de Santarém) © Isabel Correira ( for AECE) © Mariana Bancheva (for NART) © Pinar Bayram ( for APDNE) Editors: Nevena Chardakova The publication is available at https://sen-power.eu/resources/m4all/ The images and graphics used are open and premium licensed by Shutterstock and original images of the partners. Reproduction is authorized provided the source is acknowledged. Publisher: © Prosveta-Sofia Foundation, Sofia, Bulgaria ISBN ??? (pdf) This publication reflects the views only of the author, and the Commission cannot be held responsible for any use which may be made of the information contained therein. | ||
| 4 | ||
| | ||
| 5 | ||
| | ||
| | ||
| 6 | ||
| | ||
| Introduction
“It was in the mid-90s that neurodiversity as a formal concept and a rights movement began to emerge. Aided by the internet, autistic people and those with other conditions were able to connect and began sharing their experiences: what they had in common, how their lives differed. A recurring theme was how many felt marginalised, pushed out of a society that embraced only typical ways of being in the world. The phrase “neurological diversity” cropped up in their discussions, which along with “neurodiversity” appeared in magazine articles later that decade. Neurodiversity has clear parallels with biodiversity. It champions difference and the validity of individuals. It holds that a vaguely defined majority can be described as neurotypical, with brains that operate in a broadly similar way. Others, meanwhile, are neurodivergent, with brains that are built and work somewhat differently. Neurodivergent people may be diagnosed with a range of conditions, and many co-occur in the same individual. There is no definitive list, but autism (and what was once known as Asperger’s syndrome) and attention deficit hyperactivity disorder (ADHD) are common, as are dyslexia, a learning difficulty that affects reading and writing, and dyspraxia, which manifests as difficulties in movement and coordination.” Ian Sample Science editor, The Guardian The SEN Power project team fully shares the ideas and findings of the article (read the full text here). We believe that You can teach everything to everyone but not with the same means and not for the same time. This is how we came up with the SEN Power project idea and the design of the M4ALL toolkit. | ||
| 7 | ||
| | ||
| Instruction to teachers Dear Educators, The “SEN Power” project was developed as an effort to support all students (but especially students with specific learning difficulties, with autism spectrum disorders and hyperactivity/attention deficit disorders) so that they learn better topics from the Mathematics curricula. It is addressed to students aged from 7 to 11 years old and their teachers. ... In the SEN Power project we designed the present teacher’s toolkit Mathematics for All (NS4ALL) where you will find detailed lesson plans and all accompanying materials needed to present the topic to your students. The activities make use of non-formal education teaching approaches. Using them in class may be stressful at the beginning. The following words of advice could significantly help you in order to properly implement the trainings.
| ||
| 8 | ||||||||||||
| | ||||||||||||
Class preparation for the training course and the training sessions
The HOPES&FEARS/ GROUP CONTACT session is to be held at the beginning of the school year prior to the planned training sessions making use of the resources in the Teacher’s Toolkit.Hopes & Fears / Group Contract>
| ||||||||||||
| 9 | ||||||
| | ||||||
| ||||||
| 10 | ||
| | ||
Opening a training sessionWe all know that if you eager to do an activity and start doing it with positive expectations, the outcomes are far more likely to be better and the intervention – to be more efficient. Students may come to class either with great interest, or not be interested at all. Sometimes the teacher may face notable resistance if he/she begins directly with the planned theme. The students in the class may at first need to calm down or to be stimulated. There is a series of methods that can be used to start a training session:
| ||
| 11 | ||
| | ||
| NON-FORMAL EDUCATION Teaching methods In European projects – particularly within the frame of Erasmus - it is preferable to apply non-traditional teaching methods, which create a pleasant atmosphere in the class and turn learning into an interesting experience. In order to choose a method we have taken into consideration the aims of the resource. An appropriate method encourages students to identify situations in the reality of daily life and it gives them the opportunity to discuss issues as seen from their perspective. To ensure success of the method it is necessary to prepare it in the right manner. This manual consists of 38 resources distributed in three modules: Children’s Rights - Human Rights; Diversity and Social Inclusion; and Identity, Active Citizenship and Social Involvement. Each training resource consists of two tools: (a) Non Formal Education (NFE) Tool and (b) Digital Tool (DT). The NFE tool describes the “exercises” (activities) which should be utilized with the group. The DT is an extra tool which is to be used to enrich the NFE tool. Depending on the resource, the DT could be used either prior, during or after the implementation of the activities. The NFE tools used are somehow “repeatable”; the same tool (method) can be used in a variety of resources. The same principle accounts for the DT’s. The methods (NFE tools), which are applied in the present toolkit, are described below:
It has been established that team work in small groups of 4-6 students is a very effective working method. In small groups students have the opportunity to acquire knowledge, to comprehend and apply such knowledge while shaping attitudes and making choices. By discussing, participating and communicating in the group, students can develop and exercise appropriate skills. Organizing the class into small groups can be achieved in different ways: The educator explicates an activity and students shape small groups of 4-6 persons in which they practice different activities.
The educator introduces the topic, students discuss it in groups and present their conclusions to all members of the class. Students could work individually and afterwards discuss their conclusions in their group. By discussing in the class, an issue is raised and students are divided into small groups in order to discuss and propose solutions. 2. Brainstorming Brainstorming is a creative method aiming at expressing a variety of ideas. It can be applied for several reasons; most commonly it is used in order to cover as many aspects of the topic under discussion as possible. Brainstorming does not mean simply asking for ideas from others. For an effective brainstorming session there are a few rules to be followed:
Brainstorming is quite simple to utilize. The educator writes the topic or question on the blackboard, then explains the rules to the class setting a time limit, e.g. 5 minutes. Students are asked to begin. The educator writes the ideas on the blackboard quickly. If there is a gap established, the educator can fill it in his/her ideas. Depending on the ideas, they could be categorized, i.e. a few ideas could fall under the same “major” category. The next step is to process the ideas and move on to action. In some cases it may be necessary to ask students to specify some ideas. At this stage some ideas can be clarified, evaluated, chosen and ranked. This procedure is necessary in order to differentiate the ideas, i.e. if there is no differentiation during acceptance of ideas, there will probably be the impression that all ideas are equal and acceptable. 3. Role-playing games In role-playing games a certain situation is carried over from the real world into the frame of the role-playing game. Role-playing games are useful when we wish to analyze certain behaviors or to test new or alternative behaviors within a controlled and safe framework. In order to use the role-playing games it is necessary to have a warm and open-minded atmosphere in the class. It is important that all participants are aware of the meaning of the role-playing games and that they agree on certain basic rules in order to work together in a structured manner. Therefore, the educator has to explain in brief the methodology of the role-playing games and further on, the class has to set some rules for the students playing the roles, and for the students watching the performance, before the game starts. Then, the topic is defined as a certain situation and the participating characters are described in detail in order to help all participants to understand their roles. The different scenes should not last longer than a few minutes. Students, not participating actively in the role-playing game, function as observers and they are the audience. The educator acts as the coordinator or “director” and he/she is responsible for planning, carrying out and evaluating the activity. 4. Simulation 6. Case study A case study (UNSW Australia) is an account of an activity, event or problem that contains a real or hypothetical situation. Case studies can be used in order to help students understand how the complexities of real life influence decisions. A common case usually:
A case study is given to students as an example in order for them to implement an exercise, while at the same time trying to focus on the issue described. *All material used for the purposes of this project is located on the project’s website. Educators, and in some cases students, will be instructed to use the materials given in the description of each resource. 7. Guided Drama In guided drama students are presented a case as far as general settings and characters are concerned. They are guided through the framework of the plot by receiving descriptions of planned events (meetings) and of their tasks in the respected meetings (messages). They are encouraged to step in the shoes of the characters and, keeping to the provided information, are free to decide on the story, i.e. details of the plot, characters’ speech, etc. The printed information is distributed to the students shortly before the events; students read it and plan their actions and speech right away, similarly to ‘speed dating’ techniques. 8. Mind Map A mind map (Wikipedia) is a diagram used to visually organize information. A mind map is often created around a single concept, drawn as an image in the center of a blank page, to which associated representations of ideas such as images, words and parts of words are added. Major ideas are connected directly to the central concept, and other ideas branch out from those. Mind maps can be drawn by hand, either as "rough notes" during a lecture, meeting or planning session, for example, or as higher quality pictures when more time is available.
9. Blue skies thinking | ||
| 12 | ||
| | ||
The more ideas, the better; strive for:
10. Snowballing Snowballing enables participants to think about their own responses and gradually reach out to those around them to consider the thoughts of others on an issue. How to do snowballing? The teacher asks a question and/or poses a scenario and gives the participants a few moments to reflect. Then, participants are asked to turn to the person next to them and discuss their thoughts. Depending on the activity, the teacher may ask participants to prioritize their ideas, come to consensus on their top priorities, etc. (allow several minutes). Then, each pair turns to another pair and discusses their thoughts. | ||
| 13 | ||
| | ||
USE OF DIGITAL TOOLS
| ||
| 14 | ||
| | ||
EVALUATION
Evaluation is the process of estimating the effectiveness of a training course and it should be an integral part of every training and learning procedure. Evaluation deals with:
Evaluation activities are carried out in order to examine:
What is to be evaluated?
| ||
| 15 | ||||||||
| | ||||||||
| Energizers
 * The suggested energizers are different and some of them could take longer, but, as a rule, they are expected to last only a couple of minutes. With the preparation and the time needed to launch and do the described energizers, this is estimated to last 5 minutes. | ||||||||
| 16 | ||
| | ||
| Energizers |  1 - Break the Circle 1 - Break the Circle The teacher assigns randomly a number to each student, depending on the group size, i.e. for 20 students, numbers 1-4 are ok, so each group has 5 people (groups could be synthesized by the students with the same number, i.e. all having been assigned number ‘1’ or by students where each one has his/her own unique number 1-4; similarly and more fun is grouping by ingredient for a Greek salad, where every student is i.e. ‘tomato’, ‘cucumber’, ‘onion’, ‘oregano’, etc.) Once the groups have been formed, they make circles and the teacher randomly picks a number (or an ingredient) to step out of the circle and try to break in, while the others remaining are instructed to not let go of their hands no matter what. This can be repeated once more with another number stepping out. | |
| Energizers |  2 - Moo!!! 2 - Moo!!! The teacher assigns randomly in a piece of paper (turned upside down on their desks) each student with farm animal, i.e. ‘cow’, ‘horse’, ‘sheep’, ‘rooster’, etc. Once the students are informed of their animal role, they are instructed to walk around the room acting like the animal they are assigned (i.e. making its sound), in order to find their kind. | |
| Energizers |  3 - Amoeba 3 - Amoeba An evolution game! Everyone starts off as an amoeba, with the purpose of evolving to a human. All students walk around acting like an amoeba and when they meet with another amoeba, they play one round of rock/paper/scissors. Whoever wins evolves into a worm. When two worms meet they play again rock/paper/scissors and whoever wins turns into a wasp, but whoever loses goes back to becoming an amoeba. This continues until one becomes human. The evolution stages are: amoeba à worm à wasp à chicken à monkey à human. | |
| Energizers |  4 - Human chain 4 - Human chain Everybody stands up in a circle. They close their eyes and start moving towards the middle of the circle, holding their hands up. Whoever they touch with their hands, they hold and do not let go, so they make a knot. Then the facilitator asks the students to open their eyes and try to untangle themselves (make a circle) without letting go of their hands. | |
| Energizers |  5 - Good morning or good evening 5 - Good morning or good evening Everybody walks around the room greeting each other (as if everybody was their close friends) using words and gestures (shake hand, kiss, hug). Then they repeat the greeting in silence using only their eyes. When the exercise is over, the teacher asks students how did they feel with the two different ways of greeting (eg was it difficult, how did they manage to communicate, etc). | |
| 17 | |||||||||||
| | |||||||||||
| Energizers |  6 - Keep walking 6 - Keep walking The teacher instructs the students to walk in different manners covering the whole rook, i.e. walk like you are very happy, walk like a very heavy elephant, walk like you are 80 years old, walk like it’s raining cats and dogs, walk like a toddler, etc. | |
| Energizers |  7 - Connecting eyes 7 - Connecting eyes Participants stand in a circle. Each person makes eye contact with another person across the circle. The two walk across the circle and exchange positions, while maintaining eye contact. Many pairs can exchange at the same time, and the group should try to make sure that everyone in the circle is included in the exchange. Tip: Begin by trying this in silence and then exchange greetings in the middle of the circle. Variations: If the teacher considers, knowing the class atmosphere, that some students might be left not participating, i.e. they try to make eye contact but nobody responds to them and they have no chance to move from their initial position, the moderator could divide the class in 2 groups and introduce a competitive element – after the activity each group will be marked on the ‘team spirit thermometer’ (which could be printed on a A4 paper and the teacher marks the degrees with a marker). The more people you have left not participating in the ‘eye contact’ activity – the lower the degrees to be marked on the thermometer. | |
| Energizers |  8 - Find another seat: 8 - Find another seat: Have the students sit on chairs in a circle, with the number of chairs being one less than the number of students. The student without a chair stands in the middle and tells their name. Then the student calls out a characteristic or a colour, or type of clothing, e.g. “Everyone wearing orange!”. All participants who are wearing orange must get up and find another seat, but not the one immediately to their right or left. The student in the middle races to find a seat and the person left standing becomes the next caller in the middle. | |
| Energizers |  9 - Balloon pop 9 - Balloon pop Have everyone form a circle. Instruct the participants to put one piece of information about themselves, e.g. I have 2 sisters, or my mother is called Samy, on a small slip of paper, fold it, and put it in a blown up balloon. Throw the balloons in the middle of the circle and then have people take turns popping a balloon, reading the piece of paper, and guessing to whom the information applies. Participants could wander round the room asking ‘yes/ no’ questions to the other participants but not exactly the statement from the paper slip, e.g. they cannot ask “Have you got 2 sisters? But could ask “Have you got sisters?” and then “Have you got more than 1 sister?’, “Have got less than 3 sisters?”, etc. Game finishes when all participants have identified the author of the paper slip they have. *Note: this exercise should be used if there is enough time. | |
| 18 | ||||||||||||||
| | ||||||||||||||
| Energizers |  10 - Rope game 10 - Rope game Have the participants stand on the middle of a space cleared of desks, chairs, etc. Divide the room in a way that allows them easily to move from one half of the room to the other, e.g. by placing a long piece of rope on the floor. The teacher stands at one of the ends of the rope and calls out a characteristic, or a colour or a letter, e.g. “Everyone having blue eyes!”; “Everyone having 3 brothers”, “Everyone whose name begins with B”, etc. and points to the part of the room where the participants wearing orange/ having 3 brothers/ having B names have to move to. All participants who are wearing orange/ having 3 brothers/ having B names move to the respective part of the room; the ones who are not , have to go to the other part. Questions have to be constructed so that the class does not divide in groups having comparatively equal number of students, i.e. one of the groups should consist (in most cases) of one, two or few students. Debriefing: Participants are asked to share how they felt when they were part of a big group; and when they were standing alone (or were part of a very small group); what did they feel of themselves (as part of a small/ big group), and what their feelings were towards the group they were not part of. | |
| Energizers |  11 - Alphabetical order 11 - Alphabetical order Students make a circle with the chairs, take off their shoes and get on the chairs (one per person - the circle needs to be as close as possible). Standing on the chairs and just moving from one to another one without getting off, students have to arrange themselves in alphabetical order according to their name. As soon as they are ready, teacher will check if they are right; if not they continue until they are right. | |
| Energizers |  12 - Body spelling - Body geometric shapes 12 - Body spelling - Body geometric shapes Option 1 The teacher asks students to write their names in the air using different parts of their body, for example, using their hand, leg, lbow, or nose, etc. Optional: If time allows the teacher could ask to the class to spell out some words reproducing the letters with their bodies. Students can collaborate all together or can create different groups. Option 2 Task: Draw a geometric shape in the air using different parts of your body - hands, legs, elbows, noses, etc. Option 3: Task: Work in groups of 2, 3 or more students to make a geometric shape with your bodies. | |
| Energizers |  13 - Simon says 13 - Simon says Teacher tells the group that they should follow instructions when he/she starts the instruction by saying “Simon says...”. If the teacher does not begin the instructions with the words “Simon says”, then the group should not follow the instructions! The teacher begins by saying something like “Simon says clap your hands” while clapping their hands. The participants follow. The teacher speeds up the actions, always saying “Simon says” first. After a short while, the “Simon says” is omitted. Those participants who do follow the instructions anyway are ‘out’ of the game. The game can be continued for as long as it remains fun. | |
| Energizers |  14 - I am going on a trip 14 - I am going on a trip Everyone sits in a circle. Start by saying “I’m going on a trip and I’m taking a hug”, and hug the person to your right. That person then has to say “I’m going on a trip and I’m taking a hug and a pat on the back”, and then give the person on their right a hug and a pat on the back. Each person repeats what has been said and adds a new action to the list. Go round the circle until everyone has had a turn. | |
| 19 | ||||||||||||||
| | ||||||||||||||
| Energizers |  15 - Animal roundup 15 - Animal roundup The teacher tells to the class to silently think of an animal. Then he/she tells to the group that without talking, they need to arrange themselves on a line from largest to smallest animals. Group members can only make gestures and the noise of their animal. After they have finished, teacher ask to the students to say the animal they were supposed to be to see if the order is correct. | |
| Energizers |  16 - Back to back 16 - Back to back Participants find a pair of similar size and weight. They sit on the floor, back to back with their pair. They hold their arms. They have to get up, while keeping the arms and backs together. After trying once-twice with their pair they switch pairs. They can repeat this process with other pairs for a few times. | |
| Energizers |  17 - Toaster or Rock Star 17 - Toaster or Rock Star The group starts in a circle with one person in the center. The person in the center points at someone in the circle and says “Toaster” or “Rock star”.
| |
| Energizers |  18 - Mosquito game 18 - Mosquito game The group stands in a circle and the facilitator tells a story about a plague of mosquitoes and that everybody has to kill the mosquitoes so as they don’t get malaria. The facilitator puts up a mosquito on the head of a person who must lower in order to avoid the mosquito. The two persons next to that person must clap their hands above his/her head to kill the mosquito, but the mosquito escapes and it goes on. When the group is already doing the game well and quickly, the facilitator will add more mosquitoes until it is almost impossible for the group to catch as many mosquitoes. | |
| Energizers |  19 - Grab the finger 19 - Grab the finger In a circle, place right finger on next person s left palm. Try to grab a finger before yours gets grabbed. After doing several times switch; place left finger on next person s right palm and repeat the process for a few times. | |
| 20 | |||||||||||||||||||||||||||||||||||||||||||||||||||||||||||||||||||||||||||||||||||||||||||||||||||||||||||||||||||||||||||||||||||||||||||||||||||||||||||||||||||||||||||||||||||||||||||||||||||||||||||||||||||||||||||||||||||||||||||||||||||||||||||||||||||||||||||||||||||||||||||||||||||||||||||||||||||||||||||||||||||||||||||||||||||||||||||||||||||||||||||||||||||||||||||||||||||||||||||||||||||||||||||||||||||||||||||||||||||||||||||||||||||||||||||||||||||||||||||||||||||||||||||||||||||||||||||||||||||||||||||||||||||||||||||||||||||||||||||||||||||||||||||||||||||||||||||||||||||||||||||||||||||||||||||||||||||||||||||||||||||||||||||||||||||||||||||||||||||||||||||||||||||||||||||||||||||||||||||||||||||||||||||||||||||||||||||||||||||||||||||||||||||||||||||||||||||||||||||||||||||||||||||||||||||||||||||||||||||||||||||||||||||||||||||||||||||||||||||||||||||||||||||||||||||||||||||||||||||||||||||||||||||||||||||||||||||||||||||||||||||||||||||||||||||||||||||||||||||||||
| | |||||||||||||||||||||||||||||||||||||||||||||||||||||||||||||||||||||||||||||||||||||||||||||||||||||||||||||||||||||||||||||||||||||||||||||||||||||||||||||||||||||||||||||||||||||||||||||||||||||||||||||||||||||||||||||||||||||||||||||||||||||||||||||||||||||||||||||||||||||||||||||||||||||||||||||||||||||||||||||||||||||||||||||||||||||||||||||||||||||||||||||||||||||||||||||||||||||||||||||||||||||||||||||||||||||||||||||||||||||||||||||||||||||||||||||||||||||||||||||||||||||||||||||||||||||||||||||||||||||||||||||||||||||||||||||||||||||||||||||||||||||||||||||||||||||||||||||||||||||||||||||||||||||||||||||||||||||||||||||||||||||||||||||||||||||||||||||||||||||||||||||||||||||||||||||||||||||||||||||||||||||||||||||||||||||||||||||||||||||||||||||||||||||||||||||||||||||||||||||||||||||||||||||||||||||||||||||||||||||||||||||||||||||||||||||||||||||||||||||||||||||||||||||||||||||||||||||||||||||||||||||||||||||||||||||||||||||||||||||||||||||||||||||||||||||||||||||||||||||||
| Energizers |  20 - Chief of clan 20 - Chief of clan Everyone stands in a circle. One participant closes his/her eyes or steps out of the room. He/She will have to guess who is the chief of the clan. One participant volunteers to be the secret Chief (quietly, so the "guesser" can't hear anything). The chief begins an action such as snapping fingers, patting the tummy, or slapping knees, and everyone in the circle imitates him/her. The guesser returns to the room and tries to figure out who the chief is. As the guesser looks around, the chief changes the action avoiding being detected. | |
| Energizers |  21 - Name game with balls 21 - Name game with balls Students stand in a circle. The teacher gives a ball to one of the students. He/she holds the ball, then says the name of another participant and passes them the ball. After a few passes, the teacher adds one more ball in the game, and then – another one. This way there will be 2/3/4 balls in the air at a time and all participants will be calling each other’s names | |
| Energizers |  22 - Names and adjectives 22 - Names and adjectives Participants stand in a circle; they think of an adjective to describe character or how they are feeling. The adjective must start with the same letter as their name, for instance, “I’m Maria and I’m merry”. Or, “I’m Alexander and I’m amazing.” As they say this, they can also mime an action that presents the adjective in a meaningful way. (N.B. In the national language versions of the TM there should be used popular names for the country and relevant adjectives in the respective language). Variation (use if time allows): The game could also be used a memory game (concentration game) to check if the rest of the group has remembered the ‘name-adjective’ pairs. After several rounds (each participant repeating his name and adjective, the teacher/ a game master, checks if the group remembers the ‘names-adjectives’ fixed pairs by saying the name of one of the students, e.g. ‘Maria’; Maria steps forward to the middle of the circle and the rest of the group are expected to come up with the adjective previously linked to the name by saying “Maria is merry”. If they cannot guess, the participant in the circle (Maria) might mime again the adjective as a tip. | |
| Energizers |  23 - Emotions Games 23 - Emotions Games Materials required:
Move the tables and chairs around the classroom, so the students can sit in a circle. The game begins with a ball being thrown to a student, at this point the leader who has got the 5 cards (one for each emotion), raises a card; the child who has received the ball must talk about a situation that triggers the emotion that the leader has raised. The ball is then thrown to another classmate and so on until all the students have received the ball and all of them have had a chance to talk about an emotion. The ball can only be thrown once to each student. The game ends when all students have received and thrown the ball and all of them have spoken about an emotion. | |
| Energizers |  24 - How much do we weigh? 24 - How much do we weigh? Divide the students into groups of 4 Material Record sheet (appendix 1) Digital bathroom scales. Move chairs and tables so that you can have as much as free space in the room as possible. The students are divided into groups of 4, made up randomly but heterogeneously. Each group is given a record sheet and a digital bathroom scale (borrowed from parents, if necessary). Each student will weigh him/herself and record the required data on the record sheet. After this procedure, the students in each group should line up in a row, from the lightest to the heaviest. The group that completes the task correctly as soon as possible wins the game. | |
| Energizers |  25 - The mirror game 25 - The mirror game The game begins with the room cleared of tables and chairs. The students start by team up in pairs and stand in front of each other. They agree who starts the game, who plays the mirror and who plays the person. The game begins to the sound of a song chosen by the leader. The person will start to move and the "mirror" will have to follow him/her, immediately repeating the person's movements. When the leader stops the music, they swap places and the person who was the "mirror" becomes the person and vice-versa. | |
| Energizers |  26 - Empathy game 26 - Empathy game Students get into a circle with sheets of paper and coloured pencils in the centre of the room and all students are invited to express, through colour, an emotion or feeling, by using different colours and painting them on the sheet of paper. When they have finished colouring, all the students show the sheet of paper and explain what that colour represents at that moment. If it is something negative, the classmates must voluntarily offer him/her other colours that transmits a positive emotion, that represents something positive. The aim of the game is that everyone feels free to share a feeling and receive peer support if needed. | |
| Energizers |  27 - Mathematical quizzes 27 - Mathematical quizzes Engage children using math quizzes. Prepare a few fun and age-appropriate riddles to challenge their number sense and mental calculation skills. Quiz example:
Reward the participants who solve the riddles properly with math-themed stickers or badges. 5 min | |
| Energizers |  28 - Water cycle 28 - Water cycle Explain to the kids the process of the water cycle (evaporation, condensation, precipitation) in simple terms. Play some music and have the kids dance around the play area. When the music stops, call out one of the water cycle stages. When a stage is called out, the kids must quickly freeze in place, acting out the corresponding stage (e.g., spinning to represent evaporation or forming a group to mimic precipitation). Continue playing the music and calling out stages intermittently. | |
| Energizers |  29 - Calculate in 2 steps 29 - Calculate in 2 steps Divide students into 5 groups. It can be done by using playing cards. According to the number of students in the class, find out how many of the 13 ranks in each of the four suits: clubs (♣), diamonds (♦), hearts (♥) and spades (♠) you will need. For example: if there are 20 students, you will need 5 number cards - 5, 6, 7, 8 and 9. Shuffle the cards and let each child draw out their card. Then point out that the numbers of each colour form one team, and that the team formed will have to solve group problems. If there is an odd number of children in the class (eg. 23), you can have coloured slips of paper for students to pick them up as they enter the classroom. Then, you will need 5 colours with 5 cards/slips of paper for each colour. In such case, some groups will become slightly larger. If you have more children in the class - you can decide whether to increase the number of groups. It’s up to each teacher to decide, according to the size of the classroom and the possibilities to set aside work area for each group. Set up classroom space for each group to work and put a number in each area – so that the numbers 1, 2, 3, 4, 5 can be easily seen. The way work places are designed should also give enough space for the movement of students between each of the work places. Place 1 red and 1 green pencil in each working space. Print Appendix 1 five times. Put each copy in an envelope. Allow each group to draw out 1 envelope. The students do not know that they have the same tasks inside. Ask each group to go to their table and open the envelope. Give them time to look at the problems, explaining that each group must solve the problems in the row that corresponds to the group number - group 1 solves row 1, etc. The task includes 2 steps: 1. To perform the arithmetic operations on each row. The first task requires finding the sum of 2 numbers. Show this on the board with an example: 4 3 = ......... The second expression requires that you write the numbers from the first expression, swapping their places, and find the sum of the numbers again. Show this on the board by writing 3 4 = ........ The third task requires subtraction operation to be performed. Each group has to illustrate it using the table below and colour the boxes they used to find the correct answer. Recall the rule starting from the first number in the expression and counting backwards. As many steps are taken as the second number in the expression shows. Show through the example on the board:
Time for explanation and work: 5 min. 2. Now there is a change of places. 1st group goes to the second group space, 2nd group - to the 3rd, 3rd group - to the 4th, 4th group - to the 5th, and 5th group to the 1st group space. Each group has to check, if the solution is correct. If it is correct, the group circles the answers in green, but if it finds an error, it writes the correct answer in red. Working time: 3 min. | |
| Energizers |  30 - Find the figure 30 - Find the figure Option 1 Divide the class into several groups. Each group gets 1 set of the shapes and explanatory texts (Annex 1) - cut out separately each statement that describes the shape. The task of each group is to match the statements with the images of the shapes. When the groups are ready, check if the task was competed correctly. This exercise serves both to energize the students at the beginning of the lesson and as a transition to the topic of the lesson. Working time – 8 min. Option 2 Rearrange the tables (or desks) so that students can move freely around the room. Place the images from Annex 1 in the corners of the classroom. Allow each child to pick up a card with a description of a geometric figure. The task is to get as quickly as possible to the place with the geometric figure that corresponds to the description of the card. This exercise serves both to energize the students at the beginning of the lesson and as a transition to the topic of the lesson. Working time – 3 min. | |
| Energizers |  31 - Movement calculations 31 - Movement calculations Calculate moving The teacher has pre-printed and laminated the cards from Appendix 9 – Energizing exercise The teacher says: - We're going to play a game. I will tell you riddles and I will pull out one of my cards which have symbols for squatting, jumping and spinning. The answer to the riddle will determine the number of moves. - How many units are obtained if I subtract 1 unit from 1 ten? - How many tens are obtained if 5 units are added to 5 units? - How many units do you get if you add 5 more units to 5 units? - How many units are obtained if I subtract 10 units from 1 ten? | |
| Energizers |  32 - Blocks game 32 - Blocks game Blocks game Use Appendix 1 to prepare the working materials by printing as many copies as you will need. Divide the students into pairs. Give each pair of students 9 blocks of tens and 9 blocks of units in an opaque envelope. One of the students shakes the envelope, pokes in without looking, and takes out 7 blocks. The other one takes the rest. Each one writes down the number that they have drawn, and then the students combine the two drawn numbers to find out the sum. The students change the order and repeat the activity. After that, ask those who wish to write down the numbers and the sum on the white board. Discuss the results with the whole class. ASK: Why do all groups always get the sum of 99? (the blocks in the envelopes make 99). Why do we have so many different ways to sum numbers? (the students drew different combinations from the tens and from the units blocks). Who has more blocks - the one who has drawn 7 first or the one who takes the rest? (the one who takes the rest). Who gets the bigger number? Does the one with more blocks always have a bigger number? If the students confirm this, challenge them to come up with a way for a person to have more blocks, but a smaller number. If they don't answer, ASK: How is it possible that the person with more blocks have a smaller number? (one block of tens has more units than one block of units, respectively, the smaller number of blocks of tens can actually be a larger number than a larger number of units as individual blocks. Conclusion - the number of blocks does not tell us the number of units) . Time – 5 min. | |
| Energizers |  33 - Broken telephone 33 - Broken telephone
The activity can be repeated several times changing the last person in the line who starts the game. | |
| Energizers |  34 - Triangle or circle 34 - Triangle or circle The whole class participates in the game. All students face the teacher. Step 1: The teacher says circle and students raise their hands up and make a big circle above their heads. Step 2: The teacher says triangle and students make a "roof" over their heads in the shape of a triangle. Step 3: The teacher gradually increases the tempo and repeats randomly the two words circle and triangle. Anyone who does not make the named figure is out of the game. The activity continues until there are only 2 or 3 children left playing, or until the teacher decides to end the activity. | |
| Energizers |  35 - Angles 35 - Angles Students get up from their seats and stand next to their desks/tables. The teacher explains to them that he/she is going to use his arms as the arms of an angle, and they must perform the corresponding action depending on how he places his arms. When: • he/she stretches one arm out to the side parallel to the floor, at shoulder level, and raises the other up, students must lean back; • he/she raises arms up and makes a "roof" above his/her head, students must lean forward; • one of his/her hands points down to the floor and the other one points to the floor to the side, close to the body, students should squat. If there is time, the activity continues with a student taking the teacher's place. | |
| Energizers |  36 - Balloon game 36 - Balloon game Location: Classroom/Interior as free as possible. No. of participants: All the students in a class Organisation: 2 groups sit on the floor in a row behind each other. Material: 2 balloons. Description Organise two rows side by side, with the students sitting one behind the other. The teacher gives a balloon to the first person in each row who, on the teacher's signal, must pass it on to the next person, without anyone dropping it. When the balloon reaches the last member, he comes to the front of the queue and continues along the line. Whenever someone loses the balloon, the balloon goes back to the beginning, i.e. to the first person. | |
| Energizers |  37 - Fruit game 37 - Fruit game Location: Classroom/Interior. No. of participants: All the students in a class. Organisation: Students stand in a circle. The names of three fruits are chosen: pear, apple and banana; Each fruit is associated with a gesture: pear - clap your hands; apple - jump backwards; banana - hold up your hands. The teacher names the fruit randomly, which the students have to match with the correct gesture. Whenever a student makes a mistake, they leave the game. The pace at which the fruit is named can be increased in order to increase the difficulty of the game. | |
| Energizers |  38 - Opposite game 38 - Opposite game Location: Classroom No. of participants: All students in a class Organisation: Students stand in a circle. Materials: None Game description: The students are lined up side by side. The teacher starts by giving an order, e.g. one step forwards, but the aim of the game is to do the opposite, so the students must step backwards, raise their right hand while their left hand is raised, ... The orders should be anything that can be done the other way round. The participants must do exactly the opposite, whoever makes a mistake and doesn't do the opposite is out of the game. | |
| Energizers |  39 - Numbers in pairs 39 - Numbers in pairs Location: Classroom No. of participants: All the students in a class. Organisation: All the students in the class organised in pairs. Materials: None Game description: The students stand with their backs to their partner, back to back. At the teacher's signal, they jump up and face their partner, each raising as many fingers as they have thought of. When they both think of the same number and then hold up the same number of fingers, they win. | |
| Energizers |  40 - I went to the market 40 - I went to the market Location: Classroom/Interior No. of participants: All students Organisation: Students in a circle in a seated position Game description: The teacher starts by saying "I went to the market and bought some corn". Then the next student has to repeat the sentence and add new information, for example: "I went to the market and bought some corn and some apples" and so on. Once again, this is an activity that trains children's memory, as the aim is not to forget the sequence of purchases. | |
| Energizers |  41 - Odd one out 41 - Odd one out Location: Classroom/Interior No. of participants: All students Organisation: Students are seated in a circle Game description: The teacher explains that he or she is going to say four words ( they can be related to the topic), and their task is to find out which one doesn't go together and which ones are similar considering a specific characteristic. Examples: - Which is the odd one out? - Circle, ball, cube, triangle (answer: ball) - Hour, minute, house, second (answer: house) - Left, front, first, right (answer: first) | |
| Energizers |  42 - My aunt went to ... 42 - My aunt went to ... Location: Classroom No. of participants: All students Organisation: Students sitting in a circle Description of the game: The first person starts "My aunt went to Spain and bought, for example, a hat" (or any object). The next person says "My aunt went to Spain and bought a hat and a suitcase" (i.e. repeats what the previous person said and adds their own object) and so on. Whoever gets it wrong leaves the game. To increase the difficulty: Each object can be ordered in alphabetical order. A - Apple; B – Ball; C- Car; D - Cards; H-Hat; S- Shopping Bag, … | |
| Energizers |  43 - Fishnet game 43 - Fishnet game Divide the class into two groups. One group, arranged in a circle, forms the fishing net. The remaining students are the little fish and will move freely around the room. The students in the net agree on a number without the little fish hearing them. They form a circle by holding hands and start counting in series (1,2,3...) until they reach the agreed number. The little fish know they can start moving when they see the wheel formed. When they reach the agreed number, they bend down and pick up the fish that remain inside the circle. This exercise serves both to energise the students at the start of the lesson and as a transition to the lesson's theme. | |
| Energizers |  44 - Mimicking animals 44 - Mimicking animals The teacher instructs students to mimic the movements of animals in the following sequence: fox, dog, hare, hedgehog.
Figure 1. Fox (Credits: Pexels.com)
Figure 2. Dog (Credits: Pexels.com) Figure 3. Hare (Credits: Wikipedia) Figure 4. Hedgehog (Credits: Pixabay) | |
| Energizers |  45 - The dinosaur energizer 45 - The dinosaur energizer Ask each student to think of their favourite dinosaur and be ready to share it with the class. Then, organize the students in a straight line, standing side by side. Now, each student should imitate the dinosaur movement following these steps:
After everyone has had a turn, gather the students for a brief discussion. Ask them to share what they noticed about the different types of dinosaur movements. Discuss how the structure and size of each dinosaur might have influenced its way of moving. As an alternative: If the school has a large enough sandpit, a short activity could be organised to make students realise the relationship between the way humans move and the marks registered on the ground. This activity would consist of asking students to freely produce footprints in the sand as a result of walking (A) or running (B) (Figure 3). Figure 3. Walking and running footprints. The aim of this exploration would be to realise that the higher the speed of movement, the further apart the footprints tend to be arranged on the track, as well as more aligned (B), as opposed to walking, where consecutive footprints tend to be closer together and more side by side (A). Some engaging questions are:
At this stage the teacher can organise a more structured demonstration, with a chosen student, to compare the two situations. | |
| Energizers |  46 - Movement 46 - Movement Ask the students to lie down on the floor (on their backs or tummies) and tell them to demonstrate the sliding movement. Figure 1. Illustration of the sliding movement
Some questions for discussion:
Now, ask the children to lie down on the floor again and give their interpretation of the flipping movement (in a turn the pupils move from back to tummy or from tummy to back). Figure 2. Illustration of the flipping movement Some questions for discussion:
Finally, ask the pupils to lie down on the floor and demonstrate the turning movement. Figure 3. Illustration of the turning movement Some questions for discussion:
Students should be encouraged to use their own words to describe and characterize the different movements. Moves like sliding, flipping and turning constitute rigid motion. They are motions that do not distort shape. Picking something up and moving it around for instance is a rigid motion, but stretching or warping it is not. These intuitive experiments are an excellent way to introduce more advanced geometric concepts, such as translation, reflection and rotation, as fundamental types of isometric transformations. In this lesson, we shall focus on the idea of rotation. (adapted from: National Council of Teachers of Mathematics (1993). Curriculum and Evaluation Standards for School Mathematics Addenda Series, Grades K-6. Second-grade book. Reston, VA: NCTM.) | |
| Energizers |  47 - Pig Game 47 - Pig Game “Pig game” is a simple dice game which in its basic form is playable with just a single dice. You win by being the first player to achieve a certain number of points. To play you'll need 2 to 10 players, one 6-sided dice, and a pencil and some paper for keeping score. The teacher organizes the class into four or five groups, each acting as a team. Each group rolls a dice to determine the order of play, with the highest number of points going first, followed by the next highest, and so on. If possible, use a large dice made from soft material so the activity can take place with students standing and moving. The first team rolls the dice and scores the number of points shown, provided they do not roll a 1. If the team rolls a 1, their turn ends, and they lose all the points accumulated during that turn, passing the die to the next team. Team members must decide collectively whether to continue rolling and risk rolling a 1 (and losing their points) or end their turn and keep the points earned. Scores can be recorded on the whiteboard or blackboard. Play continues from team to team until a winner is determined. The first team to accumulate 50 or more points wins the game. (Adapted from https://www.dicegamedepot.com/dice-n-games-blog/pig-dice-game-rules/) | |
| Energizers |  48 - Movement 48 - Movement Part I The teacher asks the students to form pairs and gives each pair a piece of paper and a pencil. Then, each student should trace their right footprint on the paper and write their name next to it. Afterward, they should observe both footprints and identify which one is larger. Part II Teacher says to the students: “So today, let’s walk, run, or jump with energy!”. Students should move around, walking, running or jumping at the sound of a previous music chosen by the teacher. | |
| 21 | ||||||
| | ||||||
| Relaxing Exercises
|  * The suggested relaxing exercises are different and some of them could take longer, but, as a rule, they are expected to last only a couple of minutes. With the preparation and the time needed to do the relaxing activities and to end the lesson, this is estimated to last at most 5 minutes. | |||||
| 22 | ||
| | ||
| Relaxing Exercises |  1 - Guided fantasy 1 - Guided fantasy Students are asked to close their eyes (if comfortable) and, with the guidance of the facilitator, slowly imagine a scene of the past or future event. More and more details are used to describe the event with all senses and thoughts. A suggested brief script could be à Begin by breathing slowly and deeply… Think of yourself in a place where you feel relaxed and at ease… Create all the details in your mind, what do you see… what the sounds are like, the smells and colors of this special place… Are there any people …? | |
| Relaxing Exercises |  2 - Progressive muscle relaxation 2 - Progressive muscle relaxation To release tension from head to toe, students are asked to close their eyes (if comfortable) and focus on tensing and relaxing each muscle group for two to three seconds each. The teacher guides the students; he/she asks them to start with the feet and toes, then move up to the knees, thighs, rumps, chest, arms, hands, neck, jaw, and eyes—all while maintaining deep, slow breaths. Kelly Roper | |
| Relaxing Exercises |  3 - Guided breathing 3 - Guided breathing Teacher asks the students to close their eyes (if comfortable), inhale for a count of four, then exhale for a count of four (all through the nose, which adds a natural resistance to the breath). Then, with one hand on the chest and the other on the belly, the students can take a deep breath in through the nose and exhale through the mouth, ensuring this way that the diaphragm (not the chest) inflates with enough air to create a stretch in the lungs Jordan Shakeshaft | |
| Relaxing Exercises |  4 - Visualization using color/soothing sound 4 - Visualization using color/soothing sound Facilitator asks the students to imagine a favorite color that makes them feel peaceful and safe. They keep their imagine taking in that color with each breath and sending it throughout their entire body as they exhale. They continue until they visualize being filled with their special, relaxing color. The same exercise can be performed using soothing sound or aroma. Also, it is more effective if relaxing music is used. Kelly Roper | |
| Relaxing Exercises |  5 - Use a word that describes their feelings/thoughts 5 - Use a word that describes their feelings/thoughts Students are asked to close their eyes (if comfortable) for a minute and think of a word that describes their feelings/thoughts after finishing the resource. Then the students open their eyes and one by one say their word to the classroom | |
| 23 | ||||||||
| | ||||||||
| Relaxing Exercises |  6 - Bee breathing 6 - Bee breathing The teacher instructs the students to get in a comfortable position to practice bee breathing. They have to imagine that they are sitting on a leaf or a flower petal, to sit straight and allow the leaf or petal to gently support them. The teacher gives students the following instructions: Breathe in, allowing the air to just gently come in through your nose, filling up your lungs. As you breathe out, buzz like a bee. See how long your buzz can last. See how far your bee is going to fly before sitting down and resting again. Buzz. Buzz. Buzz. On the next breath, see if your bee can fly with a loud, strong buzz. On the next breath, see if your bee can fly with a soft buzz. When the exercise is finished, the teacher gives time for a short discussion: Does it feel different with a strong or a soft buzz? How does your body feel? Optional (use if time allows): After breathing practice, draw a picture of a bumblebee and the leaf or flower that you were “sitting on” in your imagination. This picture can be used as a relaxation practice reminder. When you see the picture, practice being like a Bee on a leaf and practice a Bee breath. | |
| Relaxing Exercises |  7 - Strong as a tree 7 - Strong as a tree All students spread out in the room. With their feet firmly planted on the ground, they pretend they are trees that are slowly swaying back and forth with a breeze. The movements become stronger as a storm approaches. The students try to make their movements as strong as possible, but remember to keep their feet on the ground. Slowly the wind dies down and the trees can rest. | |
| Relaxing Exercises |  8 - Seasons of the year 8 - Seasons of the year during the seasons of the year. Winter: the plants are small, weak and are crunched together on the ground. Spring: through the stronger sunshine, the plants grow slowly and slowly rise. Summer: through the warm sun, the plants slowly open their arms, the flowers open their blooms are stand up straight. Autumn: the sun rays become weaker. The plants begin to slowly shrivel, the blooms and leaves begin to fall away. | |
| 24 | |||||||||||
| | |||||||||||
| Relaxing Exercises |  9 - Lion's breath 9 - Lion's breath Lion’s breath is a playful way to release and relax into more peaceful feelings. The trainer tells students that they are going to do a breath called the lion’s breath in order to let go of feelings or thoughts we no longer want. This breath is very helpful in getting those ideas out of us and pushing them far away. Instructions
| |
| Relaxing Exercises |  10 - Mountain range 10 - Mountain range Stand side by side in a line, in mountain pose, your feet hip-width apart. Each foot must touch the foot of the person on each side. Walk (as a group) across the room without separating their feet from your partner’s. Variation: Ask the students to walk on their toes. | |
| Relaxing Exercises |  11 - Breathing exercise 11 - Breathing exercise Teacher asks students to make a circle and do the following exercises, repeating each one few times and alternate them. Teacher can also add new ones. Breathing in raise your arms above your head and say “Elevator Up!” Breathing out, float your arms back down to your sides, saying “Elevator Down.” Repeat. Take three quick breaths in while wiggling your nose. Wiggle your nose on each breath in. Then wiggle your nose on each breath out. Hold your hand in front of your nose and hiss hiss hiss while breathing out. | |
| Relaxing Exercises |  12 - Warm back 12 - Warm back A piece of paper is stuck to each student’s back and they are given a pen. The paper is already prepared. Each piece of paper says: “I like………..”. Slow music is played and the students walk around and write characteristics about the person whom they like on the paper. Each child is allowed to look at the paper at the end and take it home. | |
| 25 | ||||||||||||||
| | ||||||||||||||
| Relaxing Exercises |  13 - Body massage 13 - Body massage The students stand in a circle: they need to follow all the movement the teacher does and massage themselves. The teacher starts to massage different parts of his/her body, starting from the head till the feet (it’s better if they take off their shoes). The teacher explains how the massage needs to be done, if delicate or more energetic. Optional: The teacher can also ask to the students to massage another classmate. | |
| Relaxing Exercises |  14 - Give me your energy 14 - Give me your energy The students stand in a circle. The teacher starts, pretending he/she is holding a ball on the hands and passing it to the student on his/her right; this one do the same, until the ball comes back to the teacher. The ball needs to be passed in a gentle way, as it is very precious. At the second round, the teacher passes the ball to students in another side of the circle, making a gesture and a noise. The students will do the same until everyone will have touched the ball at least once. The ball can be passed in any way (in form of kick, kiss…), pretending it becomes bigger or smaller depending on the will of the students. | |
| Relaxing Exercises |  15 - Moving like a toy 15 - Moving like a toy The teacher uses a magic word to change the students into many string-loaded (wind-up) toys. At the teacher’s signal, the toys start to move across the class, as many robots, to get their sits. They have to move more quickly at the beginning and then gradually more and more slowly, because their charge is finishing. Some of them will be frozen in the middle of the room, and the teacher has to give their cranks one more turn to help them reach their seats | |
| Relaxing Exercises |  16 - Pass the face 16 - Pass the face It is like the game "telephone" but instead of passing a word or sentence around the group, participants pass a facial expression. | |
| Relaxing Exercises |  17 - Circle massage 17 - Circle massage The group forms a circle and faces one direction. Each participant places his/her hands on the shoulders of the person in front of her/him. Each person then gives the person who is in front a shoulder massage. The person being massaged can give a feedback. After a few minutes, the group turns the other way so that the person who has been making the massage is then receiving it in return. | |
| 26 | |||||||||||||||||||||||||||||||||||||||||||||||||||||||||||||||||||||||||||||||||||||||||||||||||||||||||||||||||||||||||||||||||||||||||||||||||||||||||||||||||||||||||||||||||||||||||||||||||||||||||||||||||||||||||||||||||||||||||||||||||||||||||||||||||||||||||||||||||||||||||||||||||||||||||||||||||||||||||||||||||||||||||||||||||||||||||||||||||||||||||||||||||||||||||||||||||||||||||||||||||||||||||||||||||||||||||||||||||||||||||||||||||||||||||||||||||||||||||||||||||||||||||||||||||||||||||||||||||||||||||||||||||||||||||||||||||||||||||||||||||||||||||||||||||||||||||||||||||||||||||||||||||||||||||||||||||||||||||||||||||||||||||||||||||||||||||||||||||||||||||||||||||||||||||||||||||||||||||||||||||||||||||||||||||||||||||||||||||||||||||||||||||||||||||||||||||||||||||||||||||||||||||||||||||||||||||||||||||||||||||||||||||||||||||||||||||||||||||||||||||||||||||||||||||||||||||||||||||||||||||||||||||||||||||||||||||||||||||||||||||||||||||||||||||||||||||||||||||||||||
| | |||||||||||||||||||||||||||||||||||||||||||||||||||||||||||||||||||||||||||||||||||||||||||||||||||||||||||||||||||||||||||||||||||||||||||||||||||||||||||||||||||||||||||||||||||||||||||||||||||||||||||||||||||||||||||||||||||||||||||||||||||||||||||||||||||||||||||||||||||||||||||||||||||||||||||||||||||||||||||||||||||||||||||||||||||||||||||||||||||||||||||||||||||||||||||||||||||||||||||||||||||||||||||||||||||||||||||||||||||||||||||||||||||||||||||||||||||||||||||||||||||||||||||||||||||||||||||||||||||||||||||||||||||||||||||||||||||||||||||||||||||||||||||||||||||||||||||||||||||||||||||||||||||||||||||||||||||||||||||||||||||||||||||||||||||||||||||||||||||||||||||||||||||||||||||||||||||||||||||||||||||||||||||||||||||||||||||||||||||||||||||||||||||||||||||||||||||||||||||||||||||||||||||||||||||||||||||||||||||||||||||||||||||||||||||||||||||||||||||||||||||||||||||||||||||||||||||||||||||||||||||||||||||||||||||||||||||||||||||||||||||||||||||||||||||||||||||||||||||||||
| Relaxing Exercises |  18 - Making room 18 - Making room Participants are asked to raise their arms with palms facing up, imagining that they are pushing up the ceiling and are asked do a lot of strength in that direction to increase the space of the room where they are. Then they are asked to turn the arms down with palms facing down thinking that they are pushing down the floor. They are asked to push away the walls turning their left arm and palm to the wall on their left and their right arm and palm to the wall that’s on their right. | |
| Relaxing Exercises |  19 - Massage ball 19 - Massage ball One ball is given to each participant and, following the rhythm of a soft music, they place the ball between their back and a wall. They bend their knees slightly to relax the legs and better place their back. Then they move their body from top to bottom and from right to left and vice versa, moving the ball around their back. When making movements of their body, they will notice some more tense (and sometimes painful) spots. When they notice this they should stop and stay quiet keeping their back against the wall, making the desired pressure and holding for a while. Variation: Do not use the wall. Participants work in pairs and one holds 1 or 2 balls in their hands and makes the massage to the other and then they switch. | |
| Relaxing Exercises |  20 - Holding legs 20 - Holding legs Participants work in pairs. And you can put a quiet and relaxing music (or sounds like water falling down, sea waves, etc.). Half of the participants are asked to lie down face up, eyes closed, with their left leg extended on the floor and their right leg elevated. Another participant stands up and loops a towel around the heel of the other’s right foot and holds the ends of the towel in his/her hands, and makes soft and gentle movements (upwards and downwards, and sidewards) while the other totally relaxes his/her leg. Then they repeat the same process with the left leg. Then the participants switch roles. | |
| Relaxing Exercises |  21 - How do I feel today? 21 - How do I feel today? The proposal is that each child should draw his or her face according to the emotion he or she is feeling at that moment: happiness, sadness, anger, fear and calmness. | |
| Relaxing Exercises |  22 - Relaxing Song 22 - Relaxing Song Use of mimed song accompanied by a musical backing, sung/recorded by the pupils themselves. (cf. video on .https://youtu.be/9TEdEKKkUWw ) | |
| Relaxing Exercises |  23 - Guess who? Draw your partner 23 - Guess who? Draw your partner With the Avatars distributed randomly on a table, the students are invited to get one of their classmates' Avatars, which they have to complete, trying to understand whose half of the Avatar they have to complete and silently draw the missing half to the sound of a calm song chosen by the leader. As the students finish, they go to a board and place the completed Avatar with reusable, malleable white adhesive putty. The whole class observe and the challenge is to try to guess to whom the avatars belong to. | |
| Relaxing Exercises |  24 - The Pot of Calmeness 24 - The Pot of Calmeness We call "the pot of calmness" to a jar in which we put water, liquid silicone to give density to the content and glitter of different colours. The construction of the jars is done in advance by the students and they can remain in the classroom to be used at other times when the call for relaxation and calmness is necessary. Each student gets his/her jar, shakes it and observes the movement. Afterwards, the group talks about what is observed: that the glitter represents the students’ emotions that they shake and stir until they are calmed down. This activity is ideal for fostering reflection. The simple act of watching the glitter moving slowly will help the students to relax. | |
| Relaxing Exercises |  25 - Body Numbers 25 - Body Numbers Students are instructed to lie on the floor with the task to form numbers or numerical expressions with their body positions. They can do the activity either individually or in groups of two or three to combine their body positions to form numbers or numerical expressions. 5 min | |
| Relaxing Exercises |  26 - Raindrops 26 - Raindrops Close your eyes and imagine that you are a water drop that falls in the ocean when it is raining. Imagine how you can return to the cloud due to the water cycle process. | |
| Relaxing Exercises |  27 - Commutative property in Mathematics 27 - Commutative property in Mathematics Go around and see how the groups have implemented their tasks. Collect the papers of the 5 groups. Ask the students to go back to their seats. Ask them, if there was anything that impressed them. Was there anything that made it difficult for them. Did they find any errors? Draw their attention to the commutative property of addition. Time: 3 min. | |
| Relaxing Exercises |  28 - The shape I found first 28 - The shape I found first Option 1 Ask the students to take their seats. If you used option 1 to move around, ask each team which geometric shape they recognized first and last. If you used option 2, ask the children if they have figured out what the hidden geometric figures are. Let them name all the shapes at least 2 times. Option 2 Guided fantasy Students are asked to close their eyes (if comfortable) and, with the guidance of - Start breathing slowly and deeply... - Imagine that you are in a place where you feel calm and relaxed... - Create the details in your mind. What can you see? - Do any of the objects resemble the shapes we talked about today? Is there a predominant shape? - What are the sounds, smells and colors of this special place? Do you associate any of the sounds with a particular shape? Or any color? - Open your eyes. after Rossman, 2016 Time – 3 min. | |
| Relaxing Exercises |  29 - Rhythmic game 29 - Rhythmic game A Rhythm Game The class is divided into three groups. The instruction for the first group is to use clapping, the second to stomp with their feet, and the third to use hip tapping. The teacher sets a rhythm by explaining that when there is a pause, he/she will signal with a pointer in front of the mouth for silence. Different rhythms can be played by alternating the three groups under the "conduct" of the teacher. Onomatopoeic words can also be used, for example: clap, clap, thump, thump, bang, bang. In the worksheet Appendix 7, 4 lines of different rhythms are indicated. Some or all of them can be performed on teacher’s decision. | |
| Relaxing Exercises |  30 - Grouping 30 - Grouping Grouping of units and tens Remind the children of the grouping rules: 10 units make 1 ten. Illustrate the ratio of 1 to 10 with the picture as well (you can draw it on the board or show it on a slide), asking the students: How many units are in the block? And how many tens are there in the column?
We can present number 10 either as 1 column of 10 squares or as one block.
Tell the students that the tens block (point at the first block) is drawn very slowly and to make it easier for us, we sometimes draw it as one long block (point at the second block).
| |
| Relaxing Exercises |  31 - Triangle of friendship 31 - Triangle of friendship Students work in pairs to draw a triangle to represent their friendship. Before starting the work, the teacher demonstrates the steps with one of the children. The two persons in the pair place their hands down with the palms facing the surface of the paper sheet; student 1 uses his/her right hand, and student 2 uses his/her left hand. They join the tips of the thumbs and the forefingers of the left hand of one of the pair with the tips of their thumbs and forefingers and outline the shape of the triangle between the fingers. After that, they can draw eyes, a nose, a mouth and whatever they want to, in order to design a personal symbol of their relationship. | |
| Relaxing Exercises |  32 - Arms and Shoulders 32 - Arms and Shoulders With each student sitting in their place in the classroom, give them clear instructions: Let's pretend you're a very hairy, lazy cat. And you want to stretch. Extend your arms forwards. Raise them above your head. Pull them back. Feel the pull in your shoulders. Extend them even further. Now let them fall normally. O.K., kitty, stretch again. Stretch your arms forwards. Raise them above your head. Pull them back. Pull hard. Now let them fall normally. That's good! Notice how your shoulders are more relaxed. This time we're going to stretch for real. Try to touch the ceiling. Spread your arms out in front of you. Raise them above your head. Pull back. Notice the tension and pull in your arms and shoulders. Hold on tight. Great! Drop them quickly and feel how good it feels to be relaxed. It's nice, warm and cosy. | |
| Relaxing Exercises |  33 - I am a tree 33 - I am a tree This game consists of students acting like a growing tree. With relaxing music in the background and low lighting, Imagine you are a seed in the soil which grows into a large tree. Start in a kneeling position with your heads tilted downwards. Then you squat and gradually start rising up and stretching your arms upwards as if they were large branches. This relaxing exercise can be repeated a few times explaining that the wind blows the seeds away and the grow into new trees. | |
| Relaxing Exercises |  34 - Ball game 34 - Ball game Location: Classroom No. of participants: All students in a class Organisation: Students form two rows side by side. Materials: rolled up paper (used paper) Using calm music and ugly balls made of rolled-up paper (one per student), form two rows of students sitting down. To the sound of the music, each student rubs the back of the classmate in front of them with the ball. | |
| Relaxing Exercises |  35 - Face and Nose 35 - Face and Nose Here comes a pesky old fly. It's landed on your nose. Try to get it out without using your hands. That's right, shrink your nose. Make as many wrinkles in your nose as you can. Pull your nose up hard. O.K. You've got the fly away. Now you can relax your nose. Oops, here it comes again! See if you can swat it away! Wrinkle your nose tightly. Hold it as tight as you can. O.K., the fly is gone. 4 You can relax your face. Notice when you wrinkle your nose, your cheeks. Your mouth, forehead and eyes also helped and tightened up. So when you relax your nose, your whole face relaxes too. And that feels good. Oh-oh! This time the old fly is back. But now it's landed on your forehead. It makes lots of wrinkles. Try to catch it in the middle of all those wrinkles. Keep your forehead tight. OK, you can relax now. I'm glad the fly is gone. Now you can relax. Let your face be smooth; not a single wrinkle. Feel your face nice and smooth and relaxed. | |
| Relaxing Exercises |  36 - Find the heart 36 - Find the heart Location: Classroom/ Indoor - Large Space No. of participants: All students Organisation: Students are invited to walk around the room observing and looking for his / her partner. Material: Cardboard hearts in one colour, cut into two parts so that one of them fits into the other. Each heart can only fit into one half (no equal parts as shown in the picture) Distribute the hearts to the students in random order. The teacher tells the students that they are going to listen to a song and that they should walk to the calm sound of the music looking for their partner, who will be the classmate who has the part of the heart that fits. When everyone has found their partner, the teacher will stop the music and instruct the students to leave the assembled heart in the space the teacher thinks appropriate and to sit quietly in their places. | |
| Relaxing Exercises |  37 - The pen game 37 - The pen game Location: Classroom/Interior - Large Space No. of participants: All students Organisation: Students arranged in a circle. Material: Ballpoint pen with cap; relaxing music The teacher tells the students to take a ballpoint pen out of their pencilcase and stand in a circle in a large area of the room. Each pupil is asked to hold the pen with the tip of their index finger and for their colleague next to them to hold the other end of the pen with their index finger (as shown in the photo) and so on, with all the pupils connected to each other by holding the ends of the pens. The teacher asks the students to keep quiet and concentrate so that the pen doesn't fall. To the sound of music, the students rotate slowly, trying to keep the pen from falling and the chain from breaking. | |
| Relaxing Exercises |  38 - Guess the shape 38 - Guess the shape Draw simple shapes: a circle, a cloud, a sun, etc. on A4 sheets of paper. At the sound of quiet music, the students organise themselves in pairs. Student A draws a shape (example – in the picture) without his/her partner seeing it and sticks it to student B’s back. With his/her index finger, student A goes round the drawing, putting pressure on student B’s back, who tries to find out which shape has been drawn on his/her back. | |
| Relaxing Exercises |  39 - Guided walking in a forest 39 - Guided walking in a forest Close your eyes and imagine you are walking in a forest. Feel a sense of calm and peace wash over you with each step you take. Imagine the sounds and the smells of the forest. | |
| Relaxing Exercises |  40 - Guided fantasy with dinosaurs 40 - Guided fantasy with dinosaurs Close your eyes and take a deep breath in. Slowly exhale and feel your body relax. Imagine that you are in a lush, green prehistoric landscape filled with tall trees, colourful plants, and the distant sounds of gentle dinosaur calls. In your mind, picture a gentle, friendly dinosaur, like a Brachiosaurus or a Triceratops, peacefully grazing or moving through the landscape. Notice the dinosaur’s size, shape, and the way it moves slowly and gracefully. Imagine the texture of its skin and the calm look in its eyes. Relax the most during this exercise. | |
| Relaxing Exercises |  41 - Puppets movements 41 - Puppets movements Students sit in a circle on the floor and freely illustrate and discuss the different movements of sliding, flipping and turning with puppets. | |
| Relaxing Exercises |  42 - Sharing strategies 42 - Sharing strategies Students sit in a semicircle, facing the teacher, and discuss what is the best strategy to win the “Pig game”. Children can express their opinion, make experiments or demonstrations. | |
| Relaxing Exercises |  43 - Footprints 43 - Footprints Close your eyes and imagine walking slowly along a warm, sandy beach. With each step, feel the soft sand shifting beneath your feet, leaving gentle footprints behind. Focus on your breath, inhaling the fresh sea breeze and exhaling any tension. As the waves gently wash away your footprints, visualize your worries fading with them, leaving you feeling calm, peaceful, and refreshed. | |
| 27 | |||
| | |||
| Activities
|  | ||
| 28 | ||
| | ||
| Grade 1
| ||
| 29 | |||||||||||||||||||||||||||||||||||||||||||||||||||||
| | |||||||||||||||||||||||||||||||||||||||||||||||||||||
| 1 |  Grade 1 / Addition and subtraction Grade 1 / Addition and subtraction | ||||||||||||||||||||||||||||||||||||||||||||||||||||
| Developed by | Prosveta-Sofia Foundation | ||||||||||||||||||||||||||||||||||||||||||||||||||||
| Grade | 1 | ||||||||||||||||||||||||||||||||||||||||||||||||||||
| Duration | 65 | ||||||||||||||||||||||||||||||||||||||||||||||||||||
| Energizers | 8 - Find another seat: Have the students sit on chairs in a circle, with the number of chairs being one less than the number of students. The student without a chair stands in the middle and tells their name. Then the student calls out a characteristic or a colour, or type of clothing, e.g. “Everyone wearing orange!”. All participants who are wearing orange must get up and find another seat, but not the one immediately to their right or left. The student in the middle races to find a seat and the person left standing becomes the next caller in the middle. | ||||||||||||||||||||||||||||||||||||||||||||||||||||
| Relaxing Exercises | 10 - Mountain range Stand side by side in a line, in mountain pose, your feet hip-width apart. Each foot must touch the foot of the person on each side. Walk (as a group) across the room without separating their feet from your partner’s. Variation: Ask the students to walk on their toes. | ||||||||||||||||||||||||||||||||||||||||||||||||||||
| Objectives | Students will:
| ||||||||||||||||||||||||||||||||||||||||||||||||||||
| Preparation | Materials Post-it notes Plasticine Markers Paper coins of 1 euro and 2 euro Small objects - clothespins, dice, colored sticks, cardboard cups and plates, straws, pencils, etc., suitable for shop play Small cardboard square pieces of paper (for drawing the faces with emoticons) Equipment Laptop and projector Preparation for the lesson
| ||||||||||||||||||||||||||||||||||||||||||||||||||||
| Introduction | A large part of our daily life is related to mathematics. Knowing numbers is of great importance, but it is especially important to be able to perform calculations with them. Imagine you want to buy a few things, but you are not sure if the money you have will be enough. If you know the total cost of the things you want, you will be able to judge whether or not you have enough money to buy what you want. This is where addition comes to the help you. And if you want to check if the change they gave you back in the shop was correctly calculated? Well, that's when subtraction comes to help. We use addition and subtraction of numbers in many activities in life - shopping, in various games, when arranging the table for breakfast, lunch or dinner, and many others. In this lesson, you will learn what it means to add up and take away numbers, how these operations are performed and how they are to be recorded. | ||||||||||||||||||||||||||||||||||||||||||||||||||||
| Teaching and learning methods | Learning in small steps Break instructions down into smaller parts Use technology and visualization Provide real-life examples Collaborative learning Countable manipulatives | ||||||||||||||||||||||||||||||||||||||||||||||||||||
| Interdisciplinary connections | Home economics: buying goods, paying with money, working with money Mother tongue: communication skills | ||||||||||||||||||||||||||||||||||||||||||||||||||||
| Resource teacher or other specialists activities | Almost all the steps of the lesson are comprehensible to most of the students with special needs who have well-preserved cognitive abilities. The lesson does not comprise a lot of text and long instructions to make it difficult for the target students to understand and follow the work flow. The role of the special needs teacher/teacher's assistant is to help target group students if they are not able to cope with some of the tasks and steps. | ||||||||||||||||||||||||||||||||||||||||||||||||||||
| New vocabulary | Addition, Subtraction, plus and minus signs | ||||||||||||||||||||||||||||||||||||||||||||||||||||
| Work Flow |
There are some pencils in a box. If you want to find out exactly how many there are, you need to count them. Now, imagine that you find 2 more pencils in your bag and decide to add them up to the ones in the box. In this case the number of pencils will increase - the new pencils will be added to the ones in the box. What happens if you decide to give some of the pencils from the box to a friend? You will take them out of the box, and, as a result, there will be fewer pencils left in the box. To represent the actions of adding up or taking away items, we can use two arithmetic operations - addition and subtraction. (3 min)
Ask each student to prepare 2 pencils. Show the first slides of the presentation, which demonstrates adding up 1 element to a group that already contains 1 element. At each step of the demonstration, ask questions. Examples:
Next step: use the second part of the presentation and introduce the operation of taking away 1 element from a set that contains 2 elements. At each step of the demonstration, ask questions. Examples:
It is important to make sure students understand that when we add up items, the resulting number is greater than any of the numbers we add up, whereas when we subtract, we result is a number which is smaller than the one we subtracted from. (10 min)
To do the first example of task 3 as a hands on activity, instruct students to make 1 small ball of plasticine for each hat they see on the left side of the equals sign and then, put all balls together – this is the result of the operation addition . Have students solve the addition problem by filling in the blanks with numbers. For the second example in task 3, as a hands on activity, ask students to use the previously made small balls to demonstrate a subtraction action - 'taking away' an object can be expressed by crushing one of the balls with a thumb. Ask them how many whole plasticine balls are left after crushing one of them. Have students solve the subtraction problem by filling in the blanks with numbers.
You could give the students an extra task to design an addition or subtraction problem with numbers 1 and 2 and the plus, minus and equal signs. To do so, you have to prepare in advance small paper cards with the numbers and the three signs. (20 min)
Task 1: Each student is expected to choose which two items which cost 1 euro he/she wants to buy. After making their choice, the students must pay the cashier for their purchase, using the 1 euro or 2 euro paper coins. Task 2: Everyone should choose only one item with a price of 2 euro and make a choice how to pay for it – with two coins of 1 euro or with one coin of 2 euros. Task 3: Each student should choose an item with a price of 1 euro and pay for it with a coin of 2 euros, calculating how much change he/she should receive. The cashier gives back the change. (15 min) 6. Finish the lesson with e-games: Students play the games on their mobile devices or the teacher opens a game on the screen and volunteer students take turns to come to the front and play. (10 min) | ||||||||||||||||||||||||||||||||||||||||||||||||||||
| Reflection | Activity 1. Ask the following questions: 1. What is the most useful thing you learned today? 2. Which activity in the lesson did you like most? • The energizing exercise Find another place. • The addition and subtraction song. • The shopping game. • The relaxing exercise Mountain Range. Activity 2. Give each student a face card. Ask them to draw a face with an emotion that best presents how they felt during the lesson using the following colours: • in green, if they are satisfied with what they have learned and with their work; • in yellow, if they are not particularly satisfied; • in red if they are not satisfied. Set a time limit and after that all students are asked to hold up their emotion cards. The teacher counts the number of green, yellow and red faces and reports to the class. If you have enough time, student representatives of the three groups could share the reasons for their choice of emotion. (5 min) | ||||||||||||||||||||||||||||||||||||||||||||||||||||
| Notes | If you know a song about addition and subtraction in the students' native language, you can play it to the class as an introduction. (in English https://www.youtube.com/watch?v=NHI0ePgwlgU). Or you can use thematically connected videos https://www.youtube.com/watch?v=ni9y0v-VuIU (in Bulgarian), https://www.youtube.com/watch?v=N4jy2BPzElw (in Bulgarian) and https://www.youtube.com/watch?v=sYuLJtzKTx4 (in Bulgarian) | ||||||||||||||||||||||||||||||||||||||||||||||||||||
| Digital Resource | |||||||||||||||||||||||||||||||||||||||||||||||||||||
| 30 | |||||||||||||||||||||||||||||||||||||||||||||||||||||
| | |||||||||||||||||||||||||||||||||||||||||||||||||||||
| 2 |  Grade 1 / Programs; presenting data sets with pictograms Grade 1 / Programs; presenting data sets with pictograms | ||||||||||||||||||||||||||||||||||||||||||||||||||||
| Developed by | AECE - Escola Básica da Zona Verde | ||||||||||||||||||||||||||||||||||||||||||||||||||||
| Grade | 1 | ||||||||||||||||||||||||||||||||||||||||||||||||||||
| Duration | 60 | ||||||||||||||||||||||||||||||||||||||||||||||||||||
| Energizers | 23 - Emotions Games Materials required:
Move the tables and chairs around the classroom, so the students can sit in a circle. The game begins with a ball being thrown to a student, at this point the leader who has got the 5 cards (one for each emotion), raises a card; the child who has received the ball must talk about a situation that triggers the emotion that the leader has raised. The ball is then thrown to another classmate and so on until all the students have received the ball and all of them have had a chance to talk about an emotion. The ball can only be thrown once to each student. The game ends when all students have received and thrown the ball and all of them have spoken about an emotion. | ||||||||||||||||||||||||||||||||||||||||||||||||||||
| Relaxing Exercises | 21 - How do I feel today? The proposal is that each child should draw his or her face according to the emotion he or she is feeling at that moment: happiness, sadness, anger, fear and calmness. | ||||||||||||||||||||||||||||||||||||||||||||||||||||
| Objectives | In the end of the lesson students should be able to: - organise and present information in a clear way; - represent a data set through pictogram; - represent a data set by means of a dot graph; - interpret the data in the pictogram and graph. | ||||||||||||||||||||||||||||||||||||||||||||||||||||
| Preparation | Material:
Every day before the end of the lesson, the teacher asks students how their day was. Each student assesses him/herself and refers to the emotion he/she feels by taking a woollen thread from the jar of the corresponding emotion. Each child, with the teacher or a classmate’s help, ties it to his/her wrist the woollen thread. Then the children go to the Emotions Picture Board - Appendix 1 (printed in A2 size and laminated with transparent adhesive paper, see appendix 1), which is attached to the students' height with malleable and reusable adhesive mass, on a wall in the classroom and mark with a pen, which allows them to write on plasticized material, a little ball, matching the day of the week and the emotion referred to. The board has a double entry, so that the days of the week are shown horizontally and the emotions are shown vertically. This procedure is kept throughout the week, so that on the last day or at the beginning of the following week the recorded data can be evaluated. Preparing the lesson Begin by moving the necessary tables and chairs out of the classroom to free up the centre of the room so that students can sit in a circle. After the game has been run, return the hijacked tables and chairs to their places to continue the lesson plan. | ||||||||||||||||||||||||||||||||||||||||||||||||||||
| Introduction | In our daily lives we are in constantly contacting with statistical information, which are presented in different forms. Therefore, it is an essential subject for everyone, as it is necessary to know how to analyse and interpret the information. Hence the need to learn to explore collectively the construction of a table, pictograms and graphs, using a symbol to represent each piece of data (one-to-one correspondence). Learning to ask a question and collecting data related to that question, to organise the data collected and finally to analyse and interpret the results in an organised way. | ||||||||||||||||||||||||||||||||||||||||||||||||||||
| Teaching and learning methods | Learning based on concrete questions/situations and proximity to the students. Learning through an effective manipulation of material, making awareness of what is being learned easier. Cooperative and collaborative learning in small groups and in pairs. New technologies as a way of learning/consolidating content and assessing learning. | ||||||||||||||||||||||||||||||||||||||||||||||||||||
| Interdisciplinary connections | Portuguese – Language comprehension and production; Social Studies - Factors that contribute to individual psychological well-being; Artistic Education - Visual Arts. Citizenship and Development - According to the citizenship education students need to know how to identify, recognise, understand and communicate their emotions because this is important for the creation the social relationship process. | ||||||||||||||||||||||||||||||||||||||||||||||||||||
| Resource teacher or other specialists activities | All steps of the topic development must be understandable for SEN students with cognitive abilities. The lesson does not include long written explanations. The role of the support or special education teacher is to help students in the target group if they are unable to complete any of the tasks or steps, or feel disorientated in understanding something that may be required. | ||||||||||||||||||||||||||||||||||||||||||||||||||||
| New vocabulary | Tables; pictograms and graphs. | ||||||||||||||||||||||||||||||||||||||||||||||||||||
| Work Flow | 1st Step: On the last day of the week, the teacher invites two students at random, or at her discretion, to go to the emotion board posted on the wall and asks them to count the little balls/dots/rings made of wollen that correspond to the various emotions, with the help of the whole class. (See Appendix 1) 2nd Step Fill in the table size A2 (which follows in Appendix 2). After completing the previous task, a pupil with the help of the whole class, draws vertical lines for each emotion on the table also posted on the wall of the classroom, preferably next to the emotion board. 3rd Step Record the emotions on a pictogram, which is a type of chart that uses pictures or symbols to represent data. The pictogram also in A3 size (which is attached in Appendix 3). It should be made on white laminated paper, to be hung on the wall next to the chart. Collectively with the whole class, transfer the data from the table to the pictogram, lining up cardboard circles (representing the different emotions) with Velcro over each emotion at the bottom of the pictogram. Once the pictogram is completed, the class answers the following questions: - What was the most recorded emotion or emotions/s? - Which emotion or emotions registered the least? - Was there an emotion or emotions that was never registered? 4th Step 5 groups are formed - each group corresponds to an emotion; with a felt-tip pen in the colour of the emotion assigned and an A4 sheet of paper with a chart of dots to be filled in, with the days of the week at the bottom (see Appendix 4), the groups are instructed to place the number of dots corresponding to the emotion assigned on each day of the week. Students are expected to answer the following questions:
5th Step: One member of each group will put their chart side by side on a wall or board that is visible to all students. Ask the question: What was the most registered emotion during the week? By looking at the graphs next to each other, the students can help each other to come up with an answer. Then, and to confirm, they can all count the total number of points recorded for each day of the week. 6th Step: Evaluation through a game created in WordWall. | ||||||||||||||||||||||||||||||||||||||||||||||||||||
| Reflection | WHAT HAVE WE LEARNT ABOUT GRAPHIC REPRESENTATIONS?
| ||||||||||||||||||||||||||||||||||||||||||||||||||||
| Notes | |||||||||||||||||||||||||||||||||||||||||||||||||||||
| Digital Resource | Wordwall game: https://wordwall.net/resource/57547694 | ||||||||||||||||||||||||||||||||||||||||||||||||||||
| 31 | |||||||||||||||||||||||||||||||||||||||||||||||||||||
| | |||||||||||||||||||||||||||||||||||||||||||||||||||||
| 3 |  Grade 1 / Number of objects in a collection of up to 20 object Grade 1 / Number of objects in a collection of up to 20 object | ||||||||||||||||||||||||||||||||||||||||||||||||||||
| Developed by | Antalya Directorate Of Education | ||||||||||||||||||||||||||||||||||||||||||||||||||||
| Grade | 1 | ||||||||||||||||||||||||||||||||||||||||||||||||||||
| Duration | 60 | ||||||||||||||||||||||||||||||||||||||||||||||||||||
| Energizers | 1 - Break the Circle The teacher assigns randomly a number to each student, depending on the group size, i.e. for 20 students, numbers 1-4 are ok, so each group has 5 people (groups could be synthesized by the students with the same number, i.e. all having been assigned number ‘1’ or by students where each one has his/her own unique number 1-4; similarly and more fun is grouping by ingredient for a Greek salad, where every student is i.e. ‘tomato’, ‘cucumber’, ‘onion’, ‘oregano’, etc.) Once the groups have been formed, they make circles and the teacher randomly picks a number (or an ingredient) to step out of the circle and try to break in, while the others remaining are instructed to not let go of their hands no matter what. This can be repeated once more with another number stepping out. | ||||||||||||||||||||||||||||||||||||||||||||||||||||
| Relaxing Exercises | 5 - Use a word that describes their feelings/thoughts Students are asked to close their eyes (if comfortable) for a minute and think of a word that describes their feelings/thoughts after finishing the resource. Then the students open their eyes and one by one say their word to the classroom | ||||||||||||||||||||||||||||||||||||||||||||||||||||
| Objectives | Students will learn to: · determine the quantity of objects in a collection of up to 20 items; · represent this number in numeric form. | ||||||||||||||||||||||||||||||||||||||||||||||||||||
| Preparation | Ingredients: Chickpeas, beads, pasta, or counting sticks Cards with numbers up to 1-20 (see Annex 1) Objects cards representing numbers between 1-10 (see Annex 2) Reusable glue or tape Equipment: Laptop and projector Tablets for the assessment (optional) Classroom settings Tables (or desks) arranged to allow students to move freely around the room Instructions: Print and cut out the number cards 1-20 (Annex 1) and paste/hang/place on wall. Print and cut the cards with objects representing numbers 1-10 (Annex 2). Make available counting sticks, beads, pasta, or other materials (30 pieces for each student). | ||||||||||||||||||||||||||||||||||||||||||||||||||||
| Introduction | Welcome, young mathematicians! Today, we're diving into the world of numbers and learning to count up to 20. Are you ready? Let's go! | ||||||||||||||||||||||||||||||||||||||||||||||||||||
| Teaching and learning methods | Learning in Small Steps: Counting and number concepts are introduced in small, sequential steps, tailored to cater to each learner's individual pace and unique learning needs. Breaking Down Instructions into Smaller Parts: Instructions are presented in simple language, broken down into manageable parts to ensure clarity and understanding for all learners. Using Multi-Sensory Tools: Multi-sensory tools, such as tactile materials, auditory cues, and visuals, are incorporated to accommodate diverse learning styles, enabling active participation and comprehension. Adaptive Technology: The learning experience is made more inclusive and accessible by utilizing adaptive technology and assistive devices, providing additional support and flexibility. Real-Life Examples with Personal Relevance: Numerical concepts are linked to real-life situations that hold personal relevance for each learner, facilitating better understanding and practical application. Active Participation in a Supportive Environment: A nurturing and supportive environment fosters active participation, building confidence and a positive learning experience for all learners. Individualized Question-Answer Interactions: Learners benefit from individualized attention, with opportunities to ask questions and engage in discussions tailored to their specific learning needs. Collaborative Learning: Encouraging collaborative activities and group work promotes social interaction and mutual support, allowing learners to learn from one another in an inclusive setting. | ||||||||||||||||||||||||||||||||||||||||||||||||||||
| Interdisciplinary connections | |||||||||||||||||||||||||||||||||||||||||||||||||||||
| Resource teacher or other specialists activities | In this lesson, the steps are designed to be easily understandable for most learners with special needs who have well-preserved cognitive abilities. The lesson avoids using lengthy written explanations and complex instructions (TGSt), which can be challenging for the pupils in the target group. The teacher or assistant teacher with special needs plays a crucial role in providing support to the TGSt. If some tasks or steps become difficult for these learners, the teacher or assistant teacher is there to assist and guide them. During the practice of naming numbers, the teacher with special needs can sit alongside students who have learning difficulties and repeat the names clearly. While counting, the emphasis is placed on realizing that the last number spoken represents the quantity of objects. This approach ensures that all learners, including those with special needs, receive the necessary support and encouragement to succeed in the lesson. By fostering a supportive and inclusive learning environment, every student can actively participate and thrive in their mathematical journey. | ||||||||||||||||||||||||||||||||||||||||||||||||||||
| New vocabulary | Numbers, Numeric Forms, Tens | ||||||||||||||||||||||||||||||||||||||||||||||||||||
| Work Flow |
| ||||||||||||||||||||||||||||||||||||||||||||||||||||
| Reflection | In an additional activity, the subject is reinforced through interactive learning methods. If available, tablets can be provided to the students, or Match The Numbers Game and Group The Numbers can be played on the smart board. This activity aims to engage students and solidify their understanding of the concepts taught in the lesson. The duration for this activity is approximately 5 minutes. As a homework assignment, the class gets the task to find objects that represent the numbers from 1 to 20 using items they have at home. Students can capture a video of themselves showcasing the objects and their corresponding numbers. This activity encourages students to apply their counting skills in real-life scenarios and fosters a connection between classroom learning and everyday experiences. Students can then send the video to the teacher, further promoting engagement and active participation in the learning process. | ||||||||||||||||||||||||||||||||||||||||||||||||||||
| Notes | |||||||||||||||||||||||||||||||||||||||||||||||||||||
| Digital Resource |
Match The Numbers Game on Wordwall Group The Numbers on Wordwall | ||||||||||||||||||||||||||||||||||||||||||||||||||||
| 32 | |||||||||||||||||||||||||||||||||||||||||||||||||||||||||||
| | |||||||||||||||||||||||||||||||||||||||||||||||||||||||||||
| 4 |  Grade 1 / Units and tens: Meaning of digits according to their position in the record of a number Grade 1 / Units and tens: Meaning of digits according to their position in the record of a number | ||||||||||||||||||||||||||||||||||||||||||||||||||||||||||
| Developed by | AECE - Escola Básica da Zona Verde | ||||||||||||||||||||||||||||||||||||||||||||||||||||||||||
| Grade | 1 | ||||||||||||||||||||||||||||||||||||||||||||||||||||||||||
| Duration | 60 | ||||||||||||||||||||||||||||||||||||||||||||||||||||||||||
| Energizers | 31 - Movement calculations Calculate moving The teacher has pre-printed and laminated the cards from Appendix 9 – Energizing exercise The teacher says: - We're going to play a game. I will tell you riddles and I will pull out one of my cards which have symbols for squatting, jumping and spinning. The answer to the riddle will determine the number of moves. - How many units are obtained if I subtract 1 unit from 1 ten? - How many tens are obtained if 5 units are added to 5 units? - How many units do you get if you add 5 more units to 5 units? - How many units are obtained if I subtract 10 units from 1 ten? | ||||||||||||||||||||||||||||||||||||||||||||||||||||||||||
| Relaxing Exercises | 29 - Rhythmic game A Rhythm Game The class is divided into three groups. The instruction for the first group is to use clapping, the second to stomp with their feet, and the third to use hip tapping. The teacher sets a rhythm by explaining that when there is a pause, he/she will signal with a pointer in front of the mouth for silence. Different rhythms can be played by alternating the three groups under the "conduct" of the teacher. Onomatopoeic words can also be used, for example: clap, clap, thump, thump, bang, bang. In the worksheet Appendix 7, 4 lines of different rhythms are indicated. Some or all of them can be performed on teacher’s decision. | ||||||||||||||||||||||||||||||||||||||||||||||||||||||||||
| Objectives | Students will: ● know and give examples of the quantitative value of numbers from 1 to 10; ● understand the quantitative value of ten; ● know that one ten is equal to ten units and that ten units is equal to one ten; ● understand the formation of the ten; ● improve their skills to compare numbers; ● practice addition and subtraction up to 10. | ||||||||||||||||||||||||||||||||||||||||||||||||||||||||||
| Preparation |
| ||||||||||||||||||||||||||||||||||||||||||||||||||||||||||
| Introduction | We already know the numbers from 1 to 10. Now it is interesting to understand what a ten is and what is the difference between a unit and a ten. Today we will learn how the ten is formed, and then how it helps us to write down and calculate numbers more easily. | ||||||||||||||||||||||||||||||||||||||||||||||||||||||||||
| Teaching and learning methods | Rhythmic exercises Working examples Group work Presentation Discussion-based learning Co-teaching of general education and resource teacher | ||||||||||||||||||||||||||||||||||||||||||||||||||||||||||
| Interdisciplinary connections | Mother tongue Physical education | ||||||||||||||||||||||||||||||||||||||||||||||||||||||||||
| Resource teacher or other specialists activities | The resource teacher: produces together with the general education teacher the worksheets, the didactic materials and the overall preparation of the lesson; prepares the steps for co-teaching (supplementary teaching) with the general education teacher during the lesson; supports the work and participation of SEN students during the lesson; participates in group work, partnering all students and supporting the participation and work of SEN students; develops an adapted version of the worksheets, if necessary, and supports the completion of the tasks of the SEN student/students. In case they have difficulties to understand the instructions, reads the task instructions with the SEN students. | ||||||||||||||||||||||||||||||||||||||||||||||||||||||||||
| New vocabulary | unit, tens, place of units and tens in the two-digit number | ||||||||||||||||||||||||||||||||||||||||||||||||||||||||||
| Work Flow | 1. Update of basic knowledge – group work The teacher says: We will start the lesson with dividing the class into three groups. The teacher groups the students into 3 groups - a group of 3 students, a second group of 5 students and a third - of 10 students. The task of each group is to count how many students there are in their own group and in the groups of the others and write down the number of students in each group on a sheet.
The results are presented to everyone, the numbers are compared. Students answer questions: - How many individual students does the first group consist of? - How many individual students does the second group consist of? - How many individual students does the third group consist of? - Which group has the fewest students? - Which group has the most students? - Who is the group in the middle? A record of the comparison is made on the board: 3 < 5 < 10. Time: 5 minutes. 2. Setting the topic and presentation The teacher says: - We see that in the group with the most students we have 10 students. That's quite a large number of individual students. A group of 10 separate units forms a ten. We say that the sum of 10 units is one ten. - Now we will see what the difference between a unit and a ten, how to form and write a ten. The next step is the presentation in Appendix 1 - Presentation. During the presentation, the teacher explains simultaneously with the visualization of the different slides. - And now we already know the numbers from 1 to 10. Slide 1 - We can easily see that the pencils are 10. Slide 2 - One pencil is one unit. Then 10 pencils are equal to ten units. Slide 3 - Ten units make one ten. Slide 4 - The opposite is also true - 1 ten is equal to 10 units. Slide 5 – Now let's see some examples. If we add another 5 units to 5 units, we will get 10 units or 1 ten. Slide 6 – However, if we subtract 5 units from 10 units, we get 5 units. Slide 7 – If we add 2 units to 5 units, we will get 7 units. Do we have a whole ten? No, we don't have a ten yet because we don't have 10 units. Slide 8 – However, if we add 3 units to 7 units, we will get 10 units or one ten. Slide 9 – However, if we subtract 3 units from a ten, we will have 7 units. Slide 10 – Now, look at some examples. We will compare 5 units to 3 units plus 3 units. We get 5 units on one side and 6 units on the other side. 5 is less than 6. Therefore, 5 units is less than 6 units. Slide 11 - We have 9 units minus 4 units that we need to compare to 2 units. We get 5 units. 5 is bigger than 2, therefore 5 units is more than 2 units. Slide 12 – We will compare 3 units with 3 units. 3 is equal to 3. So, 3 units is equal to 3 units. Slide 13 – Today we will focus on the difference between a unit and a ten, how to compare them, and how to add and subtract using them. After the presentation, the teacher explains the way number 10 is written on the board: - One ten is formed of ten free units. In two-digit numbers, the tens digit is written in the first position and means the whole first ten, and the units digit is written in the second position and means how many units of the second ten are involved in the number. Such a two-digit number is the number 10. Time: 10 minutes. 3. Working with the whole class The teacher presents the content of Appendix 2 - Presentation. The teacher says: Slide 1: We're going to play a game. Let's recall how we compare numbers. The crocodile comes to help us. It always feeds on those animals that are an extra number. Slide 2: A bigger than symbol tells us which of the two numbers we are comparing is the bigger one. The crocodile's open mouth points to this number. Slide 3: The smaller than symbol refers to numbers that are less in number. Slide 4: We use the equal to symbol when we have an equal number on both sides of the equation. Slide 5: We will use the signs <, ˃ or = to solve several maths tasks. For each slide from 6 to 11, the teacher invites a student who goes to the board, chooses a sign <, ˃ or = and, using a marker, writes it in the circle. If the board cannot be used to write on it with a marker, use Appendix 3 – symbols bigger than, less than, equal to and with the help of a double-sided tape, the student can attache the symbol of their choice to the circle on the corresponding slide. Time - 5 minutes 4. Group work with manipulatives This part of the lesson uses a decimal block and 10 free single units from the "Decimal Cube" set (Appendix 4 - photo of a decimal block with 10 single elements). The teacher says: I see you are doing very well. I will now divide the class and you’ll work in groups. The class is divided into several groups of 5 students each. The group receives a decimal block with ten unit cubes, a dice and Appendix 5 - Worksheet for group work with manipulatives. Students from each group take turns rolling the die and placing as many elements on the decimal block as the die shows. Then they add the number of units from the decimal block by 1, by 2, by 3 or by 4, depending on the group in which they are included. SEN students join the group that adds by 1, for example. Each participant, after taking his turn, records the result of the calculation in the table opposite to their name. As an additional task, each participant can be given to compare his number with the student's numbers before and after him, for example 5 units is less than 7 units, but is more than 3 units. Time – 5 minutes. 5. Individual work Teacher says: You did great. Now let's see if you have understood everything and if you can handle it yourselves. Each student receives a worksheet Appendix 6 - Worksheet for individual work. 6. Homework Students are given a copy of Appendix 10 - Homework. | ||||||||||||||||||||||||||||||||||||||||||||||||||||||||||
| Reflection | The teacher says: - I see that you are very fast and doing excellently. You will get a sheet of paper for each of you to share what you found interesting and easy. Students are given a printed copy of Appendix 8 - Reflection and they answer the questions individually. Time – 3 minutes | ||||||||||||||||||||||||||||||||||||||||||||||||||||||||||
| Notes | |||||||||||||||||||||||||||||||||||||||||||||||||||||||||||
| Digital Resource | |||||||||||||||||||||||||||||||||||||||||||||||||||||||||||
| 33 | |||||||||||||||||||||||||||||||||||||||||||||||||||||
| | |||||||||||||||||||||||||||||||||||||||||||||||||||||
| 5 |  Grade 1 / DATA - Statistical questions, data collection and organisation Grade 1 / DATA - Statistical questions, data collection and organisation | ||||||||||||||||||||||||||||||||||||||||||||||||||||
| Developed by | AECE - Escola Básica da Zona Verde | ||||||||||||||||||||||||||||||||||||||||||||||||||||
| Grade | 1 | ||||||||||||||||||||||||||||||||||||||||||||||||||||
| Duration | 60 | ||||||||||||||||||||||||||||||||||||||||||||||||||||
| Energizers | 37 - Fruit game Location: Classroom/Interior. No. of participants: All the students in a class. Organisation: Students stand in a circle. The names of three fruits are chosen: pear, apple and banana; Each fruit is associated with a gesture: pear - clap your hands; apple - jump backwards; banana - hold up your hands. The teacher names the fruit randomly, which the students have to match with the correct gesture. Whenever a student makes a mistake, they leave the game. The pace at which the fruit is named can be increased in order to increase the difficulty of the game. | ||||||||||||||||||||||||||||||||||||||||||||||||||||
| Relaxing Exercises | 33 - I am a tree This game consists of students acting like a growing tree. With relaxing music in the background and low lighting, Imagine you are a seed in the soil which grows into a large tree. Start in a kneeling position with your heads tilted downwards. Then you squat and gradually start rising up and stretching your arms upwards as if they were large branches. This relaxing exercise can be repeated a few times explaining that the wind blows the seeds away and the grow into new trees. | ||||||||||||||||||||||||||||||||||||||||||||||||||||
| Objectives |
In the end of the lesson should be able to:
| ||||||||||||||||||||||||||||||||||||||||||||||||||||
| Preparation |
Resources:
| ||||||||||||||||||||||||||||||||||||||||||||||||||||
| Introduction | Start the lesson by talking about the importance of eating fruit. Explain what a data collection method is, using simple language and examples from everyday life. Discuss different methods, such as interviews, questionnaires and observation. Use practical situations close to the students to experience and involve them in learning. | ||||||||||||||||||||||||||||||||||||||||||||||||||||
| Teaching and learning methods |
| ||||||||||||||||||||||||||||||||||||||||||||||||||||
| Interdisciplinary connections |
Mother Tongue - Select relevant information according to the listening objectives and record them using different techniques. Speak clearly and articulate words appropriately. Citizenship and Development - Sustainable Development; Environmental Education | ||||||||||||||||||||||||||||||||||||||||||||||||||||
| Resource teacher or other specialists activities | All the steps in exploring the topic are understandable for students with specific needs but cognitive abilities. The lesson does not include lengthy written explanations. The role of the support or special education teacher is to help the students in the target group if they are unable to carry out any of the tasks or steps, or if they feel disorientated in understanding something that may be asked of them. Identifying and manipulating and handling materials, taking part in games, exploring content by visualising images, etc. are usually well accepted and meet the interests and needs of most students. | ||||||||||||||||||||||||||||||||||||||||||||||||||||
| New vocabulary | Interviews Enquiry Collecting data Data recording | ||||||||||||||||||||||||||||||||||||||||||||||||||||
| Work Flow | 1st step - Large group Start the lesson by talking with students about the importance of fruit and its health benefits, particularly in terms of vitamins. Show a picture of fruit items. (Appendix 1). Since fruit is so important for boys and girls to grow up healthy, we want to know if boys and girls usually eat fruit and what their favourite fruits are. How are we going to collect this information? 2nd step- Pair work Give each pair two interview record sheets (appendix 2) and ask the students to take it in turns to be the interviewer and the interviewee, recording their answers on the sheet provided. Meanwhile, the teacher writes the title ‘YOUR FAVOURITE FRUIT’ on the interactive whiteboard or on the normal classroom whiteboard, and line by line the names of all the fruits on the recording sheet. 3rd step – Large Group The teacher collects the record sheets (appendix 2) and without identifying names he / she uses the interactive whiteboard or the classroom whiteboard to record the fruits that have been registered by the students using a vertical line. 4th step - Pair work Observing the records made by the teacher, in pairs the students fill in the table (appendix 3) counting the fruits preferred by the students in the class. The teacher helps the class by projecting the same table and noting the results the students have obtained and finalising the results. 5th step - Individual work Afterwards reflect with the students on the importance of collecting information to better understand the world around us. Encourage students to think of other situations in which they could use data collection methods ( favourite colour,extra school activities,...). In order to check the students’ comprehension about the topic, give them a worksheet with a challenge for them to solve individually. This time about colours. (Appendix 4) The results will be verified / corrected through a projection on the interactive board. (Appendix 5) | ||||||||||||||||||||||||||||||||||||||||||||||||||||
| Reflection | Thumbs UP and Down Game The teacher asks the students which activity they liked best. If they liked it, the students make a positive sign with their thumbs up; if they didn't like it or liked it less, they tick with their thumbs down. The teacher records the results on the board. - Relaxation activity ; - Group dynamics - Game ; - Large group activities; - Pair work; - Individual activity. | ||||||||||||||||||||||||||||||||||||||||||||||||||||
| Notes | |||||||||||||||||||||||||||||||||||||||||||||||||||||
| Digital Resource | Appendix 1: https://sen-power.eu/atividades/pdf/746_Appendix 1 .pdf Appendix 2: https://sen-power.eu/atividades/pdf/746_Appendix 2.pdf Appendix 3: https://sen-power.eu/atividades/pdf/746_Appendix 3.pdf Appendix 4: https://sen-power.eu/atividades/pdf/746_Appendix 4.pdf Appendix 5: https://sen-power.eu/atividades/pdf/746_Appendix 5.pdf | ||||||||||||||||||||||||||||||||||||||||||||||||||||
| 34 | |||||||||||||||||||||||||||||||||||||||||||||||||||||
| | |||||||||||||||||||||||||||||||||||||||||||||||||||||
| 6 |  Grade 1 / Measurement: Length Grade 1 / Measurement: Length | ||||||||||||||||||||||||||||||||||||||||||||||||||||
| Developed by | AECE - Escola Básica da Zona Verde | ||||||||||||||||||||||||||||||||||||||||||||||||||||
| Grade | 1 | ||||||||||||||||||||||||||||||||||||||||||||||||||||
| Duration | 60 | ||||||||||||||||||||||||||||||||||||||||||||||||||||
| Energizers | 36 - Balloon game Location: Classroom/Interior as free as possible. No. of participants: All the students in a class Organisation: 2 groups sit on the floor in a row behind each other. Material: 2 balloons. Description Organise two rows side by side, with the students sitting one behind the other. The teacher gives a balloon to the first person in each row who, on the teacher's signal, must pass it on to the next person, without anyone dropping it. When the balloon reaches the last member, he comes to the front of the queue and continues along the line. Whenever someone loses the balloon, the balloon goes back to the beginning, i.e. to the first person. | ||||||||||||||||||||||||||||||||||||||||||||||||||||
| Relaxing Exercises | 32 - Arms and Shoulders With each student sitting in their place in the classroom, give them clear instructions: Let's pretend you're a very hairy, lazy cat. And you want to stretch. Extend your arms forwards. Raise them above your head. Pull them back. Feel the pull in your shoulders. Extend them even further. Now let them fall normally. O.K., kitty, stretch again. Stretch your arms forwards. Raise them above your head. Pull them back. Pull hard. Now let them fall normally. That's good! Notice how your shoulders are more relaxed. This time we're going to stretch for real. Try to touch the ceiling. Spread your arms out in front of you. Raise them above your head. Pull back. Notice the tension and pull in your arms and shoulders. Hold on tight. Great! Drop them quickly and feel how good it feels to be relaxed. It's nice, warm and cosy. | ||||||||||||||||||||||||||||||||||||||||||||||||||||
| Objectives | In the end of the lesson should:
| ||||||||||||||||||||||||||||||||||||||||||||||||||||
| Preparation |
Resources:
Preparation: On an empty wall in the classroom, fix a tape measure vertically from the floor with tape or sticky gum. | ||||||||||||||||||||||||||||||||||||||||||||||||||||
| Introduction | Start the lesson by talking about the importance and necessity of measuring objects in the house, so that, for example, you can buy a bed that fits in the bedroom, etc. Explain that there are various ways of measuring. Present a set of unconventional objects and encourage the students in pairs to take measurements with them and record them on the recording sheet. Suggest that they share their results. Introduce conventional measuring instruments, ruler and tape measure and show the students how to use them. The students should share their results and come to the conclusion that they are the same size when using a ruler or tape measure. | ||||||||||||||||||||||||||||||||||||||||||||||||||||
| Teaching and learning methods |
| ||||||||||||||||||||||||||||||||||||||||||||||||||||
| Interdisciplinary connections | Mother tongue- Select relevant information according to the listening objectives and record them using different techniques. Speak clearly and articulate words appropriately. | ||||||||||||||||||||||||||||||||||||||||||||||||||||
| Resource teacher or other specialists activities | All the steps in exploring the topic are understandable for students with specific needs but cognitive abilities. The lesson does not include lengthy written explanations. The role of the support or special education teacher is to help the students in the target group if they are unable to carry out any of the tasks or steps, or if they feel disorientated in understanding something that may be asked of them. Identifying and manipulating and handling materials, taking part in games, exploring content by visualising images, etc. are usually well accepted and meet the interests and needs of most students. | ||||||||||||||||||||||||||||||||||||||||||||||||||||
| New vocabulary | Non-standard measures Conventional or standard measures | ||||||||||||||||||||||||||||||||||||||||||||||||||||
| Work Flow | 1st step - Large group Start the lesson by talking to the students about the need to take measurements (the height of the students, a piece of furniture in their house, a plot of land, etc.). 2nd step - In pairs Organise the students into pairs. Give each pair a sheet for recording, (appendix 1) a clothespin, a paperclip and a tube of glue (these objects must all be exactly the same). Then instruct each pair to take measurements using non-conventional units, i.e. using the clothespin, paperclip and tube of glue, and record them on the sheet. The students should measure the pen, the elasticated cap, the training notebook and their desk. - How many clothes pegs, the pen, notebook and cover measure? - How many paperclips does the pen, notebook and cover measure? - And how many glue sticks does the pen, notebook and cover measure? The students (in pairs) are also asked to measure their desks with an open hand and to say how many palms the desks measure (which are all the same size). 3rd step - Large group The students will share their data in order to check the results (the same or different). On the board, the teacher will record the results in columns. The supposedly different results will allow the teacher to explain the need for a standard measure. 4th step - Large group Next, the teacher explains what standard measures are, what they are used for and how they are used – he/she chooses to show a tape measure and a ruler. Following this explanation, the teacher shows some illustrative images which he projects onto the video projector (appendix 2). Showing a ruler and tape measure, he/she exemplifies by measuring some objects with the ruler and one of the work tables with the tape measure. On an empty wall of the room, where the tape measure is already fixed vertically with glue or adhesive tape, she selects a pupil, using a random name selector, name wheel or online roulette available on Google, to be measured. This activity of measuring all the children is left to be continued in another class, or on another day. 5th step - In pairs. Again, in pairs, give each pair a ruler and ask them to remeasure the pen, the elasticated cap, the training notebook. Record the results on the record sheet used earlier (Appendix 1). 6th step - Large group The students will share the data they have obtained and come to conclusions when they see that when using a standard measure, the results obtained are the same, which is not the case when using objects with their hands... to measure something. | ||||||||||||||||||||||||||||||||||||||||||||||||||||
| Reflection |
Bring the class together and highlight the discoveries made during the lesson.
Interactive activity: | ||||||||||||||||||||||||||||||||||||||||||||||||||||
| Notes | |||||||||||||||||||||||||||||||||||||||||||||||||||||
| Digital Resource | Appendix 1: https://sen-power.eu/atividades/pdf/747_Appendix 1.pdf Appendix 2: https://sen-power.eu/atividades/pdf/747_Appendix 2.pdf Appendix 3: https://wordwall.net/pt/resource/75771165 | ||||||||||||||||||||||||||||||||||||||||||||||||||||
| 35 | |||||||||||||||||||||||||||||||||||||||||||||||||||||
| | |||||||||||||||||||||||||||||||||||||||||||||||||||||
| 7 |  Grade 1 / Geometrical shapes Grade 1 / Geometrical shapes | ||||||||||||||||||||||||||||||||||||||||||||||||||||
| Developed by | Antalya Directorate Of Education | ||||||||||||||||||||||||||||||||||||||||||||||||||||
| Grade | 1 | ||||||||||||||||||||||||||||||||||||||||||||||||||||
| Duration | 60 | ||||||||||||||||||||||||||||||||||||||||||||||||||||
| Energizers | 6 - Keep walking The teacher instructs the students to walk in different manners covering the whole rook, i.e. walk like you are very happy, walk like a very heavy elephant, walk like you are 80 years old, walk like it’s raining cats and dogs, walk like a toddler, etc. | ||||||||||||||||||||||||||||||||||||||||||||||||||||
| Relaxing Exercises | 11 - Breathing exercise Teacher asks students to make a circle and do the following exercises, repeating each one few times and alternate them. Teacher can also add new ones. Breathing in raise your arms above your head and say “Elevator Up!” Breathing out, float your arms back down to your sides, saying “Elevator Down.” Repeat. Take three quick breaths in while wiggling your nose. Wiggle your nose on each breath in. Then wiggle your nose on each breath out. Hold your hand in front of your nose and hiss hiss hiss while breathing out. | ||||||||||||||||||||||||||||||||||||||||||||||||||||
| Objectives | · Students will be able to identify basic geometrical shapes (circle, square, triangle, rectangle). · Students will be able to describe the properties of these shape. · Students will practice cutting skills by cutting out shapes. | ||||||||||||||||||||||||||||||||||||||||||||||||||||
| Preparation | Materials Needed: · Annex 1: Sheet with various geometrical shapes · Annex 2: Sheet with shapes to be cut out · Scissors · Glue sticks · Colored pencils or crayons · Chart paper | ||||||||||||||||||||||||||||||||||||||||||||||||||||
| Introduction | Teacher: "Good morning, class! Today, we are going to learn about geometrical shapes. By the end of this lesson, you'll be able to name and describe some shapes. Let's get started!" · Teacher: "Can anyone tell me the name of a shape they know?" · Allow students to respond and write their answers on the board. · Teacher: "Great! We are going to learn about four main shapes today: circle, square, triangle, and rectangle." | ||||||||||||||||||||||||||||||||||||||||||||||||||||
| Teaching and learning methods | ·Direct Instruction:
·Visual Learning:
Hands-on Learning:
Collaborative Learning:
Review and Reflect:
| ||||||||||||||||||||||||||||||||||||||||||||||||||||
| Interdisciplinary connections | Art:
Physical Education:
Social Studies:
| ||||||||||||||||||||||||||||||||||||||||||||||||||||
| Resource teacher or other specialists activities | -Provide visual supports or cues for understanding the lesson objectives. Use picture cards to represent each shape. -Use simple, clear language and repeat instructions as necessary. - Work with students in small groups or one-on-one to ensure they understand the task. Provide additional guidance and prompt them to identify and color the shapes correctly. - For students with fine motor difficulties, provide adaptive tools such as thicker crayons or markers. - Assist students who may have difficulty with scissors by using adapted scissors or pre-cutting some of the shapes to reduce the amount of cutting required. - Use hand-over-hand assistance if necessary to help guide the cutting process. - Ask simple yes/no questions or provide multiple-choice options to help students recall and review the shapes. | ||||||||||||||||||||||||||||||||||||||||||||||||||||
| New vocabulary | Shape: A two-dimensional outline or form, such as a circle, square, triangle, or rectangle. Circle: A shape with all points equidistant from its center, forming a round outline. Square: A shape with four equal sides and four right angles. Triangle: A shape with three sides and three angles. Rectangle: A shape with four sides where opposite sides are equal in length and all angles are right angles. | ||||||||||||||||||||||||||||||||||||||||||||||||||||
| Work Flow |
-Teacher: "Let's look at these shapes one by one." -Show a large image of each shape from Annex 1, starting with the circle. -Teacher: "This is a circle. A circle is round and has no corners. Can you trace a circle in the air with your finger?"
-Square: "This is a square. A square has four equal sides and four corners." -Triangle: "This is a triangle. A triangle has three sides and three corners." -Rectangle: "This is a rectangle. A rectangle has four sides, but the opposite sides are equal in length."
-Hand out Annex 1 to each student. -Teacher: "Can you find the circles on your sheet? Color them blue." -Give students a few minutes to color the circles. -Teacher: "Now, find the squares and color them red." -Continue this process for triangles (color green) and rectangles (color yellow).
-Distribute Annex 2 (shapes to be cut out) and scissors. -Teacher: "Now, let's practice cutting. Carefully cut out each shape along the lines." -Walk around the classroom to assist students as needed.
-After cutting, have students glue their shapes onto a piece of chart paper to create a collage. -Teacher: "Arrange your shapes to make a fun picture or pattern. When you're done, glue them onto the paper."
-Teacher: "Great job, everyone! Let's review the shapes we learned today. What shape has four equal sides? What shape is round?" -Allow students to answer.
-Teacher: "You've all done a fantastic job learning about shapes today. | ||||||||||||||||||||||||||||||||||||||||||||||||||||
| Reflection |
Conclude by asking students to think about one question they still have about geometric shapes or one thing they would like to learn more about in future lessons. | ||||||||||||||||||||||||||||||||||||||||||||||||||||
| Notes | Notes for Differentiation: Provide additional support for students who may struggle with identifying or understanding geometric shapes. Offer extension activities or challenges for students who grasp the concepts quickly. Safety Considerations: Ensure that any materials used during hands-on activities are age-appropriate and safe for students to handle. Supervise students during activities that involve movement or exploration to prevent accidents. | ||||||||||||||||||||||||||||||||||||||||||||||||||||
| Digital Resource | Annex 1 for Geometrical Shapes Identification Annex 2 for Cut-out activity | ||||||||||||||||||||||||||||||||||||||||||||||||||||
| 36 | |||||||||||||||||||||||||||||||||||||||||||||||||||||
| | |||||||||||||||||||||||||||||||||||||||||||||||||||||
| 8 |  Grade 1 / Addition of natural numbers up to 20. Grade 1 / Addition of natural numbers up to 20. | ||||||||||||||||||||||||||||||||||||||||||||||||||||
| Developed by | Antalya Directorate Of Education | ||||||||||||||||||||||||||||||||||||||||||||||||||||
| Grade | 1 | ||||||||||||||||||||||||||||||||||||||||||||||||||||
| Duration | 60 | ||||||||||||||||||||||||||||||||||||||||||||||||||||
| Energizers | 8 - Find another seat: Have the students sit on chairs in a circle, with the number of chairs being one less than the number of students. The student without a chair stands in the middle and tells their name. Then the student calls out a characteristic or a colour, or type of clothing, e.g. “Everyone wearing orange!”. All participants who are wearing orange must get up and find another seat, but not the one immediately to their right or left. The student in the middle races to find a seat and the person left standing becomes the next caller in the middle. | ||||||||||||||||||||||||||||||||||||||||||||||||||||
| Relaxing Exercises | 5 - Use a word that describes their feelings/thoughts Students are asked to close their eyes (if comfortable) for a minute and think of a word that describes their feelings/thoughts after finishing the resource. Then the students open their eyes and one by one say their word to the classroom | ||||||||||||||||||||||||||||||||||||||||||||||||||||
| Objectives | -Students will understand the concept of addition. -Students will practice adding natural numbers up to 20. Students will develop fluency in basic addition facts. | ||||||||||||||||||||||||||||||||||||||||||||||||||||
| Preparation | Materials Needed - Number cards (0-20) - Counters or small objects for hands-on activities - Whiteboard and markers - Addition worksheets or activity sheets - Math manipulatives (e.g., blocks, cubes) Classroom settings Tables (or desks) arranged to allow students to move freely around the room Instructions: Make available counting objects like blocks, cubes, crayons, real objects, etc. | ||||||||||||||||||||||||||||||||||||||||||||||||||||
| Introduction | Warm-up Activity (10 minutes): - Begin the lesson with a quick review of counting from 1 to 20 as a whole class. Use Annex 3 - Introduce a counting game such as "Counting Around the Circle" where students take turns counting aloud, adding one number each time. - Incorporate movement by having students stand up or clap as they count, keeping them engaged and energized. | ||||||||||||||||||||||||||||||||||||||||||||||||||||
| Teaching and learning methods | Direct Instruction:
Hands-on Activities:
Collaborative Learning:
Individual Practice:
Exploratory Learning:
Use of Visual Aids and Flashcards:
| ||||||||||||||||||||||||||||||||||||||||||||||||||||
| Interdisciplinary connections | Art
Physical Education:
Social Studies:
| ||||||||||||||||||||||||||||||||||||||||||||||||||||
| Resource teacher or other specialists activities | - Provide worksheets with larger print or fewer problems per page to reduce visual clutter. Offer tactile supports like raised-line paper or markers for students with visual impairments. (Activity 1: Revision of Numbers Worksheets - Color the Fruit) - Pair SEN students with peer buddies or provide one-on-one assistance as needed. Use concrete manipulatives and provide step-by-step guidance for completing tasks.( Activity 2: Hands-on Addition with Fruit Visuals) | ||||||||||||||||||||||||||||||||||||||||||||||||||||
| New vocabulary | 1. Addition: The mathematical operation of combining two or more numbers to find their total or sum. 2. Sum: The result or total obtained when adding two or more numbers together. 3. Natural Numbers: Positive whole numbers (1, 2, 3, ...) used in counting and basic arithmetic operations. | ||||||||||||||||||||||||||||||||||||||||||||||||||||
| Work Flow | 1. Introduction to Addition
2. Activity 1: Revision of Numbers Worksheets - Color the Fruit
3. Activity 2: Hands-on Addition with Fruit Visuals
4. Activity 3: Math Manipulatives Exploration
5. Closure
| ||||||||||||||||||||||||||||||||||||||||||||||||||||
| Reflection | Teacher: "Show me how you feel about addition now. Thumbs up if you're feeling great about it, sideways if you're okay, and down if you need more help." Provide students with a simple self-assessment tool. For example:
| ||||||||||||||||||||||||||||||||||||||||||||||||||||
| Notes | |||||||||||||||||||||||||||||||||||||||||||||||||||||
| Digital Resource | |||||||||||||||||||||||||||||||||||||||||||||||||||||
| 37 | |||||||||||||||||||||||||||||||||||||||||||||||||||||
| | |||||||||||||||||||||||||||||||||||||||||||||||||||||
| 9 |  Grade 1 / Addition and subtraction of numbers up to 20 with carrying; word problems Grade 1 / Addition and subtraction of numbers up to 20 with carrying; word problems | ||||||||||||||||||||||||||||||||||||||||||||||||||||
| Developed by | Prosveta-Sofia Foundation | ||||||||||||||||||||||||||||||||||||||||||||||||||||
| Grade | 1 | ||||||||||||||||||||||||||||||||||||||||||||||||||||
| Duration | 60 | ||||||||||||||||||||||||||||||||||||||||||||||||||||
| Energizers | 25 - The mirror game The game begins with the room cleared of tables and chairs. The students start by team up in pairs and stand in front of each other. They agree who starts the game, who plays the mirror and who plays the person. The game begins to the sound of a song chosen by the leader. The person will start to move and the "mirror" will have to follow him/her, immediately repeating the person's movements. When the leader stops the music, they swap places and the person who was the "mirror" becomes the person and vice-versa. | ||||||||||||||||||||||||||||||||||||||||||||||||||||
| Relaxing Exercises | 14 - Give me your energy The students stand in a circle. The teacher starts, pretending he/she is holding a ball on the hands and passing it to the student on his/her right; this one do the same, until the ball comes back to the teacher. The ball needs to be passed in a gentle way, as it is very precious. At the second round, the teacher passes the ball to students in another side of the circle, making a gesture and a noise. The students will do the same until everyone will have touched the ball at least once. The ball can be passed in any way (in form of kick, kiss…), pretending it becomes bigger or smaller depending on the will of the students. | ||||||||||||||||||||||||||||||||||||||||||||||||||||
| Objectives | Students will:
| ||||||||||||||||||||||||||||||||||||||||||||||||||||
| Preparation | Materials Markers/colour pencils/pastels Black pencil Cardboard with a traffic lights (Handout 7) - for Reflection Scissors Glue White sheets of paper A3 size Equipment Laptop and projector Preparation
| ||||||||||||||||||||||||||||||||||||||||||||||||||||
| Introduction | Mathematics is all around us. That's why it's very important for everyone to be able to perform calculations with numbers. But this is not enough. We need to be able to use these skills to solve everyday problems. In this lesson, we will look at a different kind of problems called word problems which show very well how mathematics relates to practice and our everyday lives. | ||||||||||||||||||||||||||||||||||||||||||||||||||||
| Teaching and learning methods |
| ||||||||||||||||||||||||||||||||||||||||||||||||||||
| Interdisciplinary connections |
| ||||||||||||||||||||||||||||||||||||||||||||||||||||
| Resource teacher or other specialists activities | Almost all of the steps in the lesson are understandable to most students with special needs who have well-preserved cognitive abilities. The text and the instructions of the tasks are concise and clear. The role of the resource teacher or teacher's assistant is to help the target group students if they are unable to cope with some of the tasks or steps of the lesson. | ||||||||||||||||||||||||||||||||||||||||||||||||||||
| New vocabulary | Word problems | ||||||||||||||||||||||||||||||||||||||||||||||||||||
| Work Flow |
In Task 1, students must use the information from the illustrations and calculate the sum and the difference. In Tasks 2 and 3, the objects in the problem description are given by drawings. Pupils need to count the objects in order to identify the numbers, and then - calculate and write down the answers to the problems. (5 min)
Then, the teacher shows the text of the word problem. The class discusses whether the illustration and the text of the word problem correspond to each other. The teacher explains that in mathematics there are problems that are described only in words and they are called word problems. By using annex 2, the teacher introduces the elements of a word problem: (1) description of the word problem with numerical data and (2) question, and explains what the terms mean. (2 min)
In Task 1, students have to read the texts and identify the one that is a text problem. In Task 2, students have to find the suitable question to the problem description. In task 3, students need to highlight the different elements of the word problem and identify the numerical data. The tasks are checked with the whole class; the teacher provides comments and further explanations where needed. (5 min) 4. The teacher explains the different steps in solving a word problem (slides 6 and 7, Annex 2). Special attention is paid to the word(s) in the question which is (are) a clue(s) for deciding which arithmetic operation that must be performed to solve the problem (addition or subtraction). (5 min) 5. Students are divided in groups. Each group is given an addition or subtraction problem from Handout 4. Students copy the text of the problem on a A3 sheet. After that, they cut out the questions and stick them in the logical order they should be answered in order to solve the word problem. Finally, the put down their answers to the questions. If the teacher decides, they can include a step in which the students make drawings to illustrate the problem (10 min). 6. Students work in pair with Handout 5.The task is to discuss together and distribute the provided words in the 2 columns considering if they imply performing the arithmetic operation of addition or the arithmetic operation of subtraction. The teacher can play the word problem from Annex 2 to provide a practical example of the task. When the pairs are ready, the results are summed up. The white board is divided in 2 and the + sign is written on the left side, and the - sign – to the right. Students volunteer to list words belonging to the addition (+) side, and the subtraction (-) side. Alternatively, the split can be put recorded on 2 A3 sheets of paper and, once completed, could be hung in the classroom to support the process of solving word problems throughout the school year. (5 min) 7. The teacher distributes Handout 6; students work individually. In Problem 1, students must connect each description to the corresponding question to produce a meaningful word problem. After that, they need to identify which problem is to be solved by addition and which one - by subtraction. In Problem 2, students number the parts of the word problem sequentially, and after that - solve it. In Problem 3, students write the solution and the answer in the provided boxes. (10 min) 8. After completing the problems in Handout 6, the teacher summarizes the highlights of the lesson. (2 min) | ||||||||||||||||||||||||||||||||||||||||||||||||||||
| Reflection | Activity 1. Ask the following questions:
- the energizing exercise - the relaxing exercise - the group work to solve a text problem (step 5) - the pair work in splitting the words (step 6) - the individual work (step 7) Activity 2. Each student receives the picture of traffic lights with the different faces (Handout 7) and has to choose and colour one of the faces according to their opinion of the lesson: - green if they are satisfied with what they have learned and with their work; - yellow if they are not very satisfied because they didn’t understand everything or were bored; - red if they are not satisfied because of some reason. The coloured traffic lights presenting students’ feedback are displayed on the classroom walls after the lesson. (5 min) | ||||||||||||||||||||||||||||||||||||||||||||||||||||
| Notes | |||||||||||||||||||||||||||||||||||||||||||||||||||||
| Digital Resource | |||||||||||||||||||||||||||||||||||||||||||||||||||||
| 38 | |||||||||||||||||||||||||||||||||||||||||||||||||||||
| | |||||||||||||||||||||||||||||||||||||||||||||||||||||
| 10 |  Grade 1 / Addition with carrying: Adding number 9 to a single digit number Grade 1 / Addition with carrying: Adding number 9 to a single digit number | ||||||||||||||||||||||||||||||||||||||||||||||||||||
| Developed by | Prosveta-Sofia Foundation | ||||||||||||||||||||||||||||||||||||||||||||||||||||
| Grade | 1 | ||||||||||||||||||||||||||||||||||||||||||||||||||||
| Duration | 60 | ||||||||||||||||||||||||||||||||||||||||||||||||||||
| Energizers | 33 - Broken telephone
The activity can be repeated several times changing the last person in the line who starts the game. | ||||||||||||||||||||||||||||||||||||||||||||||||||||
| Relaxing Exercises | 3 - Guided breathing Teacher asks the students to close their eyes (if comfortable), inhale for a count of four, then exhale for a count of four (all through the nose, which adds a natural resistance to the breath). Then, with one hand on the chest and the other on the belly, the students can take a deep breath in through the nose and exhale through the mouth, ensuring this way that the diaphragm (not the chest) inflates with enough air to create a stretch in the lungs Jordan Shakeshaft | ||||||||||||||||||||||||||||||||||||||||||||||||||||
| Objectives | Students will: • master their skills of addition with carrying(adding 9 to a one-digit number); • strengthen their skills of adding numbers up to 20; • strengthen their modeling skills with numerical expressions of text problems; • develop a positive attitude towards mathematics; • gain confidence in their abilities. | ||||||||||||||||||||||||||||||||||||||||||||||||||||
| Preparation | Materials Markers/colored pencils/crayons Dice Manipulatives - in two colors and 9 pieces of each color (sticks, balls, tokens, plasticine for making balls, clothes pegs, etc.) Equipment Laptop and projector Preparation
| ||||||||||||||||||||||||||||||||||||||||||||||||||||
| Introduction | You already know the numbers up to 20; you can compare them, add and subtract them, you can even solve addition and subtraction word problems. We have looked at various cases of addition and subtraction, but in this lesson you will be introduced to a special case of addition – adding number 9 to a single-digit number with carrying. To calculate the sum, you will use your existing knowledge and skills. And, at the end of the lesson, you will see that this is not complicated at all. | ||||||||||||||||||||||||||||||||||||||||||||||||||||
| Teaching and learning methods | Studying in small steps Use of technology and visualization Group work/pair work Demonstration Summary | ||||||||||||||||||||||||||||||||||||||||||||||||||||
| Interdisciplinary connections | Physical education Mother tongue | ||||||||||||||||||||||||||||||||||||||||||||||||||||
| Resource teacher or other specialists activities | The steps in the lesson are comprehensible to most students with special needs who have well-preserved cognitive abilities. The text and instructions of the tasks are short and clear. The role of the support teacher is to help students if they don’t understand the instructions. | ||||||||||||||||||||||||||||||||||||||||||||||||||||
| New vocabulary | Addition with carrying | ||||||||||||||||||||||||||||||||||||||||||||||||||||
| Work Flow | Step 1 (5 min.) The lesson begins with updating students’ past knowledge and skills. Each student receives Handout 1 and works individually. In task 1, students have to write the missing number so that the sum is 10. They can use the number strip as support. In task 2, students have to calculate the sum of number 10 with a single digit number. They can use the number strip as support. In task 3, students have to represent the provided one-digit numbers as the sum of number 1 and a single-digit number. Step 2 (10 min.) The teacher opens the presentation (Annex 2) and shows the illustration from slide 2; students are asked to describe what they see. Then, as a group activity, they have to come up with the text of a word problem based on the illustration. The teacher explains that several actions must be performed in order to answer the question. However, this case of addition is different compared to what they have done in class so far. And this is what needs to be done. The teacher goes to slide 3 and demonstrates the addition of numbers 9 and 3, and the algorithm for adding number 9 to a single-digit number with a carrying:
Then, once again, demonstarates the algorithm, but applied to the sum of numbers 9 and 4 (slide 3).
Step 3 (10 min.) Each student receives Handout 3. In task 1, students will visualize the addends by first adding up to 10 and then calculating. In task 2, students have to calculate the sums and match each expression with the correct number. In task 3, students represent the second addend as the sum of 1 and a single digit number, and then calculate the sum. The first examples in each task are to be solved together with the whole class. Then, students work individually on the handout, and finally, they check the answers as a whole-class activity. Step 4 (5 min. – work in pairs) Еach pair is provided with the two cards from Handout 4 and a dice (student 1 receives worksheet 1, and student 2 - worksheet 2). Student 1 rolls the dice and puts down the number in worksheet 1 (row 1). Then he/she rolls the dice 2 more times and records the numbers in the 2nd and 3rd rows. The teacher explains that the three addends in the rows need to be different, therefore, if there is a repetition of the points when rolling the dice, it needs to be rolled again. After the first student completes worksheet 1, student 2 takes the dice and performs the same actions to fill in the addends in worksheet 2. Тhe two students exchange their worksheets and solve the problems. The teacher writes on the board/flip chart all the possible cases of adding 9 to a single-digit number. Students volunteer to write down the correct answers.
Step 5 (10 min.) Distribute Handout 6 to each student. Students work independently on assignments, and the teacher monitors their work, correcting and providing support if necessary. In task 1, students need to calculate the sums. In task 2, students calculate the sum, find the answer among the provided numbers and colour it. Problems 3 and 4 are word problems with addition (the new case from the lesson). Step 6 (2 min.) After completing the tasks from Handout 6, the teacher makes a summary of the algorithm for addition presented in the lesson. | ||||||||||||||||||||||||||||||||||||||||||||||||||||
| Reflection | Ask students the following questions (3 min.):
Praise students’ diligent work and learning something new. | ||||||||||||||||||||||||||||||||||||||||||||||||||||
| Notes | You could offer students a variety of online games to reinforce their numeracy skills, for example https://wordwall.net/resource/70371927. | ||||||||||||||||||||||||||||||||||||||||||||||||||||
| Digital Resource | |||||||||||||||||||||||||||||||||||||||||||||||||||||
| 39 | ||
| | ||
| Grade 2
| ||
| 40 | |||||||||||||||||||||||||||||||||||||||||||||||||||||
| | |||||||||||||||||||||||||||||||||||||||||||||||||||||
| 1 |  Grade 2 / Multiplication. Multiplier. Product. Grade 2 / Multiplication. Multiplier. Product. | ||||||||||||||||||||||||||||||||||||||||||||||||||||
| Developed by | Prosveta-Sofia Foundation | ||||||||||||||||||||||||||||||||||||||||||||||||||||
| Grade | 2 | ||||||||||||||||||||||||||||||||||||||||||||||||||||
| Duration | 95 | ||||||||||||||||||||||||||||||||||||||||||||||||||||
| Energizers | 20 - Chief of clan Everyone stands in a circle. One participant closes his/her eyes or steps out of the room. He/She will have to guess who is the chief of the clan. One participant volunteers to be the secret Chief (quietly, so the "guesser" can't hear anything). The chief begins an action such as snapping fingers, patting the tummy, or slapping knees, and everyone in the circle imitates him/her. The guesser returns to the room and tries to figure out who the chief is. As the guesser looks around, the chief changes the action avoiding being detected. | ||||||||||||||||||||||||||||||||||||||||||||||||||||
| Relaxing Exercises | 19 - Massage ball One ball is given to each participant and, following the rhythm of a soft music, they place the ball between their back and a wall. They bend their knees slightly to relax the legs and better place their back. Then they move their body from top to bottom and from right to left and vice versa, moving the ball around their back. When making movements of their body, they will notice some more tense (and sometimes painful) spots. When they notice this they should stop and stay quiet keeping their back against the wall, making the desired pressure and holding for a while. Variation: Do not use the wall. Participants work in pairs and one holds 1 or 2 balls in their hands and makes the massage to the other and then they switch. | ||||||||||||||||||||||||||||||||||||||||||||||||||||
| Objectives | Students will:
| ||||||||||||||||||||||||||||||||||||||||||||||||||||
| Preparation | Materials Dice Cardboard plates White sheets of paper for writing Coloured sticks/balls Cards with the numbers from 1 to 10 Small items for the shopping game - several of each type (building blocks, pencils, felt-tip pens, etc.) Patterns of coins of 1, 2, 5 and 10 cents Cards with emoticons Equipment Laptop and projector Preparation
| ||||||||||||||||||||||||||||||||||||||||||||||||||||
| Introduction | Do you like homemade biscuits? Probably yes. Imagine that your mother has prepared your favorite biscuits. You already know the numbers up to 100, so you can count how many cookies she baked and how many of them you have already eaten - yummy, yummi. You can also count how many biscuits are left. Okay, now imagine that your mom decided to please you and baked 6 trays of biscuits. How long will it take you to count all the biscuits if there are 10 in each tray? It takes a bit longer to count one by one. In this lesson, you will be introduced to multiplication and learn how to add equal addends quickly. | ||||||||||||||||||||||||||||||||||||||||||||||||||||
| Teaching and learning methods | Learning in small steps Break instructions down into smaller parts Use technology and visualization Provide real-life examples Collaborative learning | ||||||||||||||||||||||||||||||||||||||||||||||||||||
| Interdisciplinary connections | Home economics: financial means to purchase products Mother tongue: communication skills | ||||||||||||||||||||||||||||||||||||||||||||||||||||
| Resource teacher or other specialists activities | Almost all the steps of the lesson are comprehensible to most of the students with special needs who have well-preserved cognitive abilities. The lesson does not comprise a lot of text and long instructions to make it difficult for the target students to understand and follow the work flow. The role of the special needs teacher/teacher's assistant is to help target group students if they are not able to cope with some of the tasks and steps. | ||||||||||||||||||||||||||||||||||||||||||||||||||||
| New vocabulary | Multiplication Multiplier Product | ||||||||||||||||||||||||||||||||||||||||||||||||||||
| Work Flow |
Show the solution to the problem using addition. Then direct students' attention to the addends. Emphasize the fact that they are equal. Explain that in cases like that, the problem can be solved with multiplication. Play the presentation to show the second solution. Specify the way of reading the expression when the solution is written and the semantic meaning of the numbers involved in it. Read it specifying that we want to know the total number of biscuits, which are represented as 3 groups, each consisting of 2 biscuits. Write the solution as a multiplication problem and once again read it: "3 times 2 biscuits" or "3 times 2". Pay attention to the mathematical sign we use for multiplication. Summarize that the sum of equal addends can be represented by multiplication. (5 min.)
If you can provide digital devices for the students, you can use the application https://puzzel.org/en/features/create-jigsaw-puzzle to create puzzles for the students to put together on their devicee, for example https://puzzel.org/en/matching-pairs/play?p=-NdX4x10uK4uRZl5awVs or https://puzzel.org/jigsaw/play?p=-NZ03nNLzJwJslax_LBu (5 min.)
• 2 dice, preferably in a different colours (e.g. blue and red); • 6 cardboard plates; • a set of colored sticks; • a writing sheet. Students work in couples. They take their turn to roll the dice - the blue dice is for the number of groups and the red dice is for the number of objects in each group. The student who threw the blue dice arranges in front of him as many plates as the number of sports on the dice. The second student puts in each plate coloured sticks corresponding to the number of sports on the red dice he rolled previously. Students write down how many groups there are and how many subjects there are in each group by using multiplication, and then calculate the total number of objects by using addition. For example, if the couple has 2 plates with 4 coloured sticks in each of them, they have to write it mathematically as follows: 2 x 4 = 4 4 = 8. After that the roles in the couple are swapped. Each couple should write down 6 multiplication problems and calculate them with addition. The teacher exchanges the sheets among the groups and sets a time limit for each couple to check the worksheet it has received. Fanally, all couples report the rasults. (15 min.)
For example, if a student has picked up the card with the expression 3x4, he/she has to colour squares in 3 rows – 4 squares in each row, or 4 rows with 3 squares in each row. Then, on the right side of the grid, students write the problem using addition and calculate the sum to find the total number of coloured squares. (10 min.)
The multipliers are: ___ and ___. The product is: _______ and ___. (5 min.)
Option 1: Use the application https://pickerwheel.com/ to organize a mathematical dictation. Spin the wheel once to determine the first multiplier. Then spin it again to determine the second multiplier. Students have to write down the expression for the product of the two multipliers and calculate using addition. If necessary, the action can be represented visually by slashes – the number of groups corresponds to the first multiplier, and the number of slashes in each group corresponds to second multiplier. For each example, a student goes to the board, writes down the corresponding expression and reads it.
Divide the class into groups of four. Simulate a shopping experience using the dice, coloured sticks, cardboard plates from the lesson activities and any other available materials of which you have a few. Distribute them among the groups. Give each group slips of paper to write down the price in cents of each item which can be purchased. Instruct students that the prices should be from 1 cent to 10 cents maximum. Explain that these are not real prices but are just for the game. In real life, prices are different, but the concept of calculating the total amount you pay when shopping is the same. Distribute the coin patterns among the groups. Groups must designate a cashier. The remaining three participants in each group will play the role of customers. Consecutively, each student indicates which item and what number he/she wants to buy, calculates the amount to be paid by using multiplication (if necessary, the student records it mathematically by using multiplication and calculates the total price by using addition) and pays to the cashier. The cashier collects the amount paid and, if necessary, gives back the change. The cahier writes down on a separate sheet how many and which items he has sold, as well as the money he received for each sale. This is what happens in real life. The game continues until all the available items have been sold or until the customers have spent all the money they have. At the end of the game, the sums described on the sheets of the customers are collected by the cashier and a check is made to see if he/she has collected the same amount of money. (20 min.) 8. Finish the lesson with e-games: Students play the games on their mobile devices or the teacher opens a game on the screen and volunteer students take turns to come to the front and play. (10 min) | ||||||||||||||||||||||||||||||||||||||||||||||||||||
| Reflection | Activity 1. Ask the following questions: 1. What is the most useful thing you learned today? 2. Which activity in the lesson did you like most?
Activity 2. Give each student a face card. Ask them to draw a face with an emotion that best presents how they felt during the lesson using the following colours: • green, if they are satisfied with what they have learned and with their work; • yellow, if they are not particularly satisfied; • red if they are not satisfied. Set a time limit and after that ask students to hold up their emotion cards. Counts the number of green, yellow and red faces and report to the class. If you have enough time, students - representatives of the three groups could share the reasons for their choice of emotion. (5 min.) | ||||||||||||||||||||||||||||||||||||||||||||||||||||
| Notes | |||||||||||||||||||||||||||||||||||||||||||||||||||||
| Digital Resource | Presentation Multiplication https://sen-power.ipsantarem.pt/atividades/digital/17/Presentation_Multiplication.ppsx Handout 2 https://sen-power.ipsantarem.pt/atividades/pdf/17_handout 2.pdf Handout 3 https://sen-power.ipsantarem.pt/atividades/pdf/17_handout 3.pdf Handout 4 https://sen-power.ipsantarem.pt/atividades/pdf/17_handout 4.pdf Presentation Multiplication components https://sen-power.ipsantarem.pt/atividades/digital/17/presentation_ Multiplication_components.pps | ||||||||||||||||||||||||||||||||||||||||||||||||||||
| 41 | |||||||||||||||||||||||||||||||||||||||||||||||||||||
| | |||||||||||||||||||||||||||||||||||||||||||||||||||||
| 2 |  Grade 2 / Measurement and comparison of objects: weight measures Grade 2 / Measurement and comparison of objects: weight measures | ||||||||||||||||||||||||||||||||||||||||||||||||||||
| Developed by | AECE - Escola Básica da Zona Verde | ||||||||||||||||||||||||||||||||||||||||||||||||||||
| Grade | 2 | ||||||||||||||||||||||||||||||||||||||||||||||||||||
| Duration | 60 | ||||||||||||||||||||||||||||||||||||||||||||||||||||
| Energizers | 24 - How much do we weigh? Divide the students into groups of 4 Material Record sheet (appendix 1) Digital bathroom scales. Move chairs and tables so that you can have as much as free space in the room as possible. The students are divided into groups of 4, made up randomly but heterogeneously. Each group is given a record sheet and a digital bathroom scale (borrowed from parents, if necessary). Each student will weigh him/herself and record the required data on the record sheet. After this procedure, the students in each group should line up in a row, from the lightest to the heaviest. The group that completes the task correctly as soon as possible wins the game. | ||||||||||||||||||||||||||||||||||||||||||||||||||||
| Relaxing Exercises | 22 - Relaxing Song Use of mimed song accompanied by a musical backing, sung/recorded by the pupils themselves. (cf. video on .https://youtu.be/9TEdEKKkUWw ) | ||||||||||||||||||||||||||||||||||||||||||||||||||||
| Objectives | In the end of the lesson students should be able to: - distinguish between conventional and non-conventional measures; - recognise that mass (weight) measures are used to measure the weight of things or people; - know that the kilogram is represented by kg and it is the main unit of mass measurements; - weigh the amount of a body or a material; - compare the weight of different objects/materials according to their magnitudes, using conventional and non-conventional measures; - notice that everything around us has weight. | ||||||||||||||||||||||||||||||||||||||||||||||||||||
| Preparation |
Here are pictures of all the food items to be used in the weighing and the scales used. Utensils for making snacks and for snacking; (knife, salad bowl individual disposable but recyclable bowls, dessert spoons also disposable but recyclable and paper napkins;
The classroom tables and chairs must be moved close to the walls, so that there is plenty space in the centre of the room for the game. Once the game is over, the pupils help putting the tables and chairs in the previous place. Meanwhile, there should be a table with all the materials needed to carry out the plan. | ||||||||||||||||||||||||||||||||||||||||||||||||||||
| Introduction | In our daily lives, we are in constant contact with mass measurements. When we go shopping, we can observe that many products are sold already packed in kilogram (Kg). Others, such as fruit and vegetables, have to be weighed. For this reason, it is essential to know the main and most usual weight measurements in our daily life, the kilogram/ kg and the gram. Taking the topic Environment as an example, students will have to work on different types of scales and use different types of materials. They are expected to sort out their recycling bin and weigh paper and batteries. They will realise that it takes up a lot of paper and a lot of volume because paper is lighter than batteries. Batteries take up little space because they weigh more than paper, etc. We can also get a sense of heavy or light concepts by using our arms, taking the milk cartons distributed in the class as realia: the weight of the cartons before the milk is consumed and afterwards the weight of the same cartons when they are empty. | ||||||||||||||||||||||||||||||||||||||||||||||||||||
| Teaching and learning methods | Integrating the students' daily life experiences in the teaching and learning process; Learning based on concrete questions/situations and close proximity to the students; Learning by the effective manipulation of material, making the awareness of what actually is being learned easier; Cooperative and collaborative learning - Work developed in cooperation and collaboration in groups and in pairs; New technologies as a way of learning or consolidating a content. | ||||||||||||||||||||||||||||||||||||||||||||||||||||
| Interdisciplinary connections | Portuguese Language – Reading and comprehension. Natural Science – Healthy snacks. Artistic Education (Relaxation moment is done with a musical support, recorded by the students themselves). Physical Education – Dynamization of the game. Citizenship and Development - Consumer Education | ||||||||||||||||||||||||||||||||||||||||||||||||||||
| Resource teacher or other specialists activities | All steps of the topic teaching and learning process have to be understood by SEN students. The lesson does not include long written explanations. The role of the support or special education teacher is to help the students throughout the progress if they cannot can't complete any of the tasks, any of the topic steps or feel confused during the process. Students are expected to Identify and manipulate materials, play games, explore content through pictures. These are usually well accepted activities and meet the interests and needs of most students. | ||||||||||||||||||||||||||||||||||||||||||||||||||||
| New vocabulary | Mass (weight); scales; kilogram/gram; measurements and estimate. | ||||||||||||||||||||||||||||||||||||||||||||||||||||
| Work Flow | 1st Step Individual Task – Predicting: Show to the students some pieces of fruit eaten at lunchtime (various different sizes of fruit and packed bread). The products are presented in pairs. Provide each student with a double entry table with three columns (my prediction...; what I check using my hands...; I check with the scales - table in handout 1), where students will mark in the first column, by estimate, what these products may weigh. 2nd Step Individually, each student will measure and compare the weight of each pair of products presented in the previous exercise, using unconventional measures, by using their hands. They register the results on the second column of the double entry table entitled "What I measured". 3rd Step In groups of 4, students check the weight of the given products using a conventional measuring instrument, a two-arm plate scale. Each student records the results on the third column of the double entry table entitled "I confirm with the scale". 4th Step The class as a whole at this moment prepares a menu for a snack consisting of ham and cheese sandwiches and a fruit salad. Students start by listing the necessary products. 5th Step In a small group of four, students jot down a list with the quantity of each product to be purchased by weight (this task activates their previous knowledge of conventional measurements). The several groups compare their lists and conclude that some products have to be bought in kilograms and others in grams. See handout 2. 6th Step Students with the teachers’ help must weigh each product, using two-arm plate scales for fruit and digital kitchen scales for cheese and ham. 7th Step DOES AIR HAVE WEIGHT? Before finishing the lesson, the teacher elicits students to answer this question by conducting an experiment: we need a wire hanger, two balloons, two paper clips and two pieces of cotton string of exactly the same size. Fill one balloon with air and leave the other empty, tie both balloons to each of the strings, which are already attached to the clips and these to the hanger. Observe as shown in picture 1 and answer the questions. 8th Step Each group has to prepare their snacks. 9th Step Students will carry out an interactive activity for assessment, using Kahoot. 10th Step Convivial snack meeting. | ||||||||||||||||||||||||||||||||||||||||||||||||||||
| Reflection | Guided discussion: What was the most important thing you think you have learnt today?
| ||||||||||||||||||||||||||||||||||||||||||||||||||||
| Notes | |||||||||||||||||||||||||||||||||||||||||||||||||||||
| Digital Resource | Playing kahoot game: https://create.kahoot.it/share/measurement-and-comparison-of-objects-weight-measures/ef1db158-0708-4a0a-bd9a-3fd8d1cfa337 | ||||||||||||||||||||||||||||||||||||||||||||||||||||
| 42 | ||||||||||||||||||||||||||||||||||||||||||||||||||||||
| | ||||||||||||||||||||||||||||||||||||||||||||||||||||||
| 3 |  Grade 2 / The commutative and associative property of addition Grade 2 / The commutative and associative property of addition | |||||||||||||||||||||||||||||||||||||||||||||||||||||
| Developed by | NART | |||||||||||||||||||||||||||||||||||||||||||||||||||||
| Grade | 2 | |||||||||||||||||||||||||||||||||||||||||||||||||||||
| Duration | 45 | |||||||||||||||||||||||||||||||||||||||||||||||||||||
| Energizers | 29 - Calculate in 2 steps Divide students into 5 groups. It can be done by using playing cards. According to the number of students in the class, find out how many of the 13 ranks in each of the four suits: clubs (♣), diamonds (♦), hearts (♥) and spades (♠) you will need. For example: if there are 20 students, you will need 5 number cards - 5, 6, 7, 8 and 9. Shuffle the cards and let each child draw out their card. Then point out that the numbers of each colour form one team, and that the team formed will have to solve group problems. If there is an odd number of children in the class (eg. 23), you can have coloured slips of paper for students to pick them up as they enter the classroom. Then, you will need 5 colours with 5 cards/slips of paper for each colour. In such case, some groups will become slightly larger. If you have more children in the class - you can decide whether to increase the number of groups. It’s up to each teacher to decide, according to the size of the classroom and the possibilities to set aside work area for each group. Set up classroom space for each group to work and put a number in each area – so that the numbers 1, 2, 3, 4, 5 can be easily seen. The way work places are designed should also give enough space for the movement of students between each of the work places. Place 1 red and 1 green pencil in each working space. Print Appendix 1 five times. Put each copy in an envelope. Allow each group to draw out 1 envelope. The students do not know that they have the same tasks inside. Ask each group to go to their table and open the envelope. Give them time to look at the problems, explaining that each group must solve the problems in the row that corresponds to the group number - group 1 solves row 1, etc. The task includes 2 steps: 1. To perform the arithmetic operations on each row. The first task requires finding the sum of 2 numbers. Show this on the board with an example: 4 3 = ......... The second expression requires that you write the numbers from the first expression, swapping their places, and find the sum of the numbers again. Show this on the board by writing 3 4 = ........ The third task requires subtraction operation to be performed. Each group has to illustrate it using the table below and colour the boxes they used to find the correct answer. Recall the rule starting from the first number in the expression and counting backwards. As many steps are taken as the second number in the expression shows. Show through the example on the board:
Time for explanation and work: 5 min. 2. Now there is a change of places. 1st group goes to the second group space, 2nd group - to the 3rd, 3rd group - to the 4th, 4th group - to the 5th, and 5th group to the 1st group space. Each group has to check, if the solution is correct. If it is correct, the group circles the answers in green, but if it finds an error, it writes the correct answer in red. Working time: 3 min. | |||||||||||||||||||||||||||||||||||||||||||||||||||||
| Relaxing Exercises | 27 - Commutative property in Mathematics Go around and see how the groups have implemented their tasks. Collect the papers of the 5 groups. Ask the students to go back to their seats. Ask them, if there was anything that impressed them. Was there anything that made it difficult for them. Did they find any errors? Draw their attention to the commutative property of addition. Time: 3 min. | |||||||||||||||||||||||||||||||||||||||||||||||||||||
| Objectives | Students will: • Perform arithmetic operations of addition and subtraction with the numbers up to 20. • Know the commutative and associative property of addition. • Make logical conclusions and build hypotheses. | |||||||||||||||||||||||||||||||||||||||||||||||||||||
| Preparation | 1. Arrange the classroom in a way that allows at least 5 sections for 5 groups to be formed. The arrangement should allow students to get back to their seats quickly and without shuffling after completing the group task. 2. Prepare the relevant number appendices: • Appendix 1 – 5 packs for group work; • Appendix 2 – for individual work, for the number of students; • Appendix 3 and Appendix 4 – only for students with special needs; • Appendix 5 – only for students who work faster, and Appendix 5a with a key. 3. The teacher and the resource specialist have to build a common understanding of the most important elements of the lesson which should be presented to students with SEN, so that they can understand the concept of the lesson and actively participate in the learning activities, and that should be an important part of the preliminary preparation. The students with SEN will work with Appendices 3 and 4, with Cuisiner sticks and domino tiles, according to the individual characteristics of each SEN student after assessment have been made by both specialists. Learning materials • Printed materials (Appendix 1, 2, 3, 4, 5) • 10 color pencils – 5 green and 5 red • Playing cards or coloured slips • Letter envelopes • Dominoe - 2-3 boxes • Cuisiner sticks – 1 or 2 boxes depending on the number of students with SEN Equipment • Internet • Laptop/computer • Multimedia/interactive whiteboard | |||||||||||||||||||||||||||||||||||||||||||||||||||||
| Introduction | Implementing the activities within the topic students will add numbers with and without realignment. The lesson is a transition from what was studied in the first grade and the increasing complexity of arithmetic operations in the second grade. The students should already be able to calculate single-digit numbers easily. If there are students who have not yet mastered dividing single-digit numbers, provide additional guidance using the approach described below. They will also learn the method of subtracting with counting up to 10, addition and counting up after that. Knowing the pairs that make up 10 will help students in the process of grouping numbers to make algebraic operations easier. A good understanding of the grouping of numbers up to 10 will allow later to make well the transitions with grouping up to the nearest 10 for each ten up to 100. The knowledge and skills to present the number 10 as a sum of two numbers, are essential for calculating the sum of three or more numbers. This will allow them to feel confident when it comes to adding two-digit numbers. To go through the process smoothly, ask questions or give instructions in several different ways and give the students time to think before they answer. Discuss with the class letting students come up with ideas on their own, give them hints and tips, if needed. Once you've introduced a concept, don't move further until all the students have shown comprehension and are ready to move ahead. The psychological aspect reveals that each of these skills is the basis of building logical and creative thinking to discover rational ways of calculation, initiative in making a decision to use the "most convenient" method of calculation for the particular student. That way self-confidence is built, which is the basis of learning. | |||||||||||||||||||||||||||||||||||||||||||||||||||||
| Teaching and learning methods | Learning in small steps Breaking instructions down into smaller parts Guided discovery | |||||||||||||||||||||||||||||||||||||||||||||||||||||
| Interdisciplinary connections | Language | |||||||||||||||||||||||||||||||||||||||||||||||||||||
| Resource teacher or other specialists activities | Almost all the steps of the lesson are comprehensible to most special needs students who have well-preserved cognitive abilities. The lesson does not comprise long written explanations. The role of the special needs teacher or the assistant teacher is to help target group students in case they are not able to cope with some of the tasks or steps. Learning materials that can be used for SEN students towards the implementation of the lesson activities are enclosed. The specific work steps are described below in the description of the preparation for the lesson and the actual process of conducting the lesson. | |||||||||||||||||||||||||||||||||||||||||||||||||||||
| New vocabulary |
| |||||||||||||||||||||||||||||||||||||||||||||||||||||
| Work Flow |
| |||||||||||||||||||||||||||||||||||||||||||||||||||||
| Reflection | Guided discussion: Take 5 minutes at the end of the lesson to discuss again with the students what they have kept in mind. The main conclusions should be towards: • the order numbers are calculated doesn’t change their sum; • regrouping the numbers does not change their sum. Tell them that in the next lessons the tasks will become more and more interesting. Understanding the commutative property will help them not only when calculating with bigger numbers, but also when learning the multiplication table. | |||||||||||||||||||||||||||||||||||||||||||||||||||||
| Notes | The resources below are related to addition with and without regrouping in addition and subtraction with numbers up to 100. Addition up to 100 (without regrouping) https://www.youtube.com/watch?v=M32I2eoHsRI&ab_channel=MatholiaChannel Addition to 100 (with regrouping) https://www.youtube.com/watch?v=pjhlq31kBho&ab_channel=MatholiaChannel Subtraction on the 100s Chart https://www.youtube.com/watch?v=wMWT7Y6R4cg&ab_channel=ColetteMondor | |||||||||||||||||||||||||||||||||||||||||||||||||||||
| Digital Resource | ||||||||||||||||||||||||||||||||||||||||||||||||||||||
| 43 | |||||||||||||||||||||||||||||||||||||||||||||||||||||
| | |||||||||||||||||||||||||||||||||||||||||||||||||||||
| 4 |  Grade 2 / Problem with four operations Grade 2 / Problem with four operations | ||||||||||||||||||||||||||||||||||||||||||||||||||||
| Developed by | Antalya Directorate Of Education | ||||||||||||||||||||||||||||||||||||||||||||||||||||
| Grade | 2 | ||||||||||||||||||||||||||||||||||||||||||||||||||||
| Duration | 60 | ||||||||||||||||||||||||||||||||||||||||||||||||||||
| Energizers | 20 - Chief of clan Everyone stands in a circle. One participant closes his/her eyes or steps out of the room. He/She will have to guess who is the chief of the clan. One participant volunteers to be the secret Chief (quietly, so the "guesser" can't hear anything). The chief begins an action such as snapping fingers, patting the tummy, or slapping knees, and everyone in the circle imitates him/her. The guesser returns to the room and tries to figure out who the chief is. As the guesser looks around, the chief changes the action avoiding being detected. | ||||||||||||||||||||||||||||||||||||||||||||||||||||
| Relaxing Exercises | 14 - Give me your energy The students stand in a circle. The teacher starts, pretending he/she is holding a ball on the hands and passing it to the student on his/her right; this one do the same, until the ball comes back to the teacher. The ball needs to be passed in a gentle way, as it is very precious. At the second round, the teacher passes the ball to students in another side of the circle, making a gesture and a noise. The students will do the same until everyone will have touched the ball at least once. The ball can be passed in any way (in form of kick, kiss…), pretending it becomes bigger or smaller depending on the will of the students. | ||||||||||||||||||||||||||||||||||||||||||||||||||||
| Objectives |
| ||||||||||||||||||||||||||||||||||||||||||||||||||||
| Preparation |
Materials: Whiteboard or blackboard, Markers or chalk, Paper and pencils for each student. | ||||||||||||||||||||||||||||||||||||||||||||||||||||
| Introduction | Gather the students in a circle on the floor. Start by telling them, "Today, we are going on a magical math adventure in the Friendly Forest! We'll encounter exciting math problems with the help of our Friendly Forest animal friends." Review the names of the Friendly Forest animal characters (Benny the Bunny, Polly the Parrot, and Danny the Deer) from the math story. Briefly discuss the four operations (addition, subtraction, multiplication, and division) and remind the students of their importance in daily life. | ||||||||||||||||||||||||||||||||||||||||||||||||||||
| Teaching and learning methods | Storytelling: The use of an imaginative math story helps to engage students and make the math concepts more relatable. The story also provides a context for the math problems, which can help students to better understand them. Problem-solving: The students are given a set of math problems to solve. This helps them to apply the math concepts they have learned and to develop their problem-solving skills. Group work: The students are divided into small groups to work on the math problems. This allows them to collaborate with each other and to share their ideas. Visual aids: The use of visual aids, such as manipulatives, can help students to visualize the math concepts and to solve the problems more easily. Differentiation: The lesson plan includes a variety of activities and resources to accommodate different student abilities. This ensures that all students can participate and learn from the lesson. | ||||||||||||||||||||||||||||||||||||||||||||||||||||
| Interdisciplinary connections | Language arts: The students could write a math story about the Friendly Forest animal friends. They could use the story to introduce new math concepts or to reinforce existing concepts Art: The students could create a mural that depicts the Friendly Forest animal friends solving math problems. They could use different colors, shapes, and patterns to represent the different math concepts. Science: The students could conduct an experiment to determine the best way to divide a pile of acorns equally among their animal friends. They could use different methods of division, such as cutting, counting, or weighing. | ||||||||||||||||||||||||||||||||||||||||||||||||||||
| Resource teacher or other specialists activities | Instruction: Provide individual or small-group instruction to students who are struggling with the math concepts either through the use of manipulatives in all tasks or through individual instriction for the target group students. | ||||||||||||||||||||||||||||||||||||||||||||||||||||
| New vocabulary | Addition, subtraction, multiplication, division. | ||||||||||||||||||||||||||||||||||||||||||||||||||||
| Work Flow | 1. Story telling and mathematics (10 min.) Play the picture from Annex 1 "The Math Adventure in Friendly Forest" on the screen and start reading the story which you have previously printed. As you read, pause at key points to engage the students by asking questions related to the math problems encountered by the animal friends. Encourage the students to use their imagination to visualize the scenes and the solutions to the math problems; have volunteer students to come to the white board and write the problems from tha challenges in the Math Adventure story. 2. Farm stories (10 min.) Play the presentation (Annex 2) and ask students to come up with answers whenever a quiestion appears in the slide and write down their answers on paper; then play the next slide which provides the correct answer in visual format and have a volunteer to come to the whiteboard and write the rpoblem and the solution. 3. Math Problems Exploration (10 min.) Divide students into small groups and provide each group with a set of math problems related to the story (Annex 3). Each group will work together to solve the math problems, using the four operations. Circulate among the groups, providing support and guidance as needed. 4. Connection to Daily Life (10 min.) Gather the students back in a circle and ask each group to share one math problem they solved and explain how it relates to their daily lives. Discuss as a class the various ways math operations are used in everyday activities, such as sharing toys, counting objects, or solving real-life problems. Encourage students to share their unique solutions and reasoning. | ||||||||||||||||||||||||||||||||||||||||||||||||||||
| Reflection | Guided discussion (5 mins) What was your favorite part of the lesson?
Highlight the importance of math operations in everyday life and how imagination can be used to make problem-solving more enjoyable. | ||||||||||||||||||||||||||||||||||||||||||||||||||||
| Notes | |||||||||||||||||||||||||||||||||||||||||||||||||||||
| Digital Resource | |||||||||||||||||||||||||||||||||||||||||||||||||||||
| 44 | |||||||||||||||||||||||||||||||||||||||||||||||||||||
| | |||||||||||||||||||||||||||||||||||||||||||||||||||||
| 5 |  Grade 2 / A two-digit number as the sum of tens and units Grade 2 / A two-digit number as the sum of tens and units | ||||||||||||||||||||||||||||||||||||||||||||||||||||
| Developed by | NART | ||||||||||||||||||||||||||||||||||||||||||||||||||||
| Grade | 2 | ||||||||||||||||||||||||||||||||||||||||||||||||||||
| Duration | 60 | ||||||||||||||||||||||||||||||||||||||||||||||||||||
| Energizers | 32 - Blocks game Blocks game Use Appendix 1 to prepare the working materials by printing as many copies as you will need. Divide the students into pairs. Give each pair of students 9 blocks of tens and 9 blocks of units in an opaque envelope. One of the students shakes the envelope, pokes in without looking, and takes out 7 blocks. The other one takes the rest. Each one writes down the number that they have drawn, and then the students combine the two drawn numbers to find out the sum. The students change the order and repeat the activity. After that, ask those who wish to write down the numbers and the sum on the white board. Discuss the results with the whole class. ASK: Why do all groups always get the sum of 99? (the blocks in the envelopes make 99). Why do we have so many different ways to sum numbers? (the students drew different combinations from the tens and from the units blocks). Who has more blocks - the one who has drawn 7 first or the one who takes the rest? (the one who takes the rest). Who gets the bigger number? Does the one with more blocks always have a bigger number? If the students confirm this, challenge them to come up with a way for a person to have more blocks, but a smaller number. If they don't answer, ASK: How is it possible that the person with more blocks have a smaller number? (one block of tens has more units than one block of units, respectively, the smaller number of blocks of tens can actually be a larger number than a larger number of units as individual blocks. Conclusion - the number of blocks does not tell us the number of units) . Time – 5 min. | ||||||||||||||||||||||||||||||||||||||||||||||||||||
| Relaxing Exercises | 30 - Grouping Grouping of units and tens Remind the children of the grouping rules: 10 units make 1 ten. Illustrate the ratio of 1 to 10 with the picture as well (you can draw it on the board or show it on a slide), asking the students: How many units are in the block? And how many tens are there in the column?
We can present number 10 either as 1 column of 10 squares or as one block.
Tell the students that the tens block (point at the first block) is drawn very slowly and to make it easier for us, we sometimes draw it as one long block (point at the second block).
| ||||||||||||||||||||||||||||||||||||||||||||||||||||
| Objectives | Students should: ● represent a two-digit number as a sum of tens and units; ● know that one ten is equal to ten units; ● indicate the place of tens and unit digits in two-digit numbers. | ||||||||||||||||||||||||||||||||||||||||||||||||||||
| Preparation | • Appendix 1 – Motion cards • Appendix 2 – Tens and units blocks • Appendix 3 – Number writing cards You can cut the blocks with the students in advance so that they can be involved in the preparation of the lesson. • Appendix 4 - Numbers and arithmetic operations in the decimal number system https://www.youtube.com/watch?v=tuMdYPB8zt0&ab_channel=JannaRichmond | ||||||||||||||||||||||||||||||||||||||||||||||||||||
| Introduction | The activity aims to reinforce students' understanding of representing a two-digit number as a sum of tens and units. The required prior knowledge for this lesson is that students know the numbers up to 100 and can count to 100. Students will work with a variety of manipulatives to be able to represent two-digit numbers as the sum of tens and units. At the end of the lesson, they will be able to indicate the places of the units and tens in two-digit numbers and will be able to regroup tens and units to make addition or subtraction with two-digit numbers easier. | ||||||||||||||||||||||||||||||||||||||||||||||||||||
| Teaching and learning methods | Group work Co-teaching of a general education and a resource teacher Use of manipulatives Learning in small steps | ||||||||||||||||||||||||||||||||||||||||||||||||||||
| Interdisciplinary connections | Arts | ||||||||||||||||||||||||||||||||||||||||||||||||||||
| Resource teacher or other specialists activities | The resource teacher: - develops together with the general education teacher the worksheets, the didactic materials and the overall preparation of the lesson; - prepares the steps for co-teaching (supplementary teaching) with the general education teacher during the lesson; -supports the work and participation of SEN students during the lesson; -participates in the group work, partnering all students and supporting the participation and work of SEN students; - develops an adapted version of the worksheets, if necessary, and supports the implementation of the tasks of the SEN student/students; - actively uses the specified materials for visualizing and performing mathematical operations - Cuisenaire rods, Numberblocks and Base Ten Blocks. | ||||||||||||||||||||||||||||||||||||||||||||||||||||
| New vocabulary | unit, ten, place of digits | ||||||||||||||||||||||||||||||||||||||||||||||||||||
| Work Flow | 1. Ask the students to take out the envelopes with the ones and tens blocks. Tell them to use the blocks to write the numbers you will show them – 11 and 29. Ask them: How many tens blocks can replace 10 units? (1). How many units can we use to show 2 blocks of tens? (20). Continue the lesson by solving tasks 1 to 4 of Appendix 4. At this stage, the resource teacher can use the unit cubes and 10 sticks from the Base 10 manipulative or Cuisenaire rods to help SEN students understand grouping as a process and recall the formation of 10 as being made up of 10 units. When solving the following problems, Cuisiner rods, Numberblocks or Base 10 can again be used. Doing these exercises, students strengthen their skills in representing a two-digit number as the sum of tens and units and the grouping of tens and units. Time – 12 minutes 2. Writing numbers without the help of decimal blocks. Write on the board: 4 tens and 6 units is the number 46 Ask the students to go one by one to the board and write down the number for: ● 5 tens - 50 ● 8 units - 8 ● 4 tens and 6 units – 46 ● 6 tens and 3 units – 63 ● 8 tens and 9 units – 89. Ask the students how the the numbers 58 and 89 could be written using addition: 50 plus 8=58 80 plus 9=89 Write on the board and then do tasks 5, 6 and 7 of Appendix 4. To solve the tasks in the appendix the resource teacher can work with SEN students using Cuisenaire rods, Numberblocks or Base Ten Blocks. Summarize: In the two-digit number, the first digit is the number of tens. The second digit is the number of units. Time – 15 minutes Final round up: In a 2-digit number, the first digit indicates the number of tens, and the second digit - the number of units. Time– 15 minutes | ||||||||||||||||||||||||||||||||||||||||||||||||||||
| Reflection | Place the students into pairs and tell them that they will that way. Student A writes a two-digit number. Student B uses tens blocks to show the number. Student A tells whether the answer is correct. After that they change the roles. Student A uses tens blocks to show the number written by student B. Student B tells whether the answer is correct. Students have to practice the exercise twice. Time – 5 minutes | ||||||||||||||||||||||||||||||||||||||||||||||||||||
| Notes | |||||||||||||||||||||||||||||||||||||||||||||||||||||
| Digital Resource | |||||||||||||||||||||||||||||||||||||||||||||||||||||
| 45 | |||||||||||||||||||||||||||||||||||||||||||||||||||||
| | |||||||||||||||||||||||||||||||||||||||||||||||||||||
| 6 | |||||||||||||||||||||||||||||||||||||||||||||||||||||
| Developed by | NART | ||||||||||||||||||||||||||||||||||||||||||||||||||||
| Grade | 2 | ||||||||||||||||||||||||||||||||||||||||||||||||||||
| Duration | 60 | ||||||||||||||||||||||||||||||||||||||||||||||||||||
| Energizers | 32 - Blocks game Blocks game Use Appendix 1 to prepare the working materials by printing as many copies as you will need. Divide the students into pairs. Give each pair of students 9 blocks of tens and 9 blocks of units in an opaque envelope. One of the students shakes the envelope, pokes in without looking, and takes out 7 blocks. The other one takes the rest. Each one writes down the number that they have drawn, and then the students combine the two drawn numbers to find out the sum. The students change the order and repeat the activity. After that, ask those who wish to write down the numbers and the sum on the white board. Discuss the results with the whole class. ASK: Why do all groups always get the sum of 99? (the blocks in the envelopes make 99). Why do we have so many different ways to sum numbers? (the students drew different combinations from the tens and from the units blocks). Who has more blocks - the one who has drawn 7 first or the one who takes the rest? (the one who takes the rest). Who gets the bigger number? Does the one with more blocks always have a bigger number? If the students confirm this, challenge them to come up with a way for a person to have more blocks, but a smaller number. If they don't answer, ASK: How is it possible that the person with more blocks have a smaller number? (one block of tens has more units than one block of units, respectively, the smaller number of blocks of tens can actually be a larger number than a larger number of units as individual blocks. Conclusion - the number of blocks does not tell us the number of units) . Time – 5 min. | ||||||||||||||||||||||||||||||||||||||||||||||||||||
| Relaxing Exercises | 30 - Grouping Grouping of units and tens Remind the children of the grouping rules: 10 units make 1 ten. Illustrate the ratio of 1 to 10 with the picture as well (you can draw it on the board or show it on a slide), asking the students: How many units are in the block? And how many tens are there in the column?
We can present number 10 either as 1 column of 10 squares or as one block.
Tell the students that the tens block (point at the first block) is drawn very slowly and to make it easier for us, we sometimes draw it as one long block (point at the second block).
| ||||||||||||||||||||||||||||||||||||||||||||||||||||
| Objectives | Students can: • point out the order of the units and the tens in a two-digit number; • know that one ten is equal to ten units; • point out the place of the tens and the unit digits in two-digit numbers. | ||||||||||||||||||||||||||||||||||||||||||||||||||||
| Preparation | • Appendix 1 – Tens blocks and units blocks You can cut the blocks with the students in advance so that they can be involved in the preparation of the lesson. • Appendix 2 – Task table | ||||||||||||||||||||||||||||||||||||||||||||||||||||
| Introduction | The activity aims at strengthening students' understanding of the order of tens and units in two-digit numbers. The lesson is directly related to the lesson representing a two-digit number as a sum of tens and units. The prior knowledge required for the students is to know the numbers up to 100 and they can count to 100. Students will work with a variety of manipulatives to be able to correctly and fluently determine the units order and the tens order in a two-digit number. At the end of the lesson, they will be able to point out the places of the units and the tens in two-digit numbers and will be able to regroup tens and ones to make addition or subtraction with two-digit numbers easier. | ||||||||||||||||||||||||||||||||||||||||||||||||||||
| Teaching and learning methods | Group work Co-teaching of general education and resource teacher Use of manipulatives Learning in small steps | ||||||||||||||||||||||||||||||||||||||||||||||||||||
| Interdisciplinary connections | Arts | ||||||||||||||||||||||||||||||||||||||||||||||||||||
| Resource teacher or other specialists activities | The resource teacher: - develops together with the general education teacher the worksheets, the didactic materials and the overall preparation of the lesson; - prepares the steps for co-teaching (supplementary teaching) with the general education teacher during the lesson; -supports the work and participation of SEN students during the lesson; -participates in the group work, partnering all students and supporting the participation and work of SEN students; - develops an adapted version of the worksheets, if necessary, and supports the implementation of the tasks with the SEN students; - actively uses materials for visualization and performance of mathematical operations - Cuisenaire rods, Numberblocks and Base Ten Blocks | ||||||||||||||||||||||||||||||||||||||||||||||||||||
| New vocabulary | unit, tens, place of numbers | ||||||||||||||||||||||||||||||||||||||||||||||||||||
| Work Flow | 1. Presentation of numbers in two ways. Display 3 tens blocks and 4 unit blocks as shown below: ASK: What number do the blocks show? (34)
SAY: I want to replace one of the tens blocks. ASK: What can I replace it with? (10 unit blocks) Change the tens block with 10 unit blocks as shown below:
ASK: Has this number changed? (not) SAY: It means that the number 34 can be presented in different ways. Do an exercise - Use the tens blocks to show the numbers in two ways. a) 25 b) 37 c) 62 Sample answers: a) 2 blocks of tens and 5 blocks of units, 1 block of ten and 15 blocks of units; b) 3 blocks of tens and 7 blocks of units, 2 blocks of tens and 17 blocks of units; c) 6 blocks of tens and 2 blocks of units, 5 blocks of tens and 12 blocks of units. You can do this exercise in rows if the classroom tables can be divided into 3 groups. If the desks form 4 rows, add one more number to the above. The exercise can also be done in pairs or individually, and then it will take a little more time. Draw on the white board:
ASK: Which two of these patterns can you use to show the number 34? (the first and the last) Which model does not show the number 34? (the model in the middle) What number does it show? (43) SAY: What is the difference between the first and last pattern? (one block of tens is replaced by 10 blocks of units). All these exercises can be performed by SEN students using the indicated manipulatives - Cuisenaire rods, Numberblocks, Base Ten Blocks. Tell the students that now you are going to solve several problems, using rods for the tens and dots for the units.
Write 25 as shown below:
Time – 15 minutes. 2. Divide students into pairs. The task is to find all the ways to show 43 by using rods for the tens and dots for the units. SAY: In each of the following examples, replace one block of tens with ten blocks of units. Give them the Appendix 2 table and 5 minutes time to fill in all the blank spaces in the Task 1 table. Tell the children that now you will show a number with the help of the tens and the units blocks. Show the sketch below:
Ask someone to come out and write the number. Example: 73 = 7 tens blocks 3 unit blocks Tell the children that they are now going to play a game and have to be creative thinking of a way to write 73 using the blocks by moving them. You should get the following:
Summarize by asking the children what the number 7 (the tens) represents and what the number 3 (the units) shows. Then go to tasks 2, 3 and 4 of Appendix 2. Time – 15 minutes. | ||||||||||||||||||||||||||||||||||||||||||||||||||||
| Reflection | Write on the white board: 2 blocks of tens = 20 6 block units = 6 Number = 26 Point at 26 and ask students: - what is 26 (two-digit number); - what does the first digit 2 show us (it shows how many tens there are); - what does the second digit 6 show us (it shows how many units there are). Repeat with the number 18. Time – 5 minutes. | ||||||||||||||||||||||||||||||||||||||||||||||||||||
| Notes | |||||||||||||||||||||||||||||||||||||||||||||||||||||
| Digital Resource | |||||||||||||||||||||||||||||||||||||||||||||||||||||
| 46 | |||||||||||||||||||||||||||||||||||||||||||||||||||||
| | |||||||||||||||||||||||||||||||||||||||||||||||||||||
| 7 |  Grade 2 / Types of triangles based on the length of their sides; perimeter of a triangle. Grade 2 / Types of triangles based on the length of their sides; perimeter of a triangle. | ||||||||||||||||||||||||||||||||||||||||||||||||||||
| Developed by | Prosveta-Sofia Foundation | ||||||||||||||||||||||||||||||||||||||||||||||||||||
| Grade | 2 | ||||||||||||||||||||||||||||||||||||||||||||||||||||
| Duration | 60 | ||||||||||||||||||||||||||||||||||||||||||||||||||||
| Energizers | 34 - Triangle or circle The whole class participates in the game. All students face the teacher. Step 1: The teacher says circle and students raise their hands up and make a big circle above their heads. Step 2: The teacher says triangle and students make a "roof" over their heads in the shape of a triangle. Step 3: The teacher gradually increases the tempo and repeats randomly the two words circle and triangle. Anyone who does not make the named figure is out of the game. The activity continues until there are only 2 or 3 children left playing, or until the teacher decides to end the activity. | ||||||||||||||||||||||||||||||||||||||||||||||||||||
| Relaxing Exercises | 31 - Triangle of friendship Students work in pairs to draw a triangle to represent their friendship. Before starting the work, the teacher demonstrates the steps with one of the children. The two persons in the pair place their hands down with the palms facing the surface of the paper sheet; student 1 uses his/her right hand, and student 2 uses his/her left hand. They join the tips of the thumbs and the forefingers of the left hand of one of the pair with the tips of their thumbs and forefingers and outline the shape of the triangle between the fingers. After that, they can draw eyes, a nose, a mouth and whatever they want to, in order to design a personal symbol of their relationship. | ||||||||||||||||||||||||||||||||||||||||||||||||||||
| Objectives | Students will:
| ||||||||||||||||||||||||||||||||||||||||||||||||||||
| Preparation | Materials Markers/crayons/paints/colored pencils Black pencil Ruler/triangle Scissors Cardboard boxes with a traffic light for the Reflection activity A4 sheets of paper A3 sheets of paper Equipment Laptop and projector Preparation prior to the lesson 1. Prepare one blank A4 sheet for each desk/table. 2. Make color copies of Handout 1 for each desk/table 3. Make colored copies of Handout 2 and cut the 3 triangles separately. Each student should receive one triangle. Therefore, make sure that the number of triangles from the printed sheets is enough for all the students in the class. 4. Prepare the presentation from Annex 3 for demonstration. 5. Make color copies of Handout 4 for each student. 6. Make copies of Handout 5 for each student. 7. Make copies of Handout 6 for each group. 8. Print Handout 7, cut out the traffic lights separately and hand out one image of traffic lights to each student. | ||||||||||||||||||||||||||||||||||||||||||||||||||||
| Introduction | Look around. You can find many square-, rectangle-, circle- and triangle-shaped objects. Have you paid attention to the shape of the traffic sign at the zebra crossing? Triangle-shaped, of course. Other traffic signs have the same shape too. The triangle is similar in shape to a piece of your favorite pizza, to a clothes hanger, to the outline of some roofs and to many other objects that we don't even pay attention to. However, if you look closely, you will notice that although they are triangular in shape, these objects are different. In this lesson, we will learn about the different types of triangles considering the lengths of their sides. | ||||||||||||||||||||||||||||||||||||||||||||||||||||
| Teaching and learning methods | Using manipulatives and visualization Learning in small steps Group work | ||||||||||||||||||||||||||||||||||||||||||||||||||||
| Interdisciplinary connections | Arts - creating a picture recreating a scene from students' everyday life Mother tongue - skills of expression | ||||||||||||||||||||||||||||||||||||||||||||||||||||
| Resource teacher or other specialists activities | The steps in the lesson are comprehensible to most students with special needs who have well-preserved cognitive abilities. The text and instructions of the tasks are short and clear. The role of the support teacher is to help students if they don’t understand the instructions. | ||||||||||||||||||||||||||||||||||||||||||||||||||||
| New vocabulary | Equilateral triangle, isosceles triangle, scalene triangle, leg of an isosceles triangle, base of an isosceles triangle. | ||||||||||||||||||||||||||||||||||||||||||||||||||||
| Work Flow | Step 1 The lesson begins by updating students' knowledge of the geometric shape triangle and their recognition skills. For this purpose, use the picture with geometric shapes from Handout 1. Distribute one handout to each desk/table. Ask the students to look at the shapes; they have to find and circle only the triangles. Then ask them some questions related to the geometric shape triangle, for example: "How many sides does a triangle have?", "How many vertices does a triangle have?", "Are the sides of a triangle points or line segments?", “Are the vertices of the triangle points or line segments?” (4 min.) Step 2 Distribute one triangle from Handout 2 to students for individual work. Ask them to measure the lengths of the sides of the triangle they have received using a ruler and record the results of the measurements in the appropriate places. Demonstrate the correct way of using a ruler when measuring the length of a segment. (3 min) Step 3 Play the presentation (Annex 3). Ask the students who were supposed to measure the sides of the green triangle to stand up. Summarize with suitable questions that the sides of this triangle have equal length. Introduce the term equilateral triangle (slide 2). Then ask all students who worked with the blue triangle to stand up. In this case only two of the sides of the triangle had equal length. Introduce the terms isosceles triangle, lges and base of an isosceles triangle (slide 3). Finally, the students who measured the sides of the red triangle stand up. Ask students to compare the lengths of the sides of this triangle (all different) and introduce the term scalene triangle (slide 4). Sum up the three types of triangles based on the lengths of their sides (slide 5). (5 min) Step 4 Each student receives a copy of Handout 4.
Check the answers as a whole class activity. (10 min) Step 5 Distribute Handout 5 to each student. In Task 1, students have to determine the type of triangles according to the lengths of their sides. Task 2 is linked to the elements of an isosceles triangle. It is necessary to determine which two sides of the triangle are equal and which side is different in length. In Task 3, students measure the sides of the triangles, determine their type according to their sides lengths, and find their perimeters. (10 min) Step 6 Divide the students in 3 groups. The members of the first group are the students who worked with equilateral triangles in Step 2, the second group members are the students with the isosceles triangles, and the third group members - those who worked with scalene triangles. Give each group the page with the corresponding type of triangle (Handout 6). Distribute one A3 size sheet of paper to each group. Students are asked to cut out and use the triangles to create a picture to represent a real-life situation; they can also draw some extra elements and color it. Each group chooses one or two of its members, who present their artistic work to the rest of the class. (20 min) | ||||||||||||||||||||||||||||||||||||||||||||||||||||
| Reflection |
(3 min) | ||||||||||||||||||||||||||||||||||||||||||||||||||||
| Notes | |||||||||||||||||||||||||||||||||||||||||||||||||||||
| Digital Resource | |||||||||||||||||||||||||||||||||||||||||||||||||||||
| 47 | |||||||||||||||||||||||||||||||||||||||||||||||||||||
| | |||||||||||||||||||||||||||||||||||||||||||||||||||||
| 8 |  Grade 2 / Spatial Location Grade 2 / Spatial Location | ||||||||||||||||||||||||||||||||||||||||||||||||||||
| Developed by | AECE - Escola Básica da Zona Verde | ||||||||||||||||||||||||||||||||||||||||||||||||||||
| Grade | 2 | ||||||||||||||||||||||||||||||||||||||||||||||||||||
| Duration | 60 | ||||||||||||||||||||||||||||||||||||||||||||||||||||
| Energizers | 38 - Opposite game Location: Classroom No. of participants: All students in a class Organisation: Students stand in a circle. Materials: None Game description: The students are lined up side by side. The teacher starts by giving an order, e.g. one step forwards, but the aim of the game is to do the opposite, so the students must step backwards, raise their right hand while their left hand is raised, ... The orders should be anything that can be done the other way round. The participants must do exactly the opposite, whoever makes a mistake and doesn't do the opposite is out of the game. | ||||||||||||||||||||||||||||||||||||||||||||||||||||
| Relaxing Exercises | 34 - Ball game Location: Classroom No. of participants: All students in a class Organisation: Students form two rows side by side. Materials: rolled up paper (used paper) Using calm music and ugly balls made of rolled-up paper (one per student), form two rows of students sitting down. To the sound of the music, each student rubs the back of the classmate in front of them with the ball. | ||||||||||||||||||||||||||||||||||||||||||||||||||||
| Objectives |
In the end of the lesson should be able to:
| ||||||||||||||||||||||||||||||||||||||||||||||||||||
| Preparation |
Resources:
Preparation:
Play spinning roulette https://spinthewheel.io - free application to be prepared before the plan is realised. | ||||||||||||||||||||||||||||||||||||||||||||||||||||
| Introduction | Involving students in their laterality and location in space is a major challenge, which first requires them to experience locating themselves in relation to others, then in relation to space and objects. Recognising and identifying various spatial notions and then exploring the student's ability to orient themselves and act on the room space, progressively targeting the street, houses, buildings, entrances and exits, leading the student to be able to orient themselves and locate themselves independently. | ||||||||||||||||||||||||||||||||||||||||||||||||||||
| Teaching and learning methods | Teaching and learning is a process based on concrete issues and situations that are close to the students. Learning by doing through effective manipulation of the material, facilitating awareness of what is being learnt. Co-operative and collaborative learning - work carried out in cooperation and collaboration in groups and pairs. New technologies as a way of learning/consolidating content. | ||||||||||||||||||||||||||||||||||||||||||||||||||||
| Interdisciplinary connections |
Maths - Developing an interest in maths and appreciating its role in the development of other sciences and areas of human and social activity. Mother tongue- Select relevant information according to the objectives of listening and record them using different techniques. Speak clearly and articulate words appropriately. Citizenship and Development - According to the citizenship education needs diagnosed by the school group/class - The need to know how to identify, orientate oneself and help orientate others is important for the social relationship process. | ||||||||||||||||||||||||||||||||||||||||||||||||||||
| Resource teacher or other specialists activities | All the steps in exploring the topic are understandable for students with specific needs but cognitive abilities. The lesson does not include lengthy written explanations. The role of the support or special education teacher is to help the students in the target group if they are unable to carry out any of the tasks or steps, or if they feel disorientated in understanding something that may be asked of them. Identifying and manipulating and handling materials, taking part in games, exploring content by visualising images, etc. are usually well accepted and meet the interests and needs of most students. | ||||||||||||||||||||||||||||||||||||||||||||||||||||
| New vocabulary | Localisation, orientation, spatial awareness; | ||||||||||||||||||||||||||||||||||||||||||||||||||||
| Work Flow | 1st step - Individual The classroom must be organised with the desks in rows and columns, these should be numbered in the first row. 1,2,3,4...tape an A5-size piece of paper to the top left-hand corner of each row. (Appendix 1) Start by involving the students in the space by asking each student individually (following the order in which they are seated) to name the classmate who is either in front of them, behind them, on their right or on their left... Explore other spatial notions, referring to the place where the materials or other equipment are in the room, etc. E.g. The teacher’s desk is on the right side of the room.
2nd step - Large group Project the classroom plan with the tables placed in five different rows and five columns on the interactive whiteboard. (Appendix 1). Ask the class the following questions: • Where is student A? In which row is he in? • Who is the student closest to the door? • Who is sitting in front of the teacher's desk? • Name a pupil who is sitting in the last row next to the window. • Name the student in the first row who is sitting in the fourth column. • Who is sitting next to a window, a noticeboard... (depending on what's in the room) • Where is the noticeboard in the room? If there are two blackboards, ask which one is on the right and which one is on the left (if they are next to each other); if not, formulate the question according to the layout of the blackboard(s). • In the first row, which student is furthest to the left, in the middle or to the right? • With the teacher facing the students, ask which is the teacher's right hand?
3rd step - In pairs Ask the students to keep on their desks only the pencil case or bag containing the pencils, eraser, sharpener, scissors… According to the teacher's instructions, the students will place the named objects in the indicated positions. Every student has his / her own objects. E.g: Place the charcoal pencil in the top left-hand corner of your desk. Place the scissors in the bottom right-hand corner of the table. Place the eraser in the middle of the table Place a coloured pencil in the top right-hand corner. You can continue this dynamic by asking the students to place a school book on the table, for example, and ask them to position the school materials in the case in relation to the book: Eg: Put a pen on top of the book..., Put the eraser to the right of the book, Put the charcoal pencil at the top of the book... at the bottom..., Put a coloured pencil under the book. 4th step Large group Playing with spin the wheel https://spinthewheel.io - free application to be prepared before the plan is realised. The roulette wheel can be used in 2 different ways: 1st Possibility The roulette wheel can be used with the names of the students that randomly are going to answer the teacher’s questions about the pictures on appendix 2 that the teacher will project. E.g. Picture 1 - Where is the boy? He’s under the tree. 2nd possibility Write instructions on the roulette wheel that the students must perform when they are called. Here you can play a game with numbers to sort out the child to perform the task. e.g. Each child has a class number (from 1 to 20). The teacher asks: - How many students are there in this class? - 20 - Number 15 - Go and sit next to the classmate immediately to your right. Each child performs a task. - Stand up and go to the partner you think is furthest away from you ... - Get up and stand behind your chair. - Head for the exit door, passing in front of colleague B - Pass by, stand up and pass behind colleague Y and go to the teacher. - .../.... | ||||||||||||||||||||||||||||||||||||||||||||||||||||
| Reflection | Launching the final Challenge (appendix 3) What was your favourite activity? - Relaxation activity; - Group dynamics - Game; - The Individual activity; - Large group activities; - Activities carried out in pairs; - Individual activities. | ||||||||||||||||||||||||||||||||||||||||||||||||||||
| Notes | |||||||||||||||||||||||||||||||||||||||||||||||||||||
| Digital Resource | Spinning roulette https://spinthewheel.io Appendix 1: https://sen-power.eu/atividades/pdf/754_Appendix 1.pdf Appendix 2: https://sen-power.eu/atividades/pdf/754_Appendix 2.pdf Appendix 3: https://sen-power.eu/atividades/digital/754/Appendix 3.pptx | ||||||||||||||||||||||||||||||||||||||||||||||||||||
| 48 | |||||||||||||||||||||||||||||||||||||||||||||||||||||
| | |||||||||||||||||||||||||||||||||||||||||||||||||||||
| 9 |  Grade 2 / Numbers and Operations: Division Grade 2 / Numbers and Operations: Division | ||||||||||||||||||||||||||||||||||||||||||||||||||||
| Developed by | AECE - Escola Básica da Zona Verde | ||||||||||||||||||||||||||||||||||||||||||||||||||||
| Grade | 2 | ||||||||||||||||||||||||||||||||||||||||||||||||||||
| Duration | 60 | ||||||||||||||||||||||||||||||||||||||||||||||||||||
| Energizers | 39 - Numbers in pairs Location: Classroom No. of participants: All the students in a class. Organisation: All the students in the class organised in pairs. Materials: None Game description: The students stand with their backs to their partner, back to back. At the teacher's signal, they jump up and face their partner, each raising as many fingers as they have thought of. When they both think of the same number and then hold up the same number of fingers, they win. | ||||||||||||||||||||||||||||||||||||||||||||||||||||
| Relaxing Exercises | 35 - Face and Nose Here comes a pesky old fly. It's landed on your nose. Try to get it out without using your hands. That's right, shrink your nose. Make as many wrinkles in your nose as you can. Pull your nose up hard. O.K. You've got the fly away. Now you can relax your nose. Oops, here it comes again! See if you can swat it away! Wrinkle your nose tightly. Hold it as tight as you can. O.K., the fly is gone. 4 You can relax your face. Notice when you wrinkle your nose, your cheeks. Your mouth, forehead and eyes also helped and tightened up. So when you relax your nose, your whole face relaxes too. And that feels good. Oh-oh! This time the old fly is back. But now it's landed on your forehead. It makes lots of wrinkles. Try to catch it in the middle of all those wrinkles. Keep your forehead tight. OK, you can relax now. I'm glad the fly is gone. Now you can relax. Let your face be smooth; not a single wrinkle. Feel your face nice and smooth and relaxed. | ||||||||||||||||||||||||||||||||||||||||||||||||||||
| Objectives |
In the end of the lesson students should be able to:
| ||||||||||||||||||||||||||||||||||||||||||||||||||||
| Preparation |
Resources:
| ||||||||||||||||||||||||||||||||||||||||||||||||||||
| Introduction | What is division? Learn that division makes it possible to divide or distribute elements of a set or unit into equal parts. Involving students in the dynamics of division as a mathematical operation used to separate the elements of a set or unit into smaller sets or units, i.e. dividing a quantity into equal parts. Division makes it possible to solve various types of everyday situations, which is why it is so important to learn in order to apply it. Develop practical activities to consolidate learning. | ||||||||||||||||||||||||||||||||||||||||||||||||||||
| Teaching and learning methods | Teaching and learning is a process based on concrete issues and situations that are close to the students. Learning by doing through effective manipulation of the material, facilitating awareness of what is being learnt. Co-operative and collaborative learning - work carried out in cooperation and collaboration in groups and pairs. New technologies are used as a way of learning/consolidating content. | ||||||||||||||||||||||||||||||||||||||||||||||||||||
| Interdisciplinary connections |
Maths - Developing an interest in maths and appreciating its role in the development of other sciences and areas of human and social activity. (taken from Essential Learning - Basic Education) Mother Tongue- Select relevant information according to the objectives of listening and record them using different techniques. Speak clearly and articulate words appropriately. Citizenship and Development - In accordance with the citizenship education needs diagnosed by the school group/class - To help students experience and acquire skills and knowledge in various areas, particularly social, articulating knowledge of the importance of learning to share, distribute ... | ||||||||||||||||||||||||||||||||||||||||||||||||||||
| Resource teacher or other specialists activities | All the steps in exploring the topic are understandable for students with specific needs but cognitive abilities. The lesson does not include lengthy written explanations. The role of the support or special education teacher is to help the students in the target group if they are unable to carry out any of the tasks or steps, or if they feel disorientated in understanding something that may be asked of them. Identifying and manipulating and handling materials, taking part in games, exploring content by visualising images, etc. are usually well accepted and meet the interests and needs of most students. | ||||||||||||||||||||||||||||||||||||||||||||||||||||
| New vocabulary | Dividing, distributing, dividing a quantity into equal parts, equitable sharing. | ||||||||||||||||||||||||||||||||||||||||||||||||||||
| Work Flow |
1st step – Large group. Start by stating that division is a mathematical operation just like the others we have already learned, such as addition ( ), subtraction (-), multiplication (x) The symbol of division ÷ : which means to divide. Sharing is the same as separating, distributing or sharing. Engage students in a practical example. 2nd step – you should Help divide the class into EQUAL groups, which can be 3, 4, 5..., taking into account the number of students in the class on the day of the activity. If the number is odd, the teacher immediately asks for an assistant to help confirm the number of groups formed and whether all the groups have the same number of students. This data is passed on to the board, where all the students in the class are drawn and the students have to find out how many there are. 3rd step – Group work Ask students to leave on the table only the pencil case of one of their classmates in the group. Ask the students to distribute the pencils to everyone so that they all get the same number of pencils. Track how each group solves the challenge. Afterwards, ask each group to explain how they solved the challenge. 4th step – Pair work Distribute Appendix 1 to each pair. Ask them to cut the fruits and make groups with each type of fruit. This material can be used in subsequent classes that address this topic or others. 5th step – Pair work Distribute Appendix 2 to each pair, so the students can solve the exercises. They are going to use the cards with the fruits cut in step 4 to answer the questions about the division. 6th step – Large Group Before leaving the class, students are invited to make two groups comprising the same number of students (they have to find out how to do it). When the class finishes this task, the teacher explains that each group represents half of the class. The student who has the role of teacher’s assistant can count the number of students in each group and say how many students belong to each group (comprise half of the class). | ||||||||||||||||||||||||||||||||||||||||||||||||||||
| Reflection | Ask the students individually to refer to a learning activity that was most meaningful to them. What was your favourite activity? - Relaxation activity; - Group dynamics - Game; - Large group activities; - Activities carried out in pairs; - Individual activities. | ||||||||||||||||||||||||||||||||||||||||||||||||||||
| Notes | |||||||||||||||||||||||||||||||||||||||||||||||||||||
| Digital Resource | Appendix 1: https://sen-power.eu/atividades/pdf/755_Appendix 1.pdf Appendix 2: https://sen-power.eu/atividades/pdf/755_Appendix 2.pdf | ||||||||||||||||||||||||||||||||||||||||||||||||||||
| 49 | |||||||||||||||||||||||||||||||||||||||||||||||||||||
| | |||||||||||||||||||||||||||||||||||||||||||||||||||||
| 10 |  Grade 2 / Units of measurement for length: decimetre and metre Grade 2 / Units of measurement for length: decimetre and metre | ||||||||||||||||||||||||||||||||||||||||||||||||||||
| Developed by | Prosveta-Sofia Foundation | ||||||||||||||||||||||||||||||||||||||||||||||||||||
| Grade | 2 | ||||||||||||||||||||||||||||||||||||||||||||||||||||
| Duration | 60 | ||||||||||||||||||||||||||||||||||||||||||||||||||||
| Energizers | 8 - Find another seat: Have the students sit on chairs in a circle, with the number of chairs being one less than the number of students. The student without a chair stands in the middle and tells their name. Then the student calls out a characteristic or a colour, or type of clothing, e.g. “Everyone wearing orange!”. All participants who are wearing orange must get up and find another seat, but not the one immediately to their right or left. The student in the middle races to find a seat and the person left standing becomes the next caller in the middle. | ||||||||||||||||||||||||||||||||||||||||||||||||||||
| Relaxing Exercises | 19 - Massage ball One ball is given to each participant and, following the rhythm of a soft music, they place the ball between their back and a wall. They bend their knees slightly to relax the legs and better place their back. Then they move their body from top to bottom and from right to left and vice versa, moving the ball around their back. When making movements of their body, they will notice some more tense (and sometimes painful) spots. When they notice this they should stop and stay quiet keeping their back against the wall, making the desired pressure and holding for a while. Variation: Do not use the wall. Participants work in pairs and one holds 1 or 2 balls in their hands and makes the massage to the other and then they switch. | ||||||||||||||||||||||||||||||||||||||||||||||||||||
| Objectives | Students will: • update their knowledge of the measurement unit centimetre and its symbol cm; • form an idea of the measurement unit for length decimetre and its symbol dm; • form an idea of the measurement unit for length metre and its symbol m; • understand the relationships between the measurement units for length centimetre, decimetre and metre; • develop skills for converting measurement units for length; • develop skills for measuring and presenting lengths in different measurement units; • understand better the practical application of mathematics; • gain confidence in their capabilities. | ||||||||||||||||||||||||||||||||||||||||||||||||||||
| Preparation | Materials and tools Markers/colored pencils/crayons Ruler Iron tape measure Sewing tape Coloured strip 10 cm long Stopwatch Equipment Laptop and projector Preparation 1. Make colour copies of Handout 1 for each student. 2. Make colour copies of Handout 2 - make sure that after you cut the strips, there will be enough for each student. 3. Make colour copies of Handout 4 for each student. 4. Print Handout 5 for each group - specify the number of groups in advance and make sure that there will be enough copies for all groups. | ||||||||||||||||||||||||||||||||||||||||||||||||||||
| Introduction | In everyday life we often need to measure the distance between two points or the length, height or width of objects. This can be done in different ways. For example, we can use our hand span to determine the length of the sleeve of our favorite blouse. But will the result of the measurement be the same if it is expressed with your hand span compared to your father’s hand span? Most probably not. This is why, if you want to get an accurate result from the measurement of the length of the sleeve, no matter who does it, you need to use a different tool and a standardised unit of measurement for length. You already know the measuring unit for length centimetre. You can measure the length of segments using a ruler. Today, we will learn about other measuring tools and units of length that are suitable for measuring larger objects and longer distances. | ||||||||||||||||||||||||||||||||||||||||||||||||||||
| Teaching and learning methods | Using manipulatives and visualization Learning in small steps Group/ pair work | ||||||||||||||||||||||||||||||||||||||||||||||||||||
| Interdisciplinary connections | Physical education Mother tongue | ||||||||||||||||||||||||||||||||||||||||||||||||||||
| Resource teacher or other specialists activities | The steps in the lesson are comprehensible to most students with special needs who have well-preserved cognitive abilities. The text and instructions of the tasks are short and clear. The role of the support teacher is to help students if they don’t understand the instructions. | ||||||||||||||||||||||||||||||||||||||||||||||||||||
| New vocabulary | Decimetre Metre | ||||||||||||||||||||||||||||||||||||||||||||||||||||
| Work Flow | 1. For an introduction to the lesson, you can use various e-resources, such as https://www.youtube.com/watch?app=desktop&v=ftB5VU64yGA which are meant to demonstrate different handy tools for measuring length. You could have several students measure the length of one and the same object, e.g. the white board or a table, using different measures – hand span, cubit, a notebook, etc. Write the results on the board and compare them. Students will see that when the length of an object is measured making use of a non-standardised measuring unit (e.g. a notebook), there results are different and this is because some notebooks/ hand spans, etc. are bigger than others. This a practical way to come to the conclusion that we need to use uniform units of measurement for length. (5 min)
In task 1 students need to determine the length of the objects using a paper clip as a measurement unit. In task 2 they have to determine the length of objects and identify the longest and the shortest ones. In task 3 they have to measure the length of the segments using a ruler. The teacher remembers them the correct placement of the ruler. (5 min) 3. Every student is provided with a coloured strip from Handout 2 and has to measure its length with a ruler. Students begin the measurement as the teacher signals launching the activity and raise their hands when they are ready. The teacher measures the time with a stopwatch and stops it when the last student is ready. The duration is recorded on the board. (2 min) 4. Slide 3 of the presentation (Annex 3) shows the result of the measurement – the strip is 10 cm long. This is how the new measurement unit for length decimetre is introduced, as well as its symbol – dm. (3 min) 5. Students receive Handout 4. The first 3 tasks are solved as a whole class activity. In task 1 they have to determine which brush is 1 dm long. In task 2 they have to measure the length of the segments and record them in centimeters and decimetres. In task 3 they have to convert from centimeters to decimetres and vice versa. The tasks are solved collectively with the whole class, and the corresponding comments are made. (5 min) 6. After completing the 3 tasks from Handout 4, students are asked to measure the length of their desk/table/chair or other suitable object in the classroom using the coloured strip from Handout 2. The teacher signals launching the activity and, similarly, measures (making use of a stopwatch) the time until the last student is ready. The time needed to measure the length using the coloured strip is recorded on the board. The two results (from activities 3 and 6) are compared and students come to the conclusion that measuring the length of larger objects using a 10 cm long strip takes significantly longer. After that, the teacher demonstrates (using a tape measure or sewing tape) measuring the same object – this will take just a few seconds. The conclusion is that when measuring longer, taller, or wider objects, or longer distances, we need to use different tools, not the ruler we usually use in class. (4 min) 7. Slide 4 of the presentation (Annex 2) introduces the unit of length metre and its symbol - m. Slide 5 shows some tools we use to measure the length in metres. (3 min) 8. Students work again with Handout 4 completing the remaining tasks. In task 4, they have to convert from metres to decimetres and vice versa. In task 5, they have to identify which is the most suitable tool to use in each case. In task 6, students have to compare several objects and arrange them according to their height. The teacher can ask additional questions: Which object is taller than 1 m?, Which one is shorter than 1 m? etc. The tasks are solved collectively with the whole class, and the corresponding comments are made. (5 min) 9. Divide students into several groups. Distribute Handout 5 to each group. Provide a couple of rulers and tape measures or sewing tapes for each group. Students step in the shoes of detectives looking for objects in the classroom which comply with the characteristics in the boxes. They walk round the classroom and measure the objects they see using the provided tools and record the name of the objects in the appropriate cell. Some boxes will stay empty in case no object with the required characteristics is identified. After completing the task, each group chooses a representative, who communicates the results of the research to the class. (10 min) 7. Finally, the teacher makes a summary of the algorithm discussed in the lesson. (2 min) | ||||||||||||||||||||||||||||||||||||||||||||||||||||
| Reflection | At the end of the lesson the teacher can ask and discuss the following questions with the class: 1. What is the most useful thing you learned today? 2. Which activity did you like most?
| ||||||||||||||||||||||||||||||||||||||||||||||||||||
| Notes | Online games which could be used in the lesson | ||||||||||||||||||||||||||||||||||||||||||||||||||||
| Digital Resource | |||||||||||||||||||||||||||||||||||||||||||||||||||||
| 50 | |||||||||||||||||||||||||||||||||||||||||||||||||||||
| | |||||||||||||||||||||||||||||||||||||||||||||||||||||
| 11 |  Grade 2 / Symmetrical shapes Grade 2 / Symmetrical shapes | ||||||||||||||||||||||||||||||||||||||||||||||||||||
| Developed by | Antalya Directorate Of Education | ||||||||||||||||||||||||||||||||||||||||||||||||||||
| Grade | 2 | ||||||||||||||||||||||||||||||||||||||||||||||||||||
| Duration | 60 | ||||||||||||||||||||||||||||||||||||||||||||||||||||
| Energizers | 13 - Simon says Teacher tells the group that they should follow instructions when he/she starts the instruction by saying “Simon says...”. If the teacher does not begin the instructions with the words “Simon says”, then the group should not follow the instructions! The teacher begins by saying something like “Simon says clap your hands” while clapping their hands. The participants follow. The teacher speeds up the actions, always saying “Simon says” first. After a short while, the “Simon says” is omitted. Those participants who do follow the instructions anyway are ‘out’ of the game. The game can be continued for as long as it remains fun. | ||||||||||||||||||||||||||||||||||||||||||||||||||||
| Relaxing Exercises | 11 - Breathing exercise Teacher asks students to make a circle and do the following exercises, repeating each one few times and alternate them. Teacher can also add new ones. Breathing in raise your arms above your head and say “Elevator Up!” Breathing out, float your arms back down to your sides, saying “Elevator Down.” Repeat. Take three quick breaths in while wiggling your nose. Wiggle your nose on each breath in. Then wiggle your nose on each breath out. Hold your hand in front of your nose and hiss hiss hiss while breathing out. | ||||||||||||||||||||||||||||||||||||||||||||||||||||
| Objectives |
| ||||||||||||||||||||||||||||||||||||||||||||||||||||
| Preparation | Materials Needed: | ||||||||||||||||||||||||||||||||||||||||||||||||||||
| Introduction | Begin the lesson by asking students if they know what symmetry means. Encourage them to share any ideas or examples they may have. "Welcome, class! Today, we're going to embark on an exciting journey to explore the fascinating world of symmetry, where shapes come to life in perfect balance and harmony." | ||||||||||||||||||||||||||||||||||||||||||||||||||||
| Teaching and learning methods | Direct Instruction: The teacher introduces the concept of symmetry through explanations, examples, and non-examples. Direct instruction is used to provide foundational knowledge to students. Visual Aids: Visual aids such as shapes displayed on the board help students visualize symmetrical and asymmetrical shapes, reinforcing the concept through observation. Hands-On Activities: Students engage in hands-on activities such as identifying symmetrical shapes, creating symmetrical designs, and completing symmetry worksheets. These activities promote active learning and allow students to apply their understanding of symmetry in various contexts. Group Discussion: Throughout the lesson, students participate in group discussions to share their observations, reasoning, and discoveries regarding symmetry. Group discussions encourage peer-to-peer learning and help clarify misconceptions. Modeling: The teacher demonstrates how to create symmetrical designs by folding paper and drawing on one side. Modeling allows students to observe the process firsthand and provides them with a clear example to follow. | ||||||||||||||||||||||||||||||||||||||||||||||||||||
| Interdisciplinary connections | Art: The lesson incorporates elements of art through activities such as creating symmetrical designs. Students explore symmetry not only as a mathematical concept but also as a creative expression. | ||||||||||||||||||||||||||||||||||||||||||||||||||||
| Resource teacher or other specialists activities | Providing Extra Time and Modified Assignments:
| ||||||||||||||||||||||||||||||||||||||||||||||||||||
| New vocabulary | Symmetry: The quality of being made up of exactly similar parts facing each other or around an axis. Symmetrical: Having balanced proportions; exhibiting symmetry. Asymmetrical: Not having symmetry; lacking balanced proportions. Line of Symmetry: A line that divides a shape into two equal parts, with each part being a mirror image of the other. Axis: An imaginary line about which a shape or object is symmetrically arranged. Mirror Image: The image produced by reflection in a mirror or other reflective surface | ||||||||||||||||||||||||||||||||||||||||||||||||||||
| Work Flow | Warm-up Activity (5 minutes):
Guided Learning Introduction (10 minutes): 1.Display a few symmetrical and asymmetrical shapes on the board. 2.Discuss the concept of symmetry, explaining that a shape is symmetrical if it can be divided into two equal halves that mirror each other.
Activity 1: Creating Symmetrical Shapes (10 minutes): 1.Provide students with a blank sheet of paper and ask them to fold it in half. 2.Demonstrate how to create a symmetrical design by drawing on one side and then folding the paper to create a mirror image. 3.Encourage students to experiment with different shapes and designs. 4.Circulate around the room to provide assistance and feedback. Activity 2: Symmetry Worksheets (10 minutes): 1.Hand out symmetry worksheets to students (Annex 2). 2.These worksheets will include cutting out and coloring symmetrical drawings, and identifying lines of symmetry. 3.Allow students to work individually or in pairs. 4.Review the worksheets together as a class, discussing any misconceptions or challenges. Closure (5 minutes):
| ||||||||||||||||||||||||||||||||||||||||||||||||||||
| Reflection | Objective: To reflect on learning about symmetrical shapes. Procedure:
| ||||||||||||||||||||||||||||||||||||||||||||||||||||
| Notes | |||||||||||||||||||||||||||||||||||||||||||||||||||||
| Digital Resource | Annex 1 for Symmetrical Shapes Identification Annex 2 - Symmetry Worksheets | ||||||||||||||||||||||||||||||||||||||||||||||||||||
| 51 | |||||||||||||||||||||||||||||||||||||||||||||||||||||
| | |||||||||||||||||||||||||||||||||||||||||||||||||||||
| 12 |  Grade 2 / Numeric pattern Grade 2 / Numeric pattern | ||||||||||||||||||||||||||||||||||||||||||||||||||||
| Developed by | Antalya Directorate Of Education | ||||||||||||||||||||||||||||||||||||||||||||||||||||
| Grade | 2 | ||||||||||||||||||||||||||||||||||||||||||||||||||||
| Duration | 60 | ||||||||||||||||||||||||||||||||||||||||||||||||||||
| Energizers | 25 - The mirror game The game begins with the room cleared of tables and chairs. The students start by team up in pairs and stand in front of each other. They agree who starts the game, who plays the mirror and who plays the person. The game begins to the sound of a song chosen by the leader. The person will start to move and the "mirror" will have to follow him/her, immediately repeating the person's movements. When the leader stops the music, they swap places and the person who was the "mirror" becomes the person and vice-versa. | ||||||||||||||||||||||||||||||||||||||||||||||||||||
| Relaxing Exercises | 9 - Lion's breath Lion’s breath is a playful way to release and relax into more peaceful feelings. The trainer tells students that they are going to do a breath called the lion’s breath in order to let go of feelings or thoughts we no longer want. This breath is very helpful in getting those ideas out of us and pushing them far away. Instructions
| ||||||||||||||||||||||||||||||||||||||||||||||||||||
| Objectives | Students will understand the concept of numeric patterns. Students will identify and extend numeric patterns. Students will use the terms "before," "after," and "between" correctly. | ||||||||||||||||||||||||||||||||||||||||||||||||||||
| Preparation | Whiteboard and markers Printed copies of Annex 2 Colorful number cards | ||||||||||||||||||||||||||||||||||||||||||||||||||||
| Introduction | Teacher: "Good morning, class! Today, we are going to learn something very exciting called numeric patterns. A pattern is something that repeats in a regular way. Numeric patterns are patterns made with numbers. Have you ever noticed any patterns in your daily life?" Students respond with examples. Teacher: "Wonderful! Patterns are everywhere, from the days of the week to the numbers on a clock. Let's explore numeric patterns together!" | ||||||||||||||||||||||||||||||||||||||||||||||||||||
| Teaching and learning methods | Direct Instruction:
Guided Practice:
Hands-on Learning:
Collaborative Learning:
| ||||||||||||||||||||||||||||||||||||||||||||||||||||
| Interdisciplinary connections | Language Arts:
Introduces vocabulary such as "sequence," "pattern," "before," "after," and "between." | ||||||||||||||||||||||||||||||||||||||||||||||||||||
| Resource teacher or other specialists activities | Provide Visual Aids:
Offer Extra Support:
Encourage Peer Support:
| ||||||||||||||||||||||||||||||||||||||||||||||||||||
| New vocabulary | |||||||||||||||||||||||||||||||||||||||||||||||||||||
| Work Flow | 1. Explanation of Before, After, Between (5 minutes) Teacher: "First, let's understand some important terms: before, after, and between. Look at this visual (Annex 1)." Show Annex 1 to the class. Teacher: "Here we see some numbers. Let's say the number is 5. The number that comes before 5 is 4. The number that comes after 5 is 6. And the number between 4 and 6 is 5. Can you give me some examples?" Students give examples, and the teacher writes them on the board. 2. Identifying Patterns (5 minutes) Teacher: "Now, let's look at some patterns. I'll write a few on the board, and I want you to tell me what comes next." Write patterns such as 2, 4, 6, ___ or 5, 10, 15, ___. Teacher: "Who can tell me what number comes next in this pattern?" Students respond, and the teacher helps guide them to the correct answer. 3. Hands-on Activity (10 minutes) Teacher: "Now it's your turn to practice. Look at Annex 2. Write the correct number that completes each pattern." Distribute Annex 2 to the students and guide them through the activity. 4. Group Activity (10 minutes) Teacher: "Let's play a game with numeric patterns. I will give each group a set of number cards. Your task is to create a pattern using these cards and then present it to the class. The other groups will try to figure out the rule of your pattern." Divide the class into small groups and distribute number cards. Allow each group to create and present their pattern. 5. Review and Reinforcement (10 minutes) Teacher: "Let's review what we learned today. What is a numeric pattern? Can someone give me an example?" Students respond. Teacher: "Great job! Remember, a numeric pattern follows a rule, and it repeats in a regular way. Now, who can tell me what number comes before 7? After 7? Between 6 and 8?" Students answer. Teacher: "Excellent! You all did a wonderful job today. Keep practicing your numeric patterns!" | ||||||||||||||||||||||||||||||||||||||||||||||||||||
| Reflection | Self-Reflection:
Guided Questions:
Challenges and Solutions:
Listen to students' feedback and address any misunderstandings. Write down the common challenges and discuss solutions as a class | ||||||||||||||||||||||||||||||||||||||||||||||||||||
| Notes | Remember to emphasize the importance of checking their answers. Encourage students to double-check their work and ensure that their final answer makes sense in the context of the problem. Encourage active participation from all students during class discussions and group activities to ensure everyone is engaged in the learning process. | ||||||||||||||||||||||||||||||||||||||||||||||||||||
| Digital Resource | |||||||||||||||||||||||||||||||||||||||||||||||||||||
| 52 | ||
| | ||
| Grade 3
| ||
| 53 | |||||||||||||||||||||||||||||||||||||||||||||||||||||
| | |||||||||||||||||||||||||||||||||||||||||||||||||||||
| 1 |  Grade 3 / Parts of a whole: a half, a third, a fourth, a tenth Grade 3 / Parts of a whole: a half, a third, a fourth, a tenth | ||||||||||||||||||||||||||||||||||||||||||||||||||||
| Developed by | Prosveta-Sofia Foundation | ||||||||||||||||||||||||||||||||||||||||||||||||||||
| Grade | 3 | ||||||||||||||||||||||||||||||||||||||||||||||||||||
| Duration | 75 | ||||||||||||||||||||||||||||||||||||||||||||||||||||
| Energizers | 14 - I am going on a trip Everyone sits in a circle. Start by saying “I’m going on a trip and I’m taking a hug”, and hug the person to your right. That person then has to say “I’m going on a trip and I’m taking a hug and a pat on the back”, and then give the person on their right a hug and a pat on the back. Each person repeats what has been said and adds a new action to the list. Go round the circle until everyone has had a turn. | ||||||||||||||||||||||||||||||||||||||||||||||||||||
| Relaxing Exercises | 16 - Pass the face It is like the game "telephone" but instead of passing a word or sentence around the group, participants pass a facial expression. | ||||||||||||||||||||||||||||||||||||||||||||||||||||
| Objectives | Students will: • become familiar with the concepts of half, third, quarter and tenth obtained by dividing a whole into two, three, four or ten equal parts; • will increase their motivation for learning; • will develop a positive attitude towards mathematics; • will develop their confidence and imagination; • will build a connection between the division of a whole into equal parts with real situations from their everyday life. | ||||||||||||||||||||||||||||||||||||||||||||||||||||
| Preparation | Materials Sticky notes Plasticine Marker pens Paper clips Toothpicks Equipment Laptop and projector Preparation 1. Make one colour copy of Handout 1. 2. Make color copies of Handout 2 for each desk/table. 3. Make 2 color copies of Handout 3. Cut out the squares. 4. Make colored copies of Handout 5 for each desk/table and cut the cards along the outline. 5. Make colored copies of Handout 6 for each desk/table and cut the cards along the outline. 6. Make colored copies of Handout 7 for each student. 7. Provide 11 paper clips for each desk/table. 8. Provide plasticine and several boxes of toothpicks. Divide the students into groups of 4 in advance so that you can provide enough sets of materials to work with. 9. Prepare a card with a circle drawn on it for each student (for the reflection activity). | ||||||||||||||||||||||||||||||||||||||||||||||||||||
| Introduction | Quite often in our daily life we share different things with members of family or friends - the chocolate with a sibling, the pizza or the bill in the restaurant with friends, etc. In cases like that, we divide a whole into several smaller parts. And because we want this division to be fair, the parts must be equal, right? In this lesson, you will learn about dividing a whole in 2, 3, 4, or 10 equal parts. | ||||||||||||||||||||||||||||||||||||||||||||||||||||
| Teaching and learning methods | Learning in small steps Break instructions down into smaller parts Use technology and visualization Provide real-life examples Collaborative learning | ||||||||||||||||||||||||||||||||||||||||||||||||||||
| Interdisciplinary connections | Technology and Entrepreneurship: Constructing and Modeling Fine art: coloring Mother tongue: communication skills | ||||||||||||||||||||||||||||||||||||||||||||||||||||
| Resource teacher or other specialists activities | The role of the special needs teacher is to provide support as needed when students are not able to cope with some of the tasks or steps. When practicing the names of the parts obtained during the division, the special needs teacher can repeat the names with the target students. | ||||||||||||||||||||||||||||||||||||||||||||||||||||
| New vocabulary | A half A third A fourth A tenth | ||||||||||||||||||||||||||||||||||||||||||||||||||||
| Work Flow |
Use animations and video clips to show possible ways of dividing a whole into parts. https://www.youtube.com/watch?v=eEsy0igg4XE https://www.nagwa.com/en/videos/686103468703/ Another option is to use the images from Handout 1. Print the handout for each student so that they can compare the different ways of dividing the pizza. Ask students to cut the pictures along the white line, compare the two parts, and find out in which case they are the same. (5 min.)
Present the paintings of the famous artist Wassily Kandinsky. Ask students to look carefully at the paintings and spot the parts in which there is division into parts (1) and division into equal parts (2). (5 min.) Optional task Prepare a similar picture in which there are figures divided into parts, or use handout 10. Ask students to colour the picture of their choice, giving them freedom which parts to colour and in what colour. 12. Finish the lesson with e-games: Students play the games on their mobile devices or the teacher opens a game on the screen and volunteer students take turns to come to the front and play. (10 min) | ||||||||||||||||||||||||||||||||||||||||||||||||||||
| Reflection | Activity 1. Ask the following questions: 1. What is the most useful thing you learned today? 2. Which activity in the lesson did you like the most?
Activity 2. Let everyone think ohow to represent their general impression of the lesson through a living statue – appropriate pose and facial expression. All the living statues are asked to stand in a designated empty space in the classroom so as to create a common collage. (5 min.) | ||||||||||||||||||||||||||||||||||||||||||||||||||||
| Notes | |||||||||||||||||||||||||||||||||||||||||||||||||||||
| Digital Resource | Handout 1 https://sen-power.ipsantarem.pt/atividades/pdf/33_handout1.pdf Handout 2 https://sen-power.ipsantarem.pt/atividades/pdf/33_handout2.pdf Handout 3 https://sen-power.ipsantarem.pt/atividades/pdf/33_handout3.pdf Presentation Parts of a whole https://sen-power.ipsantarem.pt/atividades/digital/33/presentation_Parts_of_a_whole.pps Handout 5 https://sen-power.ipsantarem.pt/atividades/pdf/33_handout5.pdf Handout 6 https://sen-power.ipsantarem.pt/atividades/pdf/33_handout6.pdf Handout 7 https://sen-power.ipsantarem.pt/atividades/pdf/33_handout7.pdf Presentation Parts of a whole in real life https://sen-power.ipsantarem.pt/atividades/digital/33/parts of a whole in real life.pps Presentation Parts of a whole in fine arts https://sen-power.ipsantarem.pt/atividades/digital/33/parts of a whole in art.pps Handout 10 https://sen-power.ipsantarem.pt/atividades/pdf/33_handout10.pdf | ||||||||||||||||||||||||||||||||||||||||||||||||||||
| 54 | |||||||||||||||||||||||||||||||||||||||||||||||||||||
| | |||||||||||||||||||||||||||||||||||||||||||||||||||||
| 2 |  Grade 3 / Figure operations; reflection Grade 3 / Figure operations; reflection | ||||||||||||||||||||||||||||||||||||||||||||||||||||
| Developed by | AECE - Escola Básica da Zona Verde | ||||||||||||||||||||||||||||||||||||||||||||||||||||
| Grade | 3 | ||||||||||||||||||||||||||||||||||||||||||||||||||||
| Duration | 60 | ||||||||||||||||||||||||||||||||||||||||||||||||||||
| Energizers | 25 - The mirror game The game begins with the room cleared of tables and chairs. The students start by team up in pairs and stand in front of each other. They agree who starts the game, who plays the mirror and who plays the person. The game begins to the sound of a song chosen by the leader. The person will start to move and the "mirror" will have to follow him/her, immediately repeating the person's movements. When the leader stops the music, they swap places and the person who was the "mirror" becomes the person and vice-versa. | ||||||||||||||||||||||||||||||||||||||||||||||||||||
| Relaxing Exercises | 23 - Guess who? Draw your partner With the Avatars distributed randomly on a table, the students are invited to get one of their classmates' Avatars, which they have to complete, trying to understand whose half of the Avatar they have to complete and silently draw the missing half to the sound of a calm song chosen by the leader. As the students finish, they go to a board and place the completed Avatar with reusable, malleable white adhesive putty. The whole class observe and the challenge is to try to guess to whom the avatars belong to. | ||||||||||||||||||||||||||||||||||||||||||||||||||||
| Objectives | In the end of the lesson students should be able to:
| ||||||||||||||||||||||||||||||||||||||||||||||||||||
| Preparation | Material:
Lesson pre-preparation Create each student's Avatar from the following free link. https://avatarmaker.com/ Students can either create their own Avatar during a computer activity, or during a study support moment, or any other that the teacher considers appropriate. Or the teacher may create each student's Avatar, making them available ready to be used. Preparing the lesson The room should be with the tables and chairs shifted close to the walls, so that there can be plenty space to make a dynamic game. Once the game is finished, the students help putting the tables and chairs back in their places. Meanwhile, there should be a table with all the necessary materials to be used during the lesson. Students' individual computers should be on their desks and already connected to the internet. A board where Avatars can be placed, is available for students to display their works. | ||||||||||||||||||||||||||||||||||||||||||||||||||||
| Introduction | Symmetry and reflection should be approached from concrete situations. Teachers should integrate students’ experiences, use familiar or daily life contact materials, enabling them to learn the content by, observing, experiencing and discovering the contents in a natural way by:
| ||||||||||||||||||||||||||||||||||||||||||||||||||||
| Teaching and learning methods | Considering that the teaching of reflection and symmetry can be approached using concrete material, we will have to invest in:
| ||||||||||||||||||||||||||||||||||||||||||||||||||||
| Interdisciplinary connections | Portuguese Language – Understamding the gist of oral discourse on familiar topics; use appropriate language to express knowledge and present narratives. Natural Studies - Knowing how to ask questions, make hypotheses, make inferences, check results and know how to communicate them, recognising how knowledge is built up. Observation of living things to find points of symmetry. Artistic Education - Visual Arts - Drawing each student's missing half of his/her face, symmetry painting and cut out folding. Physical Education - The mirror game. | ||||||||||||||||||||||||||||||||||||||||||||||||||||
| Resource teacher or other specialists activities | All steps of the topic development must be understood for SEN students with cognitive abilities. The lesson does not include long written explanations. The role of the support or special education teacher is to help students in the target group if they are unable to complete any of the tasks or steps of the lesson, or feel confused in understanding something that may be required. | ||||||||||||||||||||||||||||||||||||||||||||||||||||
| New vocabulary | Symmetry, reflection and axis. | ||||||||||||||||||||||||||||||||||||||||||||||||||||
| Work Flow | 1st STEP With the room organised again with tables and chairs in their places. The teacher starts the lesson by introducing the topic, asking the students if they have any idea what the words symmetry and reflection mean. For students to understand better the concept of symmetry, the teacher provides printed images (Annex A) in individual folder) and asks students to fold them so that the two parts coincide leading students to understand that the 'fold' is the axis of symmetry. 2nd STEP In small groups of four, students are asked to collect and identify symmetrical objects/materials/figures existing in the classroom. According to the size of the materials, students are due to take the smaller ones to their working station while they try to identify and explain the larger ones with the teacher’s help. Learners should identify where the axis of symmetry of each object/figure is, and using their imagination students should figure out what would happen if a certain material is folded in half. 3rd STEP Observing the symmetry of figures using a mirror. In pairs, students are provided with a sheet of squared paper with only one symmetry axis dividing the sheet in half (Appendix B). The teacher asks each student to draw with charcoal pencil or black pen, without filling or painting, part of a figure they wish to draw, only on one side, left or right in relation to the axis. 4th STEP After distributing mirrors to students, the teacher asks the learners to place the mirror on the axis of reflection. Afterwards, the students observe the reflection of the figure before it is completely drawn, leading students to realise that the missing part of the drawing is reflected in the mirror and that the mirror acts as an 'axis of symmetry'. 5th STEP Each student exchanges with their peers the drawing they made in the previous task and tries to complete the missing half of the sheet, respecting the used squares. The principle of mutual help should always be present. 6th STEP The teacher challenges the students again. This time they have to work in pairs, to search for a picture on the computer, which can be: a photograph, a drawing a painting, a figure, a landscape... preferably placed vertically and occupying half the screen: 1- Students should be asked to place the mirror, on the axis of reflection and observe in the mirror the reflection of the full image. 2- Each pair should use the computer to discover the reflection axes in other symmetrical images. 7th STEP Working on Arts (Artisitic Education Activity). Two options:
| ||||||||||||||||||||||||||||||||||||||||||||||||||||
| Reflection | Guided discussion: What was the most important thing you think you have learnt today? What was the activity you enjoyed most?
| ||||||||||||||||||||||||||||||||||||||||||||||||||||
| Notes | Extra Activity: With the Avatars distributed randomly on a table, the students are invited to get one of their classmates' Avatars, which they have to complete, trying to understand whose half of the Avatar they have to complete and silently draw the missing half to the sound of a calm song chosen by the leader. As the students finish, they go to a board and place the completed Avatar with reusable, malleable white adhesive putty. The whole class observe and the challenge is to try to guess to whom the avatars belong to. | ||||||||||||||||||||||||||||||||||||||||||||||||||||
| Digital Resource | |||||||||||||||||||||||||||||||||||||||||||||||||||||
| 55 | |||||||||||||||||||||||||||||||||||||||||||||||||||||
| | |||||||||||||||||||||||||||||||||||||||||||||||||||||
| 3 |  Grade 3 / Exploring Whole, Half, and Quarter Fractions Grade 3 / Exploring Whole, Half, and Quarter Fractions | ||||||||||||||||||||||||||||||||||||||||||||||||||||
| Developed by | Antalya Directorate Of Education | ||||||||||||||||||||||||||||||||||||||||||||||||||||
| Grade | 3 | ||||||||||||||||||||||||||||||||||||||||||||||||||||
| Duration | 55 | ||||||||||||||||||||||||||||||||||||||||||||||||||||
| Energizers | 4 - Human chain Everybody stands up in a circle. They close their eyes and start moving towards the middle of the circle, holding their hands up. Whoever they touch with their hands, they hold and do not let go, so they make a knot. Then the facilitator asks the students to open their eyes and try to untangle themselves (make a circle) without letting go of their hands. | ||||||||||||||||||||||||||||||||||||||||||||||||||||
| Relaxing Exercises | 11 - Breathing exercise Teacher asks students to make a circle and do the following exercises, repeating each one few times and alternate them. Teacher can also add new ones. Breathing in raise your arms above your head and say “Elevator Up!” Breathing out, float your arms back down to your sides, saying “Elevator Down.” Repeat. Take three quick breaths in while wiggling your nose. Wiggle your nose on each breath in. Then wiggle your nose on each breath out. Hold your hand in front of your nose and hiss hiss hiss while breathing out. | ||||||||||||||||||||||||||||||||||||||||||||||||||||
| Objectives |
| ||||||||||||||||||||||||||||||||||||||||||||||||||||
| Preparation | Materials
Preparation
You can use different methods: You can watch the video to learn one of these methods. Manipulatives: Virtual manipulatives like blocks or tiles can be used to visually display fractions by grouping and arranging them accordingly.( https://youtu.be/hUEkmcTeIos) | ||||||||||||||||||||||||||||||||||||||||||||||||||||
| Introduction | Begin the lesson by asking students if they have encountered fractions before or not and after the answers you can give an easy example : Tell the students the following case: If a family consists of 4 people and there is only one apple in the house but everybody wants to eat a piece of the apple, how can we share it between the family members equally? The solution is to cut the apple in 2 equal parts, and then cut each of the pieces in 2, so that we have 4 equal pieces. These part of the whole apple we call quarters; and a quarter is a fraction. | ||||||||||||||||||||||||||||||||||||||||||||||||||||
| Teaching and learning methods |
| ||||||||||||||||||||||||||||||||||||||||||||||||||||
| Interdisciplinary connections | Connect fractions to art by discussing how artists use proportions and ratios in their work. Color Mixing Ratios: In painting, artists use fractions and ratios when mixing colors to achieve the desired hue and shade. The right blend of colors can enhance the overall visual impact of the artwork | ||||||||||||||||||||||||||||||||||||||||||||||||||||
| Resource teacher or other specialists activities | |||||||||||||||||||||||||||||||||||||||||||||||||||||
| New vocabulary | Whole, Half, Quarter, Fraction | ||||||||||||||||||||||||||||||||||||||||||||||||||||
| Work Flow |
-Gather all the students together and introduce the concept of fractions. -Explain that fractions represent parts of a whole. - Divide the students into three groups. Aim for diverse groupings to encourage collaboration and teamwork. - Distribute the fraction manipulatives to each group and briefly explain how to use them. -each student from group 1 receives a circle of different colour; instruct students to cut the circle into four equal pieces by folding it; when students are ready with the cuts, all pieces are put together; - each student from group 2 receives a circle of different colour; instruct group 2 students to cut their circles into eight equal pieces; when students are ready with the cuts, all pieces are put together; - each student from group 3 receives a circle of different colour; instruct students to cut the circle into 16 equal pieces; when students are ready with the cuts, all pieces are put together. Task 1: Show them how to represent a whole using the manipulatives. Instruct the groups to work together to create a whole using the fraction manipulatives they have prepared. They can use different combinations of fractions to represent a whole. Task 2: After the groups have successfully created a whole, ask them to find different ways to represent halves using the fraction manipulatives. They must use their true size and colour pieces of manipulatives. - Once they have grasped halves, challenge the groups to represent quarters using the fraction manipulatives.
Exploring Color Ratios -Provide each student with a white sheet of paper and the primary colors of paint. -Instruct them to choose a primary color and create a color gradient by adding varying amounts of white paint to that color. -Encourage students to experiment with different ratios and observe how the color changes as they add more or less white paint.
Task 1: Students have to find out how many they are. İn case the number is odd, the teacher asks one student to be his assistant, so that the numebr of students is even. Task 2: Students are asked to split in 2 equal groups (they have to find out a way how to do it). When the task is completed the teacher explaines that each group is half of the class. The student playing the role of an assistant teacher (if any) could count the number of students in each group and tell the class how many students comprise a half. Task 3: Preparation: Students are instructed to come all together again. The teacher makes sure that the number divides by 4. İf this is not the case, e.g. there are 27 students in the class, 3 students are asked to come to the teacher and assist him/her during the activity. Task 4: Students are asked to split in 4 groups with equal number of students in each group. Similarly, the teacher explaines that each group is a quarter of the class. | ||||||||||||||||||||||||||||||||||||||||||||||||||||
| Reflection |
| ||||||||||||||||||||||||||||||||||||||||||||||||||||
| Notes | Encourage peer-to-peer interactions during group activities to foster collaborative learning. | ||||||||||||||||||||||||||||||||||||||||||||||||||||
| Digital Resource | |||||||||||||||||||||||||||||||||||||||||||||||||||||
| 56 | |||||||||||||||||||||||||||||||||||||||||||||||||||||
| | |||||||||||||||||||||||||||||||||||||||||||||||||||||
| 4 |  Grade 3 / Word problems: inverse variation (addition and subtraction) Grade 3 / Word problems: inverse variation (addition and subtraction) | ||||||||||||||||||||||||||||||||||||||||||||||||||||
| Developed by | Prosveta-Sofia Foundation | ||||||||||||||||||||||||||||||||||||||||||||||||||||
| Grade | 3 | ||||||||||||||||||||||||||||||||||||||||||||||||||||
| Duration | 60 | ||||||||||||||||||||||||||||||||||||||||||||||||||||
| Energizers | 20 - Chief of clan Everyone stands in a circle. One participant closes his/her eyes or steps out of the room. He/She will have to guess who is the chief of the clan. One participant volunteers to be the secret Chief (quietly, so the "guesser" can't hear anything). The chief begins an action such as snapping fingers, patting the tummy, or slapping knees, and everyone in the circle imitates him/her. The guesser returns to the room and tries to figure out who the chief is. As the guesser looks around, the chief changes the action avoiding being detected. | ||||||||||||||||||||||||||||||||||||||||||||||||||||
| Relaxing Exercises | 20 - Holding legs Participants work in pairs. And you can put a quiet and relaxing music (or sounds like water falling down, sea waves, etc.). Half of the participants are asked to lie down face up, eyes closed, with their left leg extended on the floor and their right leg elevated. Another participant stands up and loops a towel around the heel of the other’s right foot and holds the ends of the towel in his/her hands, and makes soft and gentle movements (upwards and downwards, and sidewards) while the other totally relaxes his/her leg. Then they repeat the same process with the left leg. Then the participants switch roles. | ||||||||||||||||||||||||||||||||||||||||||||||||||||
| Objectives | Students will: • become familiar with a new type of word problems; • form skills for solving text problems of addition and subtraction – inverse variation; • consolidate their skills for addition and subtraction of numbers up to 1000 with carrying; • understand better the practical application of mathematics. | ||||||||||||||||||||||||||||||||||||||||||||||||||||
| Preparation | Materials Colour pencils Equipment Laptop and projector Preparation 1. Print out Handout 1 in several copies and cut the 3 cards with problems. Each student should receive one card. 2. Print Handout 3 for each student. 3. Print Handout 4 for each student. 4. Print Handout 5 and cut the traffic lights separately so that students can provide their feedback. | ||||||||||||||||||||||||||||||||||||||||||||||||||||
| Introduction | You already know that some problems may be expressed in words not in numbers. Word problems show very well the application of mathematics in our daily life. To solve a word problem we need to decide which arithmetic operation or operations we need to perform to solve it. There are some specific words that play the role of hints telling us what to do - add, subtract, multiply or divide numbers. You know that when the problem reads "... more than" we have to add up the numbers to find the answer, whereas when the problem reads "... less than" – we subtract the numbers. But is that always the case? Definitely not! In today's lesson, we will discuss cases when this rule is not to be applied. You will get acquainted with a new type of word problems. | ||||||||||||||||||||||||||||||||||||||||||||||||||||
| Teaching and learning methods | Using diagrams for visualization Learning in small steps | ||||||||||||||||||||||||||||||||||||||||||||||||||||
| Interdisciplinary connections | Mother tongue – communication skills Nature studies – evolution of species | ||||||||||||||||||||||||||||||||||||||||||||||||||||
| Resource teacher or other specialists activities | Word problems are difficult for all students, special needs students included. It is important to pay specific attention to presenting the contents of the problems as diagrams so that the students understand the link between the provided information and the resulting arithmetic operations. | ||||||||||||||||||||||||||||||||||||||||||||||||||||
| New vocabulary | Word problems - inverse variation | ||||||||||||||||||||||||||||||||||||||||||||||||||||
| Work Flow | 1. The lesson can begin with tasks meant to update students' knowledge and skills of addition and subtraction of numbers up to 1000 with carrying. For this purpose, the teacher can use the task cards from Handout 1 or various online resources such as https://wordwall.net/resource/70887109. (5 min)
3. The teacher distributes Handout 3 to all students. They do the problems one by one. Firstly, they have a minute to do a problem, and then, its solution (with the relevant comments) is written and presented to the class. (10 min) 4. The teacher distributes Handout 4 to all students. In task 1 students need to word the problems in a different way, so that they are in direct form. They have to make the diagrams and solve the problems. In task 2 students have to draw the diagram and solve the problem. In task 3 students have to write the text in abbreviated format and solve the problem. (10 min) 7. Finally, the teacher sums up the most important difference between the two variations of word problems – the inverse one, presented in the lesson, and the direct one. (2 min) | ||||||||||||||||||||||||||||||||||||||||||||||||||||
| Reflection | Provide a picture of a traffic lights to each student (Handout 5). Ask them to colour the light which indicates how they feel at the end of the lesson.
| ||||||||||||||||||||||||||||||||||||||||||||||||||||
| Notes | |||||||||||||||||||||||||||||||||||||||||||||||||||||
| Digital Resource | |||||||||||||||||||||||||||||||||||||||||||||||||||||
| 57 | |||||||||||||||||||||||||||||||||||||||||||||||||||||
| | |||||||||||||||||||||||||||||||||||||||||||||||||||||
| 5 |  Grade 3 / Figure operations: Rotation Grade 3 / Figure operations: Rotation | ||||||||||||||||||||||||||||||||||||||||||||||||||||
| Developed by | IPSantarem - Bento Cavadas e Nelson Mestrinho | ||||||||||||||||||||||||||||||||||||||||||||||||||||
| Grade | 3 | ||||||||||||||||||||||||||||||||||||||||||||||||||||
| Duration | 3h15 | ||||||||||||||||||||||||||||||||||||||||||||||||||||
| Energizers | 46 - Movement Ask the students to lie down on the floor (on their backs or tummies) and tell them to demonstrate the sliding movement. Figure 1. Illustration of the sliding movement
Some questions for discussion:
Now, ask the children to lie down on the floor again and give their interpretation of the flipping movement (in a turn the pupils move from back to tummy or from tummy to back). Figure 2. Illustration of the flipping movement Some questions for discussion:
Finally, ask the pupils to lie down on the floor and demonstrate the turning movement. Figure 3. Illustration of the turning movement Some questions for discussion:
Students should be encouraged to use their own words to describe and characterize the different movements. Moves like sliding, flipping and turning constitute rigid motion. They are motions that do not distort shape. Picking something up and moving it around for instance is a rigid motion, but stretching or warping it is not. These intuitive experiments are an excellent way to introduce more advanced geometric concepts, such as translation, reflection and rotation, as fundamental types of isometric transformations. In this lesson, we shall focus on the idea of rotation. (adapted from: National Council of Teachers of Mathematics (1993). Curriculum and Evaluation Standards for School Mathematics Addenda Series, Grades K-6. Second-grade book. Reston, VA: NCTM.) | ||||||||||||||||||||||||||||||||||||||||||||||||||||
| Relaxing Exercises | 41 - Puppets movements Students sit in a circle on the floor and freely illustrate and discuss the different movements of sliding, flipping and turning with puppets. | ||||||||||||||||||||||||||||||||||||||||||||||||||||
| Objectives | Students will:
| ||||||||||||||||||||||||||||||||||||||||||||||||||||
| Preparation | Materials:
| ||||||||||||||||||||||||||||||||||||||||||||||||||||
| Introduction | Geometry is a cornerstone subject in school mathematics, both because of its undeniable importance for understanding the space around us and because of its unavoidable historical relevance. Geometric transformations add a perspective of movement to the traditional methods of elementary geometry, and it makes perfect sense to study them from the first years of school. With this activity, students will have the opportunity, starting from an everyday context, to explore the notions associated with the concept of rotation in the plane, in its simplest forms (quarter-turn and half-turn rotations), while at the same time promoting their sense of aesthetics and developing their fine motor skills. | ||||||||||||||||||||||||||||||||||||||||||||||||||||
| Teaching and learning methods | Exploratory learning from real-life situations. | ||||||||||||||||||||||||||||||||||||||||||||||||||||
| Interdisciplinary connections | Language – oral and visual communication. Arts – Construction and identification of geometric regularity in patterns Culture | ||||||||||||||||||||||||||||||||||||||||||||||||||||
| Resource teacher or other specialists activities | Almost all the steps of the lesson are comprehensible to most special needs students who have well-preserved cognitive abilities. The lesson does not comprise written explanations, and the long instructions, which are difficult for the target group’s students (TGSt), are not many. The role of the special needs teacher or the assistant teacher is to help TGSt in case they are not able to cope with some of the tasks or steps. | ||||||||||||||||||||||||||||||||||||||||||||||||||||
| New vocabulary | Quarter-turn Half-turn Clockwise and anti-clockwise | ||||||||||||||||||||||||||||||||||||||||||||||||||||
| Work Flow | Phase 1: Presenting the context A quilt is a multi-layered textile, traditionally composed of two or more layers of fabric or fiber. A single piece of fabric can be used for the top of a quilt, but in many cases the top is created from smaller fabric pieces joined, or patchwork, sometimes using scrap pieces of fabric. The pattern and color of these pieces creates the design, and many of them are built as repetitive geometric patterns.  Examples of quilts created with repetitive geometric pattern. By National quilters circle | nationalquilterscircle.com
 By Billvolckening - Own work, CC BY-SA 4.0 https://commons.wikimedia.org/w/index.php?curid=45371912 Check on some exemples of quilt pattern traditions from aroud the world: https://www.marthastewart.com/7836632/traditional-quilts-around-the-world https://www.internationalquiltmuseum.org/ The teacher may show to pupils some local traditional pattern quilts, and discuss about the decorative and utilitarian use of quilts (like bedding, table topping,...) and the process quilting (sustainability by reduction of textile waste, an art form and an hobby,...). If possible, the teacher shows a quilt to students and discuss how the quilt is 10 minutes Phase 2: Creating a quilt square In this phase, teacher shows how to create a paper quilt square: Cut a red 30 cm x 30 cm sheet of construction paper along its diagonals to create four congruent triangles.  Cut a yellow 30 cm x 30 cm sheet of construction paper the same way.
 Glue one yellow triangle and one red triangle onto a blue 30 cm x 30 cm piece of construction paper as shown below:  The teacher needs to have another three copies of this design for steps ahead.Then, the teacher shows students other possible quilt square designs that he/she made previously from construction paper. Some examples that one may consider are:
Teacher discuss with pupils how the pieces of construction paper are glued together to create each design. Organized in pairs, children now can draw on graph paper their own simple design or copy one design of their choice (one design for each pair). Next, the teacher tells pupils that they will construct four identical quilt squares using construction paper, following their own design as drawn. On this stage of the work, teacher should: - Check to ensure that students have drawn a simple design. - Allow children to collect the materials needed to create their four squares (10 cm x 10 cm sheets of coloured construction paper, scissors, glue). - Monitor pupils’ work and collaboration as they build their quilt squares, assisting them, if necessary, to make identical squares. 50 minutes Phase 3: Exploring Rotations When students have finished making their paper quilt squares, the teacher begins by drawing vertical and horizontal axes on the board.
Then, the teacher fixes (with tape or magnets) one of the quilt squares in the upper left quadrant on the board.
Teacher now holds a second quilt square directly superimposed the fixed square. Then, he/she asks the students, “How could I turn this quilt square onto the next (upper right) section?”. A volunteer student can show how to perform the rotation. Then, this second quilt square can be fixed in the upper right quadrant.  It is essential to recognise that, during rotation, there is a point on the square that remains fixed in relation to the movement - the centre of rotation - and the movement can be carried out while placing a finger at the center of rotation, on the vertex of the square positioned at the point where the axes intersect (marked in the image above). Now the teacher ask students, “Why would we call this rotation a quarter turn?”, connecting the quarter turn to the movement of the minute hand on a clock from the upright position to the quarterpast-the-hour position. Then, he/she records “Quarter Turn” next to the square. At this point, the teacher can ask students, "What if instead of turning clockwise we turned anti-clockwise? Where would the square be?" Holding a third quilt square directly on top of the original one, another volunteer student can show how to perform this new rotation, a quarter turn anti-clockwise, keeping the same center of rotation as before. This third quilt square will be fixed in the lower left quadrant, with the corresponding record “Quarter-turn anti-clockwise”, also completing the first record as “Quarter-turn clockwise”.
 To finish the pattern, after superimposing a fourth square on the initial square, the teacher asks a student to turn it round half turn. The quilt square will then occupy the bottom right-hand quadrant.
The teacher can also ask the student if the direction of rotation makes a difference (clockwise or anti-clockwise). At this stage it should be clear that the result of a half-turn is always the same regardless of whether it is taken in the forward or reverse direction. Students can be asked to describe the result of a full turn, to conclude that after a complete rotation the square returns to its original position and record “full turn” next to the original square. The teacher can invite other students to demonstrate quarter turns (both clockwise and anti-clockwise). 40 minutes Phase 4: Students’ quilt patterns In this phase, each pair of students will build their quilt pattern using the quilt squares they built previously and using the process described above, using rotations. Each pair will glue their four quilt squares on a blank sheet of paper, to form the pattern. It's up to the teacher to supervise each pair's work, making sure that the process is correctly implemented and that all groups present a quilt pattern formed from both quarter-turn rotations (clockwise and anti-clockwise directions), as well as half-turn rotation. At the end, the teacher collects the work of all the pairs and, with the help of the students, builds an exhibition so that everyone can enjoy the diversity of patterns constructed, as well as assessing the correctness of the work carried out by the different pairs. 50 minutes Adapted from: Ontario Education (2005). A Guide to Effective Instruction in Mathematics – Kindergarten to Grade 3 – Geometry and Spatial Sense. Ministry of Education. Queens Printer for Ontario. | ||||||||||||||||||||||||||||||||||||||||||||||||||||
| Reflection | Pairs of students are asked to explain the construction of their pattern. Some questions to ask might be:
Teacher can provide some (e. g. a car making a left or right turn) and ask students to describe the rotation (is it a quarter turn, a half turn or a other type of turn?) 15 minute | ||||||||||||||||||||||||||||||||||||||||||||||||||||
| Notes | |||||||||||||||||||||||||||||||||||||||||||||||||||||
| Digital Resource | |||||||||||||||||||||||||||||||||||||||||||||||||||||
| 58 | |||||||||||||||||||||||||||||||||||||||||||||||||||||
| | |||||||||||||||||||||||||||||||||||||||||||||||||||||
| 6 |  Grade 3 / Mathematical Connections: External connections Grade 3 / Mathematical Connections: External connections | ||||||||||||||||||||||||||||||||||||||||||||||||||||
| Developed by | AECE - Escola Básica da Zona Verde | ||||||||||||||||||||||||||||||||||||||||||||||||||||
| Grade | 3 | ||||||||||||||||||||||||||||||||||||||||||||||||||||
| Duration | 60 | ||||||||||||||||||||||||||||||||||||||||||||||||||||
| Energizers | 41 - Odd one out Location: Classroom/Interior No. of participants: All students Organisation: Students are seated in a circle Game description: The teacher explains that he or she is going to say four words ( they can be related to the topic), and their task is to find out which one doesn't go together and which ones are similar considering a specific characteristic. Examples: - Which is the odd one out? - Circle, ball, cube, triangle (answer: ball) - Hour, minute, house, second (answer: house) - Left, front, first, right (answer: first) | ||||||||||||||||||||||||||||||||||||||||||||||||||||
| Relaxing Exercises | 37 - The pen game Location: Classroom/Interior - Large Space No. of participants: All students Organisation: Students arranged in a circle. Material: Ballpoint pen with cap; relaxing music The teacher tells the students to take a ballpoint pen out of their pencilcase and stand in a circle in a large area of the room. Each pupil is asked to hold the pen with the tip of their index finger and for their colleague next to them to hold the other end of the pen with their index finger (as shown in the photo) and so on, with all the pupils connected to each other by holding the ends of the pens. The teacher asks the students to keep quiet and concentrate so that the pen doesn't fall. To the sound of music, the students rotate slowly, trying to keep the pen from falling and the chain from breaking. | ||||||||||||||||||||||||||||||||||||||||||||||||||||
| Objectives |
In the end of the lesson students should be able to:
| ||||||||||||||||||||||||||||||||||||||||||||||||||||
| Preparation |
Recourses: Recycled paper (used sheets) Writing material Cardboard Objects brought from home by the students Computer with speakers Internet access Pre-preparation: Freeing a classroom wall placard. Preparation: 1st – Go out into the green space outside the school with the group/class and observe examples of maths in the world around us. The students take a small notebook (made from a few sheets of reused paper cut to A5 size and stapled together) and take notes of what they observe with words and simple drawings. 2nd – Return to the classroom and collectively list what the students have said on the board. Collectively draw up a poster on cardboard summarising the students' findings. The poster is displayed on the classroom wall. 3rd – Ask the students to bring in an object or material from home that relates to maths such as tins, dice, bottles, mugs, cups, etc | ||||||||||||||||||||||||||||||||||||||||||||||||||||
| Introduction | In our daily lives, we are constantly in contact with the presence of maths, both in our homes and outside. The ability to understand this relationship is extremely important in the development of all students. Students need to understand and use mathematical knowledge fluently (according to their age level), meaningfully and in a variety of situations. Mathematical knowledge is a fundamental tool to mobilise when working in mathematics and when interacting with other areas of knowledge, as well as the ability to create and solve problems in a variety of contexts, both mathematical and otherwise. | ||||||||||||||||||||||||||||||||||||||||||||||||||||
| Teaching and learning methods |
| ||||||||||||||||||||||||||||||||||||||||||||||||||||
| Interdisciplinary connections | Mother tongue- Select relevant information according to the listening objectives and record it using different techniques. Speak clearly and articulate words appropriately. Write texts in a variety of genres, suitable for purposes such as narrating and informing, in different media. Environmental Study - Know how to ask questions, hypothesise, make inferences, prove results and know how to communicate them, Arts - Demonstrate expressive and creative skills in their artistic Citizenship and Development - Road safety. Consumer education | ||||||||||||||||||||||||||||||||||||||||||||||||||||
| Resource teacher or other specialists activities | - To raise awareness of what is being learnt, encourage learning based on concrete situations/issues that are close to the students; - Active/experiential learning that allows students to develop increasingly important instrumental skills for understanding, explaining and acting on the environment in a conscious and creative way; - Learning that takes into account the diverse starting points and learning rhythms of students, their interests and needs and the characteristics of the environment; - Learning that values themes generating questions arising from observation of the reality that is close to the students and that enables them to problematize and investigate; - Co-operative and collaborative learning - Work carried out in cooperation and collaboration in groups and pairs; - New technologies as a way of learning/consolidating content. | ||||||||||||||||||||||||||||||||||||||||||||||||||||
| New vocabulary | Problems, strategies, connections. | ||||||||||||||||||||||||||||||||||||||||||||||||||||
| Work Flow | 1st step – Large Group Each student shows the object/material they brought from home, justifying their choice (the relationship of what they brought with Maths). 2nd step - In pairs In pairs, they select one of the objects/materials they brought. They invent a problem with data taken from the object/material (e.g. the weight mentioned on the packet of rice) or with the mathematical possibilities offered by the object (e.g. mug, cup...where the question is related to geometry). They solve the problem/question they have invented. The teacher goes through the groups, making sure that the resolution strategy is appropriate and the solution is correct. 3rd step - Large group Each pair presents the selected object/material to the large group, and only the problem/question they came up with. From the problems presented, one (problem/question) is selected at random and the teacher writes it on the board. 4th step - Small group All groups solve the selected problem. 5th step- Large group The problem is discussed collectively, explaining the various solving strategies that the groups have come up with. The remaining problems/questions will be worked on in future lessons. | ||||||||||||||||||||||||||||||||||||||||||||||||||||
| Reflection | Guided discussion: How they made the mathematical connection with the physical objects and how they problematised it, in the moment in pairs. What do you think you learnt that was important today? What was your favourite activity? - Going outside; - Group dynamics - game; | ||||||||||||||||||||||||||||||||||||||||||||||||||||
| Notes | |||||||||||||||||||||||||||||||||||||||||||||||||||||
| Digital Resource | |||||||||||||||||||||||||||||||||||||||||||||||||||||
| 59 | |||||||||||||||||||||||||||||||||||||||||||||||||||||
| | |||||||||||||||||||||||||||||||||||||||||||||||||||||
| 7 |  Grade 3 / Money: Uses of money Grade 3 / Money: Uses of money | ||||||||||||||||||||||||||||||||||||||||||||||||||||
| Developed by | AECE - Escola Básica da Zona Verde | ||||||||||||||||||||||||||||||||||||||||||||||||||||
| Grade | 3 | ||||||||||||||||||||||||||||||||||||||||||||||||||||
| Duration | 60 | ||||||||||||||||||||||||||||||||||||||||||||||||||||
| Energizers | 40 - I went to the market Location: Classroom/Interior No. of participants: All students Organisation: Students in a circle in a seated position Game description: The teacher starts by saying "I went to the market and bought some corn". Then the next student has to repeat the sentence and add new information, for example: "I went to the market and bought some corn and some apples" and so on. Once again, this is an activity that trains children's memory, as the aim is not to forget the sequence of purchases. | ||||||||||||||||||||||||||||||||||||||||||||||||||||
| Relaxing Exercises | 36 - Find the heart Location: Classroom/ Indoor - Large Space No. of participants: All students Organisation: Students are invited to walk around the room observing and looking for his / her partner. Material: Cardboard hearts in one colour, cut into two parts so that one of them fits into the other. Each heart can only fit into one half (no equal parts as shown in the picture) Distribute the hearts to the students in random order. The teacher tells the students that they are going to listen to a song and that they should walk to the calm sound of the music looking for their partner, who will be the classmate who has the part of the heart that fits. When everyone has found their partner, the teacher will stop the music and instruct the students to leave the assembled heart in the space the teacher thinks appropriate and to sit quietly in their places. | ||||||||||||||||||||||||||||||||||||||||||||||||||||
| Objectives |
In the end of the lesson should be able to:
| ||||||||||||||||||||||||||||||||||||||||||||||||||||
| Preparation |
Resources
Preparation: In visual arts class. 1st Collectively, they observe and handle notes and coins from the monetary system in use, brought by the teacher. 2nd Individually The teacher distributes pieces of cardboard or cardboard to each student. Each student draws and cuts out coins and notes: 1 of 10 euros; 1 of 5 euros; 1 coin of each of the following values: 2 euros; 1 euro; 50 cents; 20 cents; 10 cents; 5 cents. | ||||||||||||||||||||||||||||||||||||||||||||||||||||
| Introduction | Knowledge of money, and the many everyday situations in which it is used, is an extremely important factor in students' learning journey, as it is learning that prepares them for life. It should be emphasised that students' mathematical experience is based on tasks, and it is essential that these are powerful and challenging in order to captivate students and boost their learning. It is important to consider tasks of a different nature, selected/adapted or created according to the objectives to be achieved. In this context, there are proposals such as creating situations in the classroom that depict people's everyday lives. For example, a "shopping trip". Students need to see mathematics as a means of understanding and modelling situations in different contexts, and making informed and reasoned decisions, particularly with regard to the importance of money for purchasing goods and distinguishing between basic necessities and superfluous goods. | ||||||||||||||||||||||||||||||||||||||||||||||||||||
| Teaching and learning methods |
| ||||||||||||||||||||||||||||||||||||||||||||||||||||
| Interdisciplinary connections | Mother tongue - Select relevant information according to the listening objectives and record it using different techniques. Speak clearly and articulate words appropriately. Write texts in a variety of genres, suitable for purposes such as narrating and informing, in different media. Environmental Study - Know how to ask questions, hypothesise, make inferences, prove results and know how to communicate them, recognising how knowledge is constructed. Artistic Education/Visual Arts - Demonstrate expressive and creative skills in their visual arts.
| ||||||||||||||||||||||||||||||||||||||||||||||||||||
| Resource teacher or other specialists activities |
- To raise awareness of what is being learnt, encourage learning based on concrete situations/issues that are close to the students; - Active/experiential learning that allows students to develop important instrumental skills for understanding, explaining and acting on the environment in a conscious and creative way; - Learning that takes into account the diverse starting points and learning rhythms of students, their interests and needs and the characteristics of the environment; - Learning that values themes and/or generating questions arising from observation of the reality that is close to the students and that enables them to problematize and investigate; - Co-operative and collaborative learning - Work carried out in cooperation and collaboration in groups and pairs; - New technologies as a way of learning/consolidating content. | ||||||||||||||||||||||||||||||||||||||||||||||||||||
| New vocabulary | Money; shopping list; basic necessities and superfluous goods. | ||||||||||||||||||||||||||||||||||||||||||||||||||||
| Work Flow | 1st step - Collective The teacher places the products "for sale" on a table. In front of each product, he places a card with the price. (Photos with products and prices (Appendix1) 2nd step - In pairs Give each pair a record sheet (Appendix2) Each student takes the notes and coins they drew and cut out in Visual Arts class. Together they count the "money" they have and record the amount on the sheet. 3rd step - In pairs Students make a shopping list based on the money they have and the products on display, and make the calculations to find out how much money they have spent and how much money they have left. 4th step - Pair / Collective Each pair of students presents to the class what they bought, how much they spent and the money left over, justifying their choices. 5th step - Collective The teacher involves the students in a guided discussion about their shopping choices, bearing in mind that there are goods that are essential to us and others that are superfluous and that money management must take these assumptions into account. | ||||||||||||||||||||||||||||||||||||||||||||||||||||
| Reflection | Carrying out an interactive assessment activity using Kahoot. https://create.kahoot.it/share/maths-money/5032ab45-5fa9-4eab-b212-fc3f97ebaa07 What do you think you learnt that was important today? Which activity did you enjoy the most? - Group dynamics - Making a shopping list ; - The shopping trip; - Presenting to the class; - Relaxation activity; - Kahoot interactive activity. | ||||||||||||||||||||||||||||||||||||||||||||||||||||
| Notes | |||||||||||||||||||||||||||||||||||||||||||||||||||||
| Digital Resource | Appendix 1: https://sen-power.eu/atividades/pdf/761_Appendix 1.pdf Appendix 2: https://sen-power.eu/atividades/pdf/761_Appendix 2.pdf Kahoot: https://create.kahoot.it/share/maths-money/5032ab45-5fa9-4eab-b212-fc3f97ebaa07 | ||||||||||||||||||||||||||||||||||||||||||||||||||||
| 60 | |||||||||||||||||||||||||||||||||||||||||||||||||||||
| | |||||||||||||||||||||||||||||||||||||||||||||||||||||
| 8 |  Grade 3 / Problems with Division Grade 3 / Problems with Division | ||||||||||||||||||||||||||||||||||||||||||||||||||||
| Developed by | Antalya Directorate Of Education | ||||||||||||||||||||||||||||||||||||||||||||||||||||
| Grade | 3 | ||||||||||||||||||||||||||||||||||||||||||||||||||||
| Duration | 60 | ||||||||||||||||||||||||||||||||||||||||||||||||||||
| Energizers | 13 - Simon says Teacher tells the group that they should follow instructions when he/she starts the instruction by saying “Simon says...”. If the teacher does not begin the instructions with the words “Simon says”, then the group should not follow the instructions! The teacher begins by saying something like “Simon says clap your hands” while clapping their hands. The participants follow. The teacher speeds up the actions, always saying “Simon says” first. After a short while, the “Simon says” is omitted. Those participants who do follow the instructions anyway are ‘out’ of the game. The game can be continued for as long as it remains fun. | ||||||||||||||||||||||||||||||||||||||||||||||||||||
| Relaxing Exercises | 15 - Moving like a toy The teacher uses a magic word to change the students into many string-loaded (wind-up) toys. At the teacher’s signal, the toys start to move across the class, as many robots, to get their sits. They have to move more quickly at the beginning and then gradually more and more slowly, because their charge is finishing. Some of them will be frozen in the middle of the room, and the teacher has to give their cranks one more turn to help them reach their seats | ||||||||||||||||||||||||||||||||||||||||||||||||||||
| Objectives | Students will:
| ||||||||||||||||||||||||||||||||||||||||||||||||||||
| Preparation | Required materials and print-outs: | ||||||||||||||||||||||||||||||||||||||||||||||||||||
| Introduction | "Good morning, class! Today, we are going to learn about division. Division is a way of sharing equally." "When we divide, we split a number into equal parts. Can anyone tell me what we call the numbers we use in division? The number we are dividing is called the dividend, the number we are dividing by is called the divisor, and the answer is called the quotient." "Let’s start with a simple example. Imagine you have 12 cookies and you want to share them equally with 3 friends. How many cookies will each friend get? Let's write this on the board: 12 ÷ 3 = ?" "To solve this, we divide 12 cookies by 3 friends. We can think of it as making 3 equal groups. Let's draw groups on the board "So, if we put 12 cookies into 3 equal groups, each group will have 4 cookies. Therefore, 12 divided by 3 equals 4. We write it as 12 ÷ 3 = 4." "Division is very useful in our daily lives. For example, if you want to share something equally, like a pizza or a pack of crayons, you are using division." "Can anyone give me another example of when we might use division in real life?" | ||||||||||||||||||||||||||||||||||||||||||||||||||||
| Teaching and learning methods |
| ||||||||||||||||||||||||||||||||||||||||||||||||||||
| Interdisciplinary connections | Art: Visual Representation:
| ||||||||||||||||||||||||||||||||||||||||||||||||||||
| Resource teacher or other specialists activities |
| ||||||||||||||||||||||||||||||||||||||||||||||||||||
| New vocabulary | |||||||||||||||||||||||||||||||||||||||||||||||||||||
| Work Flow | Step 1: Direct Instruction (10 minutes)
Step 2: Interactive Discussion (15 minutes)
Step 3: Hands-on Activity (15 minutes)
Step 4: Group Work (15 minutes):
Step 5: Cut-and-Paste Activity (20 minutes):
Step 6: Closure (5 minutes):
| ||||||||||||||||||||||||||||||||||||||||||||||||||||
| Reflection | Guided discussion using the prompts:
| ||||||||||||||||||||||||||||||||||||||||||||||||||||
| Notes | |||||||||||||||||||||||||||||||||||||||||||||||||||||
| Digital Resource | |||||||||||||||||||||||||||||||||||||||||||||||||||||
| 61 | |||||||||||||||||||||||||||||||||||||||||||||||||||||
| | |||||||||||||||||||||||||||||||||||||||||||||||||||||
| 9 |  Grade 3 / Dividend - Quotient - Divisor - Remainder Grade 3 / Dividend - Quotient - Divisor - Remainder | ||||||||||||||||||||||||||||||||||||||||||||||||||||
| Developed by | Antalya Directorate Of Education | ||||||||||||||||||||||||||||||||||||||||||||||||||||
| Grade | 3 | ||||||||||||||||||||||||||||||||||||||||||||||||||||
| Duration | 60 | ||||||||||||||||||||||||||||||||||||||||||||||||||||
| Energizers | 15 - Animal roundup The teacher tells to the class to silently think of an animal. Then he/she tells to the group that without talking, they need to arrange themselves on a line from largest to smallest animals. Group members can only make gestures and the noise of their animal. After they have finished, teacher ask to the students to say the animal they were supposed to be to see if the order is correct. | ||||||||||||||||||||||||||||||||||||||||||||||||||||
| Relaxing Exercises | 32 - Arms and Shoulders With each student sitting in their place in the classroom, give them clear instructions: Let's pretend you're a very hairy, lazy cat. And you want to stretch. Extend your arms forwards. Raise them above your head. Pull them back. Feel the pull in your shoulders. Extend them even further. Now let them fall normally. O.K., kitty, stretch again. Stretch your arms forwards. Raise them above your head. Pull them back. Pull hard. Now let them fall normally. That's good! Notice how your shoulders are more relaxed. This time we're going to stretch for real. Try to touch the ceiling. Spread your arms out in front of you. Raise them above your head. Pull back. Notice the tension and pull in your arms and shoulders. Hold on tight. Great! Drop them quickly and feel how good it feels to be relaxed. It's nice, warm and cosy. | ||||||||||||||||||||||||||||||||||||||||||||||||||||
| Objectives | Students will understand and be able to identify the terms dividend, quotient, divisor, and remainder in division problems. | ||||||||||||||||||||||||||||||||||||||||||||||||||||
| Preparation | |||||||||||||||||||||||||||||||||||||||||||||||||||||
| Introduction | Teacher: "Good morning, class! Today, we're going to learn about some important terms in division: dividend, quotient, divisor, and remainder. Division is when we split a number into equal parts." Teacher: "Let's start with a story to help us understand division. Imagine you have 12 candies and you want to share them equally with 3 friends. How many candies will each friend get?" Allow students to think and respond. Teacher: "That's right! Each friend will get 4 candies. This is what division helps us do – it helps us share things equally." | ||||||||||||||||||||||||||||||||||||||||||||||||||||
| Teaching and learning methods | Direct Instruction:
Interactive Learning:
Hands-on Learning:
| ||||||||||||||||||||||||||||||||||||||||||||||||||||
| Interdisciplinary connections | Art:
| ||||||||||||||||||||||||||||||||||||||||||||||||||||
| Resource teacher or other specialists activities | Visual and Hands-On Learning:
| ||||||||||||||||||||||||||||||||||||||||||||||||||||
| New vocabulary | Dividend , Quotient ,Divisor, Remainder,Division | ||||||||||||||||||||||||||||||||||||||||||||||||||||
| Work Flow | Warm-up Activity (5 minutes):
Introduction of Key Terms (10 minutes):
Guided Practice (10 minutes):
Activity 1: Hands-On Division (10 minutes):
Activity 2: Division Worksheet (10 minutes):
Closure (5 minutes):
| ||||||||||||||||||||||||||||||||||||||||||||||||||||
| Reflection | Inquire about which activities students found most enjoyable and engaging.
| ||||||||||||||||||||||||||||||||||||||||||||||||||||
| Notes | |||||||||||||||||||||||||||||||||||||||||||||||||||||
| Digital Resource | |||||||||||||||||||||||||||||||||||||||||||||||||||||
| 62 | ||
| | ||
| Grade 4
| ||
| 63 | |||||||||||||||||||||||||||||||||||||||||||||||||||||
| | |||||||||||||||||||||||||||||||||||||||||||||||||||||
| 1 |  Grade 4 / Area of a rectangle Grade 4 / Area of a rectangle | ||||||||||||||||||||||||||||||||||||||||||||||||||||
| Developed by | Prosveta-Sofia Foundation | ||||||||||||||||||||||||||||||||||||||||||||||||||||
| Grade | 4 | ||||||||||||||||||||||||||||||||||||||||||||||||||||
| Duration | 65 | ||||||||||||||||||||||||||||||||||||||||||||||||||||
| Energizers | 12 - Body spelling - Body geometric shapes Option 1 The teacher asks students to write their names in the air using different parts of their body, for example, using their hand, leg, lbow, or nose, etc. Optional: If time allows the teacher could ask to the class to spell out some words reproducing the letters with their bodies. Students can collaborate all together or can create different groups. Option 2 Task: Draw a geometric shape in the air using different parts of your body - hands, legs, elbows, noses, etc. Option 3: Task: Work in groups of 2, 3 or more students to make a geometric shape with your bodies. | ||||||||||||||||||||||||||||||||||||||||||||||||||||
| Relaxing Exercises | 14 - Give me your energy The students stand in a circle. The teacher starts, pretending he/she is holding a ball on the hands and passing it to the student on his/her right; this one do the same, until the ball comes back to the teacher. The ball needs to be passed in a gentle way, as it is very precious. At the second round, the teacher passes the ball to students in another side of the circle, making a gesture and a noise. The students will do the same until everyone will have touched the ball at least once. The ball can be passed in any way (in form of kick, kiss…), pretending it becomes bigger or smaller depending on the will of the students. | ||||||||||||||||||||||||||||||||||||||||||||||||||||
| Objectives | Students will: • become familiar with the concepts of square centimeter and area of a rectangle; • learn how to find the area of a rectangle; • increase their motivation for learning; • develop a positive attitude towards mathematics; • develop their confidence and imagination; • establish a connection between finding the area of a rectangle and situations from everyday life. | ||||||||||||||||||||||||||||||||||||||||||||||||||||
| Preparation | Materials Markers Geoboard and rubber bands (optional) Picture of a rectangle Plasticine or a paper clip Small colored squares with a side of 1 cm Equipment Laptop and projector A laptop or tablet for each student if the online geoboard application will be used Preparation 1. Handouts 2, 4, 5 and 7 are to be printed for each student for individual work. 2. Handouts 3 and 6 are to be printed in the required number of copies for working in pairs. | ||||||||||||||||||||||||||||||||||||||||||||||||||||
| Introduction | Geometric shapes are all around us. We already know that the circumference of a geometric figure, e.g. а square, а rectangle or а triangle, indicates the total length of its outlines. And the area of a geometric shape shows how big the space enclosed by the outlines of the figure is. But what do we need to know that for? Imagine that your parents agreed to paint one of the walls in your room a new colour and are wondering whether they would buy 1 or 2 cans of paint. On the packaging of the selected paint, it is written what surface can be painted with it. But how can we find the area on the wall? In this lesson you will learn how to find the area of a rectangle and you will be able to help your parents buy the correct number of cans of the paint to paint the wall in your room. | ||||||||||||||||||||||||||||||||||||||||||||||||||||
| Teaching and learning methods | Learning in small steps Break instructions down into smaller parts Use technology and visualization Hands-on activities | ||||||||||||||||||||||||||||||||||||||||||||||||||||
| Interdisciplinary connections | Technology and entrepreneurship: working with a geoboard or the corresponding software application Social skills | ||||||||||||||||||||||||||||||||||||||||||||||||||||
| Resource teacher or other specialists activities | The lesson tasks are worded in a simple and clear way and they are easy to understand. New knowledge is presented visually, with hands-on activities, in small steps. The role of the special needs teacher is to assist the students if they fail to cope with some of the tasks or do not understand the instructions. | ||||||||||||||||||||||||||||||||||||||||||||||||||||
| New vocabulary | Square centimetre Area of a rectangle | ||||||||||||||||||||||||||||||||||||||||||||||||||||
| Work Flow |
1.1. Show different objects in the room that have the shape of a rectangle - the door, the windows, the blackboard, the computer/laptop monitor, etc. Ask them to add more examples from everyday life. You can use the video https://www.youtube.com/watch?v=U_D56_HQBnQ 1.2. Show a drawing of a rectangle. You can use a rectangle pattern that you have previously drawn and cut out. The rectangle is a geometric shape students already know. Revise its elements and features with the students. Ask questions and comment on the answers. Remember the students that a rectangle has 4 sides and 4 vertices; all its angles are right angles; the lengths of the opposite sides are equal; one pair of sides is longer than the other pair. For each of the features described, do the corresponding demonstration on the model you are using. 1.3. Another option is to use the presentation Elements of a rectangle to do the revision.
Task 1: Repeat the dashed lines along the outlines of the rectangle starting from the lower left corner. After drawing each side of the rectangle, put down its length in the assigned order. After completing the task, the teacher sums up what students have done - by tracing the sides of the rectangle, they actually "have gone around" it – this is the perimeter of the rectangle. Task 2: Calculate the perimeter of the rectangle using the formula. Alternatives of drawing the sides of the rectangle:
Ask the students to colour the inside of the outlined part of the sheet (any colour), and explain that the lesson is about this coloured part (we call it area of a rectangle) and what to do to find out how big it is.
3.1. Distribute a set with the shapes from Handout 3 to the tables so that students work in couples. Provide some time to see the shapes and set the task to think about the common characteristics of all shapes and differences between them (Common characteristics: all shapes are rectangles that are made up of squares of the same size. Differences: the rectangles comprise different number of squares.) 3.2. Explain that the sides of the small squares that make up the rectangles are 1 cm, and introduce the concept of a square centimeter. Introduce the way we write 1 square centimeter in mathematics - 1 sq. cm or cm2. 3.3. Discuss the green (the first) shape. If we count the number of squares it comprises of, we will know its area. The area of a rectangle is measured in square centimetres, and the number of squares indicates how many square centimeters the area is. 3.4. Task: Count the number of squares and determine the area of the green shape, the yellow shape and the brown shape.
4.1. Distribute Handout 4 to each student, specifying that the sides of the small squares are 1 cm. Have the students count how many squares cover each rectangle and record the results. Alternatively, you can suggest another smart way of finding the number of squares each rectangle is made of – this can be done by counting the rows and columns of squares into which the rectangle is divided, and the total number can be reached by multiplication. 4.2. You can use suitable animations to illustrate how to find the number of squares that cover a rectangle, for example https://www.google.com/search?client=firefox-b-d&q=animation of area of rectangle#fpsstate=ive&vld=cid:96e89487,vid:41ADSvcoRKo . 4.3. Distribute Handout 5 for individual work. Task: Determine the areas of the rectangles and put a ball of plasticine or a paper clip on the one with the biggest area. 4.4. Distribute Handout 6 and the pre-cut squares with a side of 1 cm to the tables for pair work. Task 1: Cover the rectangles with the small pre-cut squares, lining them up tightly next to each other. Task 2: Find the area of each rectangle.
Alternatively, students could divide the rectangles in the square grids into 1 cm squares. 4.5. Final wrap-up: The area of a rectangle can be calculated by multiplying the lengths of two adjacent sides. Students receive Handout 7 with the task of identifying the area of each shape. The dimensions of the first two rectangles are provided, and for the others it is necessary to measure the lengths of the sides first and then, calculate the area.
| ||||||||||||||||||||||||||||||||||||||||||||||||||||
| Reflection | Discuss the following questions in the plenary:
| ||||||||||||||||||||||||||||||||||||||||||||||||||||
| Notes | |||||||||||||||||||||||||||||||||||||||||||||||||||||
| Digital Resource | Revision: Elements of a rectangle https://sen-power.ipsantarem.pt/atividades/digital/9/Rectangle Elements.pps Handout 2 https://sen-power.ipsantarem.pt/atividades/pdf/9_handout2 EN.pdf Handout 3 https://sen-power.ipsantarem.pt/atividades/pdf/9_handout3 EN.pdf Handout 4 https://sen-power.ipsantarem.pt/atividades/pdf/9_handout4 EN.pdf Handout 5 https://sen-power.ipsantarem.pt/atividades/pdf/9_handout5 EN.pdf Handout 6 https://sen-power.ipsantarem.pt/atividades/pdf/9_handout6 EN.pdf Handout 7 https://sen-power.ipsantarem.pt/atividades/pdf/9_handout7 EN.pdf Rectangles in everyday life https://sen-power.ipsantarem.pt/atividades/digital/9/Rectangles Everyday life.pps | ||||||||||||||||||||||||||||||||||||||||||||||||||||
| 64 | |||||||||||||||||||||||||||||||||||||||||||||||||||||
| | |||||||||||||||||||||||||||||||||||||||||||||||||||||
| 2 |  Grade 4 / Data presentation and interpretation; probability Grade 4 / Data presentation and interpretation; probability | ||||||||||||||||||||||||||||||||||||||||||||||||||||
| Developed by | AECE - Escola Básica da Zona Verde | ||||||||||||||||||||||||||||||||||||||||||||||||||||
| Grade | 4 | ||||||||||||||||||||||||||||||||||||||||||||||||||||
| Duration | 60 | ||||||||||||||||||||||||||||||||||||||||||||||||||||
| Energizers | 26 - Empathy game Students get into a circle with sheets of paper and coloured pencils in the centre of the room and all students are invited to express, through colour, an emotion or feeling, by using different colours and painting them on the sheet of paper. When they have finished colouring, all the students show the sheet of paper and explain what that colour represents at that moment. If it is something negative, the classmates must voluntarily offer him/her other colours that transmits a positive emotion, that represents something positive. The aim of the game is that everyone feels free to share a feeling and receive peer support if needed. | ||||||||||||||||||||||||||||||||||||||||||||||||||||
| Relaxing Exercises | 24 - The Pot of Calmeness We call "the pot of calmness" to a jar in which we put water, liquid silicone to give density to the content and glitter of different colours. The construction of the jars is done in advance by the students and they can remain in the classroom to be used at other times when the call for relaxation and calmness is necessary. Each student gets his/her jar, shakes it and observes the movement. Afterwards, the group talks about what is observed: that the glitter represents the students’ emotions that they shake and stir until they are calmed down. This activity is ideal for fostering reflection. The simple act of watching the glitter moving slowly will help the students to relax. | ||||||||||||||||||||||||||||||||||||||||||||||||||||
| Objectives | In the end of the lesson students should be able to: · Select ways of organising and representing data; · Analyse and interpret statistical information represented in absolute and relative frequency tables and bar graphs; · Communicate reasoning based on the data collected in the tables and processed in the graphs. | ||||||||||||||||||||||||||||||||||||||||||||||||||||
| Preparation | MATERIAL: · Glass jars with lids · Sticky paper or insulating tape · glitter; · Water; · Liquid silicone · Sheets of A4 and A5 paper · Water-resistant tape · Coloured pencils · Scissors; · Printouts on sheets of A3 and A4 paper; · White reusable adhesive putty; · Individual student computers. Lesson pre-preparation Ask each student to bring a glass jar with a lid to school. Each pupil makes their own "pot of calmness" by putting water, liquid silicone to make the contents dense and coloured glitter into the jar. Then close the jar and wrap waterproof tape around the lid to make a better seal. Preparing the lesson There should be a table with all the necessary materials for the execution of the plan, including the pots of calmness. | ||||||||||||||||||||||||||||||||||||||||||||||||||||
| Introduction | In our daily lives, we are constantly in contact with statistics presented in different ways. It is therefore an essential subject for everyone, as it is necessary to know how to analyse and interpret this information. Using situations which are close to the students and which encourage and support meaningful mathematical learning, we will record and then organise the data collected, exploring the collective construction of absolute frequency tables and graphs. Students will ask and answer questions related to data collection and finally analyse and interpret the results in an organised manner. | ||||||||||||||||||||||||||||||||||||||||||||||||||||
| Teaching and learning methods | The teaching learning is process based on concrete questions and proximity situations to students. Learning by doing through the effective manipulation of material, making awareness o easier of what is being learned. Cooperative and collaborative learning - work developed in cooperation and collaboration in groups and pairs. New technologies as a way of learning/consolidating contents. | ||||||||||||||||||||||||||||||||||||||||||||||||||||
| Interdisciplinary connections | Portuguese Language – Listening and selecting relevant information, using different recording of data register techniques; Expressing opinions and sharing ideas audibly, with good articulation, appropriate intonation and rhythm; Ensure eye contact with the audience (body posture, facial expression, and gaze). Natural Science – Asking questions, making hypotheses, making inferences, checking and communicate results, recognising how knowledge is constructed. Artistic Education – Constructing the "pots of calmness" and drawing emotions. Citizenship and Development - Human Rights - Developing attitudes and behaviours of dialogue and respect, underpinning ways of being in society, contributing to the formation of responsible and supportive people, fostering attitudes of personal and social responsibility. | ||||||||||||||||||||||||||||||||||||||||||||||||||||
| Resource teacher or other specialists activities | All steps of the topic development must be understood for SEN students with cognitive abilities. The lesson does not include long written explanations. The role of the support or special education teacher is to help students in the target group if they are unable to complete any of the tasks or steps of the lesson, or feel confused in understanding something that may be required. | ||||||||||||||||||||||||||||||||||||||||||||||||||||
| New vocabulary | Statistical information; absolute frequency; relative frequency; bar graphs. | ||||||||||||||||||||||||||||||||||||||||||||||||||||
| Work Flow | 1st STEP Listening is an essential activity in the educational context and strengthens the development of the empathic side of teachers and students. After an early approach to the theme of empathy with the involvement of learners. At this moment students are proposed to work acts of empathy in the class, to be marked daily on a double entry board with the days of the week and the acts of empathy, (Appendix 1) which are:
Each act of empathy will correspond to a colour that makes it easier to differentiate them. During the week, at the end of the day, each student goes to the blackboard and there marks the act of sympathy which, in his or her opinion, he or she practised that day. The board should be fixed with white reusable adhesive mass, on a wall of the classroom at the height of the students. 2nd STEP At the end of the week, the class as a whole, will count the data previously recorded on the table and registered the numbers on a A3 size sheet, (Appendix 2), with dashes (|). The table should be placed on the wall next to the blackboard. 3rd STEP It is necessary to present the data recorded in the counting table in an organised way. Students in pairs will construct a frequency table: absolute frequency, which is the digit/s that corresponds to each count of the traces (I), and relative frequency, which implies activating prior knowledge and transforming the same digit into a fraction. The fraction will always depend on the number of students present in class on each day, i.e. if there were 20 students on one day and five of these, students performed a specific act of empathy, then the transformation into a fraction is
After completing the table, collectively the class answers the following questions:
4th STEP After completing the table, in groups of 4/5 students, the acts of empathy will be recorded in a bar graph, on pre-prepared A4 paper (Appendix 4), with the aim of visually representing data and information which would allow a quicker and clearer understanding of the acts of empathy which were more or less presented. Each group works on the acts practiced on each day of the week. After the groups have constructed the various graphs, the graphs are placed on a wall or whiteboard (with white flexible and reusable adhesive), one next to the other. Observing visually the values on each day, one group at a time answers the following questions:
5th STEP Assessment of the acquired learning through Forms, available on Teams, with each student using their own computer with internet access: ·
| ||||||||||||||||||||||||||||||||||||||||||||||||||||
| Reflection | Guided discussion: What was the most important thing you think you have learnt today?
| ||||||||||||||||||||||||||||||||||||||||||||||||||||
| Notes | |||||||||||||||||||||||||||||||||||||||||||||||||||||
| Digital Resource | Note: Anyone with an Office 356 school or professional account can edit and view the result, via the link sent. https://forms.office.com/Pages/DesignPageV2.aspx?subpage=design&FormId=Agm9ovOYw0GG5zuIxAak61elXK4Ab3VItYYUHvA8fixUQUtEUldXNDhWOTgzUEJYUVlKRkUwOTRWVi4u&Token=b8f4899ea40b4e21a6942eae5f12c36d | ||||||||||||||||||||||||||||||||||||||||||||||||||||
| 65 | ||||||||||||||||||||||||||||||||||||||||||||||||||||||||
| | ||||||||||||||||||||||||||||||||||||||||||||||||||||||||
| 3 |  Grade 4 / Geometric shapes Grade 4 / Geometric shapes | |||||||||||||||||||||||||||||||||||||||||||||||||||||||
| Developed by | NART | |||||||||||||||||||||||||||||||||||||||||||||||||||||||
| Grade | 4 | |||||||||||||||||||||||||||||||||||||||||||||||||||||||
| Duration | 45 | |||||||||||||||||||||||||||||||||||||||||||||||||||||||
| Energizers | 30 - Find the figure Option 1 Divide the class into several groups. Each group gets 1 set of the shapes and explanatory texts (Annex 1) - cut out separately each statement that describes the shape. The task of each group is to match the statements with the images of the shapes. When the groups are ready, check if the task was competed correctly. This exercise serves both to energize the students at the beginning of the lesson and as a transition to the topic of the lesson. Working time – 8 min. Option 2 Rearrange the tables (or desks) so that students can move freely around the room. Place the images from Annex 1 in the corners of the classroom. Allow each child to pick up a card with a description of a geometric figure. The task is to get as quickly as possible to the place with the geometric figure that corresponds to the description of the card. This exercise serves both to energize the students at the beginning of the lesson and as a transition to the topic of the lesson. Working time – 3 min. | |||||||||||||||||||||||||||||||||||||||||||||||||||||||
| Relaxing Exercises | 28 - The shape I found first Option 1 Ask the students to take their seats. If you used option 1 to move around, ask each team which geometric shape they recognized first and last. If you used option 2, ask the children if they have figured out what the hidden geometric figures are. Let them name all the shapes at least 2 times. Option 2 Guided fantasy Students are asked to close their eyes (if comfortable) and, with the guidance of - Start breathing slowly and deeply... - Imagine that you are in a place where you feel calm and relaxed... - Create the details in your mind. What can you see? - Do any of the objects resemble the shapes we talked about today? Is there a predominant shape? - What are the sounds, smells and colors of this special place? Do you associate any of the sounds with a particular shape? Or any color? - Open your eyes. after Rossman, 2016 Time – 3 min. | |||||||||||||||||||||||||||||||||||||||||||||||||||||||
| Objectives | Recognizing the geometric shapes cube, rectangular parallelepiped, sphere, cylinder, cone, pyramid. Developing self-confidence. Building a connection between geometric shapes and everyday objects. Stimulating student’s imagination to discover patterns and similarities. | |||||||||||||||||||||||||||||||||||||||||||||||||||||||
| Preparation |
| |||||||||||||||||||||||||||||||||||||||||||||||||||||||
| Introduction | Geometric shapes are all around us. They are part of our daily life. We are so used to them that we no longer even see them as geometric shapes, but only as objects. In the following lessons, we will learn to recognize them. We will also see how artists use geometric shapes to create art. | |||||||||||||||||||||||||||||||||||||||||||||||||||||||
| Teaching and learning methods | Learning in small steps Breaking instructions down into smaller parts Using patterns Using technology and visualization Providing real-life examples Using manipulatives | |||||||||||||||||||||||||||||||||||||||||||||||||||||||
| Interdisciplinary connections | Arts – Piet Mondrian History and Geography - the pyramids in Egypt, Mexico, Paris, Louvre Museum Technology | |||||||||||||||||||||||||||||||||||||||||||||||||||||||
| Resource teacher or other specialists activities |
| |||||||||||||||||||||||||||||||||||||||||||||||||||||||
| New vocabulary | cube, rectangular, parallelepiped, sphere, cylinder, cone, pyramid | |||||||||||||||||||||||||||||||||||||||||||||||||||||||
| Work Flow |
| |||||||||||||||||||||||||||||||||||||||||||||||||||||||
| Reflection | Final wrap-up: Finish the lesson by having students look around the classroom. Ask them which geometric shape it looks like. Then ask them to look at other classroom objects: textbooks, pencil cases, or other items in their bags. Let everyone name their discoveries. An additional activity is to provide students with tablets and allocate time to create their own geometric shapes by drawing them with appropriate applications (in case the school has the appropriate devices and software). You can also ask the class, as a homework assignment, to find out different objects resembling the new geometric shapes at home. Working time – 10 min. | |||||||||||||||||||||||||||||||||||||||||||||||||||||||
| Notes | ||||||||||||||||||||||||||||||||||||||||||||||||||||||||
| Digital Resource | ||||||||||||||||||||||||||||||||||||||||||||||||||||||||
| 66 | |||||||||||||||||||||||||||||||||||||||||||||||||||||
| | |||||||||||||||||||||||||||||||||||||||||||||||||||||
| 4 |  Grade 4 / Mathematical reasoning Grade 4 / Mathematical reasoning | ||||||||||||||||||||||||||||||||||||||||||||||||||||
| Developed by | IPSantarem | ||||||||||||||||||||||||||||||||||||||||||||||||||||
| Grade | 4 | ||||||||||||||||||||||||||||||||||||||||||||||||||||
| Duration | 60 | ||||||||||||||||||||||||||||||||||||||||||||||||||||
| Energizers | 27 - Mathematical quizzes Engage children using math quizzes. Prepare a few fun and age-appropriate riddles to challenge their number sense and mental calculation skills. Quiz example:
Reward the participants who solve the riddles properly with math-themed stickers or badges. 5 min | ||||||||||||||||||||||||||||||||||||||||||||||||||||
| Relaxing Exercises | 25 - Body Numbers Students are instructed to lie on the floor with the task to form numbers or numerical expressions with their body positions. They can do the activity either individually or in groups of two or three to combine their body positions to form numbers or numerical expressions. 5 min | ||||||||||||||||||||||||||||||||||||||||||||||||||||
| Objectives | Students will:
| ||||||||||||||||||||||||||||||||||||||||||||||||||||
| Preparation | Materials
Equipment Laptop and projector Preparation for the lesson 1. Provide one character card for each student. The teacher can print several copies of Annex 1 in A4 size on cardboard. Each page has 3 different character cards to cut, so students can choose their favorite one from the available characters . 2. Provide a good amount of used coffee capsules, properly cleaned, organized by colors. The idea is that each student can choose the color of their preference for this activity. 3. Students should be organized into groups of 4 participants in order to make simulations in the first part of the task. 4. Print a copy of the registration board (Annex 2) for each group. | ||||||||||||||||||||||||||||||||||||||||||||||||||||
| Introduction | Mathematical reasoning is a fundamental aspect of mathematical knowledge and its development should be promoted from the earliest years of schooling and specifically with students with special learning needs. One of the central aspects of this work is the recognition of regularities and the mobilization of inductive reasoning to formulate generalizations in the form of conjectures. This process will open opportunities for the construction of arguments with progressive levels of abstraction. Solving the activity presented in this lesson plan, students will have the opportunity to follow an exploratory learning path with great meaning and reach, starting from a problem. | ||||||||||||||||||||||||||||||||||||||||||||||||||||
| Teaching and learning methods | Exploratory learning from real-life situations. | ||||||||||||||||||||||||||||||||||||||||||||||||||||
| Interdisciplinary connections | Language – oral and written communication. | ||||||||||||||||||||||||||||||||||||||||||||||||||||
| Resource teacher or other specialists activities | Almost all the steps of the lesson are comprehensible to the majority of students with special needs who have well-preserved cognitive abilities. The lesson does not comprise long written explanations, and long instructions, which are difficult for the target group students. The role of the special needs teacher or the assistant teacher is to help target group students in case they are not able to cope with some of the tasks or instructions provided. | ||||||||||||||||||||||||||||||||||||||||||||||||||||
| New vocabulary | Conjecture | ||||||||||||||||||||||||||||||||||||||||||||||||||||
| Work Flow | Phase 1: Explore and understand the proposed problem After organizing students into groups of 4, the following problem is presented: On the last day of classes, a group of primary school students from grade 2A decided to give each other souvenir gifts. How many gifts are given altogether? The presentation of the problem could be done using the image (Annex 3) projected on the screen from a laptop computer. This first phase is about understanding of the problem. Students must figure out the meaning of "give each other souvenir gifts". It should be made clear that, under these conditions, each person gives a gift and receives a gift from each of the other members of the group. The formulation of the problem is deliberately vague so that student do not know the number of students in grade 2A that constitute the group. This is intended to compel students to explore the context, considering groups formed by a reduced number of peers, allowing the teacher to give the trivial example of 2 people: Each one must bring 1 gift (to offer to the other). Altogether, there are a total of 2 gifts. 5 min Phase 2: Explore and identify regularities At this stage, students should choose a character card (Annex1) and a colour, according to their preference These resources are going to be used by the students to explore the presented situation. The character card represents an element of the group. Each coffee capsule of the chosen colour represents a gift to be distributed to each of the remaining elements of the group. Students have already researched the case when the group of 2ª students comprises 2 students. Now, the teacher can ask "And what happens if the group is made up of three (Figure 2) or four students (Figure 3)?" Students explore each case using the resources mentioned above.
.Figure 2. Representation of the problem solution for a group of three students
Figure 3. Representation of the problem solution for a group of four students. The results obtained are recorded on the registration board (Annex 2).
The exploration can be extended to groups with a greater number of elements. For this purpose, the previous groups can be combined two by two. At this stage, the structure underlying the question asked should be more or less evident, and its rectangular representation more clear, such as in the resolution for a group of five students (Figure 4).
Figure 4. Representation of the problem solution for a group of five students. The gifts altogether correspond to: the product of the number of elements in the group by the number of gifts that each element should offer (and obviously receive), as seen in the previous example. 20 min Phase 3: Conjecture and verification As a result of the observation of the analysed cases and the observed regularity, it will be possible to conjecture the number of gifts each student should bring to the party and the total number of gifts, such as presented on Table 1.
Table 1. Conjectures of the number of gifts each person should bring to the party and the total number of gifts. The total number of souvenir gifts in a group of students where everyone gives each other a gift equals the number of elements of the group times the number of elements of the group less 1. The formulation of the conjecture can be done only using words or algebraic language, according to the level of proficiency of the students. Another way of generalizing the result found is to solve the proposed problem applied to a larger number of elements in the group, without reference to the simulation and representation provided by the materials previously used. An answer to the following question could be proposed: On the last day of classes, all students from our class decided to give each other souvenir gifts. How many gifts are given altogether? For example, in a class of 20, there would be a total of 20×19=380 gifts. 15 min | ||||||||||||||||||||||||||||||||||||||||||||||||||||
| Reflection | Guided discussion:
Proposed solution: The total amount of gifts is the product of the number of elements in the group by the number of gifts that each element should offer.
Total number of gifts: n × (n – 1) | ||||||||||||||||||||||||||||||||||||||||||||||||||||
| Notes | |||||||||||||||||||||||||||||||||||||||||||||||||||||
| Digital Resource | Annex 1 https://sen-power.ipsantarem.pt/atividades/pdf/12_Annex1 final.pdf Annex 2 https://sen-power.ipsantarem.pt/atividades/pdf/12_Annex2 final.pdf Annex 3 https://sen-power.ipsantarem.pt/atividades/fotos/12_annex3.jpg | ||||||||||||||||||||||||||||||||||||||||||||||||||||
| 67 | |||||||||||||||||||||||||||||||||||||||||||||||||||||
| | |||||||||||||||||||||||||||||||||||||||||||||||||||||
| 5 |  Grade 4 / Determining the value of the variable in an equation Grade 4 / Determining the value of the variable in an equation | ||||||||||||||||||||||||||||||||||||||||||||||||||||
| Developed by | Antalya Directorate Of Education | ||||||||||||||||||||||||||||||||||||||||||||||||||||
| Grade | 4 | ||||||||||||||||||||||||||||||||||||||||||||||||||||
| Duration | 60 | ||||||||||||||||||||||||||||||||||||||||||||||||||||
| Energizers | 4 - Human chain Everybody stands up in a circle. They close their eyes and start moving towards the middle of the circle, holding their hands up. Whoever they touch with their hands, they hold and do not let go, so they make a knot. Then the facilitator asks the students to open their eyes and try to untangle themselves (make a circle) without letting go of their hands. | ||||||||||||||||||||||||||||||||||||||||||||||||||||
| Relaxing Exercises | 4 - Visualization using color/soothing sound Facilitator asks the students to imagine a favorite color that makes them feel peaceful and safe. They keep their imagine taking in that color with each breath and sending it throughout their entire body as they exhale. They continue until they visualize being filled with their special, relaxing color. The same exercise can be performed using soothing sound or aroma. Also, it is more effective if relaxing music is used. Kelly Roper | ||||||||||||||||||||||||||||||||||||||||||||||||||||
| Objectives | Students will:
| ||||||||||||||||||||||||||||||||||||||||||||||||||||
| Preparation | Materials:
| ||||||||||||||||||||||||||||||||||||||||||||||||||||
| Introduction |
Review basic addition/subtraction operations. Ask the students to answer these basic addition/subtractions problems: 5 + 1= ??; 7 + 9= ??; 8-3 = ??; 9-1 = ?? | ||||||||||||||||||||||||||||||||||||||||||||||||||||
| Teaching and learning methods | 1. Direct Instruction: The teacher presents new concepts and explains how to solve equations step-by-step. Direct instruction is used to provide clear explanations, demonstrate problem-solving strategies, and introduce new concepts to the students. 2. Real-Life Examples: The use of real-life examples helps students relate the concept of variables and equations to situations they encounter in their daily lives. It makes the learning experience more meaningful and relevant. 3. Visual Aids: Visual aids manipulatives (e.g., counters or blocks) are used to make abstract concepts more concrete and understandable for students. 4. Group Work: Students are encouraged to work in pairs or small groups to solve practice problems and word problems. Group work fosters collaboration, communication, and peer learning. It also allows students to discuss their strategies and learn from one another. 5. Practice Worksheets: The use of practice worksheets allows students to apply the concepts they've learned independently. Worksheets provide opportunities for students to practice solving equations and reinforce their understanding. 6. Checking Answers: Emphasizing the importance of checking answers helps students develop a habit of verifying their work for accuracy. It also promotes a deeper understanding of the concepts and helps students identify potential errors. 7. Positive Reinforcement: The teacher celebrates students' successes and progress throughout the lessons, boosting their confidence and motivation to continue learning. | ||||||||||||||||||||||||||||||||||||||||||||||||||||
| Interdisciplinary connections |
| ||||||||||||||||||||||||||||||||||||||||||||||||||||
| Resource teacher or other specialists activities | Inclusion specialist ensures all students participate as described and provides support if needed. Some students may take more time to grasp the concept of variables and equations. Be patient, provide additional support, and adapt your teaching approach if necessary. | ||||||||||||||||||||||||||||||||||||||||||||||||||||
| New vocabulary | Variable, addition, subtraction, equation, unknown, balance. | ||||||||||||||||||||||||||||||||||||||||||||||||||||
| Work Flow |
Start by asking students if they know what an equation is .After the answers explain that an equation is a mathematical statement that shows that two expressions are equal. Introduce the concept of variables as placeholders for unknown values. Use simple real-life examples . Tell the students: Imagine we want to play "Tug of War" game. We have Team A with 10 students but Team B has only 5 students. The number os students in the teams is not equal and it wouldn’t be fair to play like that. In order to make the participants in the two teams equal we need 5 more students to join team B. This case we can record with an equation as follows: 5 + ⃣ = 10. The missing numver in the square is a variable. In the equation, the variable is represented by ' ⃣ .'
Manipulatives are physical objects that students can touch, move, and interact with, which helps them visualize the problem and gain a better understanding of the mathematical concepts involved. Blocks: Provide students with counters or blocks of different colors. In the addition and subtraction equations, have students physically move the blocks to represent the numbers in the equation.
Place 3 blocks on the left side of the table, and 8 blocks on the right side. Are they equal? (Answer: NO). Then, add more blocks to the left side one by one until both sides are equal and check at every step: put a blank sheet of paper on the left side and place 1 extra block on it; count all the blocks on the left side: we have 4 on the left and 8 on the right side, Are they equal? NO. Put one more block on the paper and count; we have 5 blocks on the left side all together, and 8 on the right side. Are they equal? NO. Continue the process until students have placed 5 blocks on the paper sheet on the left side and have theme count the blocks. In this case we have 8 blocks on the left side and 8 blocks on the right side – they are equal. How many blocks are there on the paper sheet? – 5 blocks. This is the unknown number (the variable) in the initial equation 3 + ⃣ = 8 one more visually showing how to solve the equation. After example make three groups and give each group an equation to solve with blocks. (Write the each group’s equation on board)
Tell students that addition and subtraction are inverse operations. If you add 5 to a number and then subtract 5 from the result, you will get back to the original number.
Show students step-by-step methods to solve equations using inverse operations - write all operation steps on the board.
Step 1: Ask students to Identify the variable ( ⃣ .). Step 2: Use inverse operation to isolate the variable. To isolate the variable ' ⃣ ,' use the inverse operation of addition, which is subtraction. Subtract the number which stands on the left side of the equation where the variable is (3) from both sides of the equation: 3 + ⃣ - 3 = 8 - 3 Step 3: Simplify both sides. The left side simplifies to ' ⃣ ,' and the right side simplifies to '5': ⃣ = 5 Step 4: Check your answer. Substitute the value of ' ⃣ ' back into the original equation to make sure the answer is correct: 3 + 5 = 8; 8 = 8 (True)
10 - ⃣ = 6 Step 1: Add the unknown number (the variable ⃣ to both sides. 10 - ⃣ + ⃣ = 6 + ⃣ Step 2: Simplify the equation - ⃣ + ⃣ = 0, so we get 10 = 6 + ⃣ Step 3: Isolate only the variable on the right side by subtractibg 6 from bothe sides: 10 - 6 = 6 + ⃣ - 6 6-6 =0; and 10-6 =4, so we get 4 = ⃣ Step 4: Check your answer. Substitute the value of ' ⃣ ' back into the original equation to make sure the answer is correct: 10 – 4 = 6; 6 = 6 – the answer is correct. | ||||||||||||||||||||||||||||||||||||||||||||||||||||
| Reflection |
| ||||||||||||||||||||||||||||||||||||||||||||||||||||
| Notes | Remember to emphasize the importance of checking their answers. Encourage students to double-check their work and ensure that their final answer makes sense in the context of the problem. Encourage active participation from all students during class discussions and group activities to ensure everyone is engaged in the learning process. | ||||||||||||||||||||||||||||||||||||||||||||||||||||
| Digital Resource | |||||||||||||||||||||||||||||||||||||||||||||||||||||
| 68 | |||||||||||||||||||||||||||||||||||||||||||||||||||||
| | |||||||||||||||||||||||||||||||||||||||||||||||||||||
| 6 |  Grade 4 / Probability Grade 4 / Probability | ||||||||||||||||||||||||||||||||||||||||||||||||||||
| Developed by | IPSantarem - Bento Cavadas e Nelson Mestrinho | ||||||||||||||||||||||||||||||||||||||||||||||||||||
| Grade | 4 | ||||||||||||||||||||||||||||||||||||||||||||||||||||
| Duration | 1h25 | ||||||||||||||||||||||||||||||||||||||||||||||||||||
| Energizers | 47 - Pig Game “Pig game” is a simple dice game which in its basic form is playable with just a single dice. You win by being the first player to achieve a certain number of points. To play you'll need 2 to 10 players, one 6-sided dice, and a pencil and some paper for keeping score. The teacher organizes the class into four or five groups, each acting as a team. Each group rolls a dice to determine the order of play, with the highest number of points going first, followed by the next highest, and so on. If possible, use a large dice made from soft material so the activity can take place with students standing and moving. The first team rolls the dice and scores the number of points shown, provided they do not roll a 1. If the team rolls a 1, their turn ends, and they lose all the points accumulated during that turn, passing the die to the next team. Team members must decide collectively whether to continue rolling and risk rolling a 1 (and losing their points) or end their turn and keep the points earned. Scores can be recorded on the whiteboard or blackboard. Play continues from team to team until a winner is determined. The first team to accumulate 50 or more points wins the game. (Adapted from https://www.dicegamedepot.com/dice-n-games-blog/pig-dice-game-rules/) | ||||||||||||||||||||||||||||||||||||||||||||||||||||
| Relaxing Exercises | 42 - Sharing strategies Students sit in a semicircle, facing the teacher, and discuss what is the best strategy to win the “Pig game”. Children can express their opinion, make experiments or demonstrations. | ||||||||||||||||||||||||||||||||||||||||||||||||||||
| Objectives |
| ||||||||||||||||||||||||||||||||||||||||||||||||||||
| Preparation | Materials:
Preparation for the lesson: The teacher should prepare a set of boxes, ensuring there are several identical boxes for each type. Type 1: A match box with 1 dice inside Type 2: A match box with 3 marbles inside, one white and the other two blue (we propose two diferent shades of blue) Type 3: A match box with 4 marbles inside, 2 pairs of marbles with the same colors (we show a box with 2 red and 2 green marbles).
Figure 1. Examples of boxes of type 1 (left side), type 2 (center) and type 3 (right side). | ||||||||||||||||||||||||||||||||||||||||||||||||||||
| Introduction | Data and Probability is fundamental to understanding today’s world, although not traditionally a core subject in early years mathematics. Simple games provide children with opportunities to explore random phenomena and their patterns, introducing ways of thinking and communicating about events characterized by uncertainty and chance. | ||||||||||||||||||||||||||||||||||||||||||||||||||||
| Teaching and learning methods | Exploratory learning from an experimental set-up. | ||||||||||||||||||||||||||||||||||||||||||||||||||||
| Interdisciplinary connections | Language – oral and visual communication. | ||||||||||||||||||||||||||||||||||||||||||||||||||||
| Resource teacher or other specialists activities | Almost all the steps of the lesson are comprehensible to most special needs students who have well-preserved cognitive abilities. The lesson does not comprise written explanations, and the long instructions, which are difficult for the target group’s students (TGSt), are very few. The role of the special needs teacher or the assistant teacher is to help TGSt in case they are not able to cope with some of the tasks or steps. | ||||||||||||||||||||||||||||||||||||||||||||||||||||
| New vocabulary | Unlikely Likely Probable Equally probable | ||||||||||||||||||||||||||||||||||||||||||||||||||||
| Work Flow | Phase 1: Presenting the context (see appendix 1) Children are presented to the three types of boxes. The teacher organizes the students into small groups (between 2 and 4 children). Each group is arbitrarily assigned a box. Each box is associated with a game. Game 1: Close box type 1 properly, shake it for a few seconds and place the box upright so that the dice inside can rest against the bottom and top of the inside of the box (see figure 2). Open the box. If the sum of the points on the two exposed faces is even you win, if is odd you lose.
Figure 2. Example of outcome of game 1. In this case, the exposed faces are 4 (headed front) and 1 (at the top), whose sum is 5, an odd number - meaning the player loses the game. Game 2: Close box 2 properly, shake it for a few seconds and place the box upright so that the marbles inside are aligned with the bottom of the box (see figure 3). Open the box. If the white marble is between the blue marbles you win, otherwise you lose.  Figure 3. Example of outcome of game 2. In this case, the white marble is between the blue marbles - meaning the player wins the game.
Game 3: Close box 3 properly, shake it for a few seconds and place the box upright so that the marbles inside are aligned with the bottom of the box (see figure 4). Open the box. If the red marble are together you win, otherwise you lose.
 Figure 4. Example of outcome of game 3. In this case, the red marbles are alternated with the green ones meaning the player loses the game. 10 minutes Phase 2: Formulating the problem In this phase, each group has a box of one of the three types, so there are several groups for game 1, several for game 2 and several for game 3. Each group will have to analyze the game they have been assigned in order to answer the following question: Is the game fair? At this stage, the teacher should discuss with the students what it means ‘a fair fair’, based on the understandings expressed by the students. They should realize that being fair means having equal chances of winning and losing. It is appropriate to use expressions such as ‘equally probable’. The teacher can ask each group about the game they have been given, whether it seems, at first glance, fair or not and why. 10 minutes Phase 3: Exploring the games Now the working groups are invited to explore the game they have been assigned by repeating a set of trials, recording the result (win or lose) for each one. The roles of performing the trials and recording can rotate among all the members of the group so that everyone participates actively. The registers can take the form shown in figure 5, or any other form with pedagogical interest. It is important that, in total, each group does a sufficiently large number of tests so that a pattern can emerge (lets say, 50 or 60 trials). Each pair of tester/recorder students can carry out a series of 10 tests, rotating these functions within the group. The other members should ensure that each trial takes place in a way to avoid bias.
Figure 5. Example of record of an hypothetical outcome of a set of 50 trials. Teachers should bear in mind that, effectively, games 1 and 3 are fair, with the probability of winning equal to the probability of losing. In game 2 the probability of losing is substantially higher then the probability of winning, and thus game 2 is not fair (see annex 1). However, one should not forget that equal probability of results does not imply the mandatory equality of wins and losses when repeating the experiment a certain number of times. Chance, in itself, is unpredictable and the probabilistic model inherent to the random experience only reveals itself after a large number of repetitions. The example in figure 5 is perfectly plausible as a result of 50 repetitions of games 1 or 3. Only a very ‘well-behaved chance’ would produce 25 wins and 25 losses in 50 trials. However, for those willing to see, the fairness between wins and losses is there and will be so much more visible the higher the number trials. In a fair game, such as the cases of game 1 and game 3, one can expect a small advantage of either outcomes (win or lose) in a large set of trials. In the case of game 2 a significant difference between the number of gains and the number of losses is expected, with obvious benefit for the latter. 30 minutes Phase 4: Discussion of results At this stage, the teacher asks the groups to share their results from each game. It may be interesting to combine the totals from the different groups that played each game to obtain overall totals for each one. With a larger number of trials, it is expected that the fairness or unfairness of the games will become more evident. The class should conclude that:
20 minutes | ||||||||||||||||||||||||||||||||||||||||||||||||||||
| Reflection | Students should try to find an explanation for why games 1 and 3 are fair, while game 2 is not. To guide their reflection, the following questions can be asked for each game:
15 minutes | ||||||||||||||||||||||||||||||||||||||||||||||||||||
| Notes | |||||||||||||||||||||||||||||||||||||||||||||||||||||
| Digital Resource | |||||||||||||||||||||||||||||||||||||||||||||||||||||
| 69 | |||||||||||||||||||||||||||||||||||||||||||||||||||||
| | |||||||||||||||||||||||||||||||||||||||||||||||||||||
| 7 |  Grade 4 / Measuring and drawing angles Grade 4 / Measuring and drawing angles | ||||||||||||||||||||||||||||||||||||||||||||||||||||
| Developed by | Prosveta-Sofia Foundation | ||||||||||||||||||||||||||||||||||||||||||||||||||||
| Grade | 4 | ||||||||||||||||||||||||||||||||||||||||||||||||||||
| Duration | 60 | ||||||||||||||||||||||||||||||||||||||||||||||||||||
| Energizers | 35 - Angles Students get up from their seats and stand next to their desks/tables. The teacher explains to them that he/she is going to use his arms as the arms of an angle, and they must perform the corresponding action depending on how he places his arms. When: • he/she stretches one arm out to the side parallel to the floor, at shoulder level, and raises the other up, students must lean back; • he/she raises arms up and makes a "roof" above his/her head, students must lean forward; • one of his/her hands points down to the floor and the other one points to the floor to the side, close to the body, students should squat. If there is time, the activity continues with a student taking the teacher's place. | ||||||||||||||||||||||||||||||||||||||||||||||||||||
| Relaxing Exercises | 15 - Moving like a toy The teacher uses a magic word to change the students into many string-loaded (wind-up) toys. At the teacher’s signal, the toys start to move across the class, as many robots, to get their sits. They have to move more quickly at the beginning and then gradually more and more slowly, because their charge is finishing. Some of them will be frozen in the middle of the room, and the teacher has to give their cranks one more turn to help them reach their seats | ||||||||||||||||||||||||||||||||||||||||||||||||||||
| Objectives | Students will:
| ||||||||||||||||||||||||||||||||||||||||||||||||||||
| Preparation | Materials Markers/colored pencils Black pencil Sticky notes/paper tape Straws Scissors Glue White A4 sheets Equipment Laptop and projector Drawing equipment Board protractor Protractors for each student Preparation 1. Prepare sticky notes with an angle drawn on them or print out Handout 1 for each student. 2. Make colored copies of Handout 3 for each student. 3. Make color copies of Handout 4 – one per table/desk. 4. Make copies of Handout 6 for each student. 5. Make copies of Handout 7 for each group. 6. Print Handout 8 and cut the traffic lights separately. Each student needs one image of traffic lights. | ||||||||||||||||||||||||||||||||||||||||||||||||||||
| Introduction | Have you looked carefully at the hour and minute hands of the clock? They form an angle that changes all the time. In our daily life there are many objects in which we can find different angles – in the clothes hanger, the scissors, in a slice of our favorite pizza, etc. If you look closely, you will find angles in the letters and the numbers too. While doing various physical activities, we stand in a variety of poses, in which there are hidden angles as well. Angles are all around us. And sometimes it is extremely important to know their exact size. Carpenters, for example, have to measure the angles very precisely when making a door, a table or a chair. Engineers construct buildings, bridges, monuments, etc., using angles of precisely defined sizes. In this lesson, we will learn about the unit of measurement used to measure the size of an angle and learn how to measure angles using a protractor. | ||||||||||||||||||||||||||||||||||||||||||||||||||||
| Teaching and learning methods | Using manipulatives and visualization Learning in small steps Group work | ||||||||||||||||||||||||||||||||||||||||||||||||||||
| Interdisciplinary connections | Arts - creating a picture recreating a scene from students' everyday life Mother tongue - skills of expression Technology – using tools Physical education – active living | ||||||||||||||||||||||||||||||||||||||||||||||||||||
| Resource teacher or other specialists activities | The steps in the lesson are comprehensible to most students with special needs who have well-preserved cognitive abilities. The text and instructions of the tasks are short and clear. The role of the support teacher is to help students if they don’t understand the instructions. | ||||||||||||||||||||||||||||||||||||||||||||||||||||
| New vocabulary | Degree Protractor | ||||||||||||||||||||||||||||||||||||||||||||||||||||
| Work Flow | Step 1 (5 min) The lesson begins by updating students' knowledge of the geometric shape angle. The teacher opens the presentation from Annex 2 on shows slide 2 and asks students about the name of the shapes they see. On slide 3 students have to name the shape we receive when we have two rays with a common endpoint. The elements of an angle are remembered: vertex, arms and how an angle is named. The teacher then shows slides 4, 5 and 6 successively, students see the different types of angles. The class remembers the rule of how to determine the type of an angle using a drawing triangle. Step 2 (5 min) Students work in pairs with Handout 3. They outline with a solid coloured line the angles they find in the provided objects. They colour the circle for the corresponding type of angle. If needed, they can use a drawing triangle to determine the type of angles. Step 3 (5 min) Students receive Handout 4 for individual work. They have to record the result of the measurement of each object. The teacher remembers them that the length, height and width of an object can be measured in millimeters, centimeters, decimeters, or meters; the distance between two cities can be measured in kilometers; the mass of an object can be measured in grams, kilograms, or tons; a period of time can be measured in seconds, minutes, hours, days, or years. Step 4 (5 min) Determining the size of an angle. There is a special tool called a protractor. It is used to measure the size of an angle, and the measuring unit is called degrees. The topic is introduced by making use of the presentation from Annex 5. It shows different types of protractors and explains the most important elements. If a board protractor is available, the teacher can draw an angle on the board and demonstrate how to use it properly. If this is not possible, the teacher can demonstrate the procedure for measuring the size of an angle by showing slide 5 of the presentation. Slide 6 demonstrates how to measure the size of an angle that is open to the left. Pay attention: when the angle is open to the left, the top set of numbers is used, whereas when the angle is open to the right, the bottom set of numbers is used. Step 5 (10 min) Students receive Handout 6.
Step 6 (20 min)
One student stands in the centre of the circle. His task is to find out what angle he has on attached to his/her back by asking questions to the other students - only Yes or No questions can be asked: examples “Am I greater than a right angle?”, “Am I a right angle?”, “Am I smaller than a right angle?” etc. When the student has guessed the type of angle he has been assigned, he leaves the circle and points to a classmate to take the place in the centre. The game continues until all the students have taken their turn to be in the centre. When a student guesses his/her type of angle and exits the circle, he stands next to the other students (if any) who got the same type of angle. Thus, at the end of the game, the students will be divided into three groups: "Right Angle", "Acute Angle" and "Obtuse Angle". Tip: The number of images with each type of angle should be fairly equal to form groups of similar size. 2. Students work in the three groups. Each group gets one page from Handout 7 and a couple of straws. Students are advised to cut out the geometric shapes from the paper and use them for the head and body of their figure. The straws that each group received could be cut into pieces and used for arms and legs. The straws and the shapes should be glued on a white A4 sheet of paper so that the collage looks like the provided image. The team can colour their collage and draw additional elements. After making the person, each group identifies and measure the angles they see and fills in the information in the table. Step 7 (2 min) After completing the activity from Step 6, the teacher makes a short summary of the most important things in the lesson. | ||||||||||||||||||||||||||||||||||||||||||||||||||||
| Reflection | Activity 1 Ask the following questions: 1. Did you learn something useful today? What is it? 2. Which activity did you like most? • The energizer Angles • The relaxing activity Moving like a toy? • The task of finding angles in different objects • The task of measuring different objects • The guessing game “What type of angle am I?” • The collage – making a person with shapes and straws. Activity 2. Provide a picture of a traffic lights to each student (Handout 8). Ask them to colour the light which indicates how they feel at the end of the lesson.
(5 min) | ||||||||||||||||||||||||||||||||||||||||||||||||||||
| Notes | |||||||||||||||||||||||||||||||||||||||||||||||||||||
| Digital Resource | |||||||||||||||||||||||||||||||||||||||||||||||||||||
| 70 | |||||||||||||||||||||||||||||||||||||||||||||||||||||
| | |||||||||||||||||||||||||||||||||||||||||||||||||||||
| 8 |  Grade 4 / Geometric shapes - circle and circumference Grade 4 / Geometric shapes - circle and circumference | ||||||||||||||||||||||||||||||||||||||||||||||||||||
| Developed by | AECE - Escola Básica da Zona Verde | ||||||||||||||||||||||||||||||||||||||||||||||||||||
| Grade | 4 | ||||||||||||||||||||||||||||||||||||||||||||||||||||
| Duration | 60 | ||||||||||||||||||||||||||||||||||||||||||||||||||||
| Energizers | 43 - Fishnet game Divide the class into two groups. One group, arranged in a circle, forms the fishing net. The remaining students are the little fish and will move freely around the room. The students in the net agree on a number without the little fish hearing them. They form a circle by holding hands and start counting in series (1,2,3...) until they reach the agreed number. The little fish know they can start moving when they see the wheel formed. When they reach the agreed number, they bend down and pick up the fish that remain inside the circle. This exercise serves both to energise the students at the start of the lesson and as a transition to the lesson's theme. | ||||||||||||||||||||||||||||||||||||||||||||||||||||
| Relaxing Exercises | 38 - Guess the shape Draw simple shapes: a circle, a cloud, a sun, etc. on A4 sheets of paper. At the sound of quiet music, the students organise themselves in pairs. Student A draws a shape (example – in the picture) without his/her partner seeing it and sticks it to student B’s back. With his/her index finger, student A goes round the drawing, putting pressure on student B’s back, who tries to find out which shape has been drawn on his/her back. | ||||||||||||||||||||||||||||||||||||||||||||||||||||
| Objectives |
In the end of the lesson students should be able to:
| ||||||||||||||||||||||||||||||||||||||||||||||||||||
| Preparation | Resources For the students - Compass - Ruler - Pencils - Coloured pencils - Scissors - A square of white paper (1 per student) For the teacher - 1 piece of card - printed words: "centre", "radius", "diameter" "circumference" and "circle" - Felt-tip pens - Record sheet - Computer and video projector Preparation: 1. Make sure each student has the necessary material on their desk 2. Cut out white sheets of paper in a square shape (approx. 10 cm x 10 cm). 3. A circle on A2 card (template) 4. Printed words to stick on the cardboard circle: "centre", "radius", "diameter", "circumference", "circle". (Appendix 1) 5. Free panel on which to place the work(s) done: cardboard with names (template) and drawings drawn up later by the students. 6. Print out a record sheet for each student in advance. | ||||||||||||||||||||||||||||||||||||||||||||||||||||
| Introduction | Geometric shapes are all around us. They are part of our daily lives. We're so used to them that we don't even see them as geometric shapes anymore, but just as objects. In this lesson, we'll learn how to draw circles with a compass and identify the centre of the circle. We'll also learn how to measure the radius and diameter of the circle. We'll also see how artists use the circle and circumference to create art and how these notions can be applied to scientific studies. | ||||||||||||||||||||||||||||||||||||||||||||||||||||
| Teaching and learning methods | - Learning in small steps, reinforcing instructions in smaller chunks that cater for students' different starting points and learning rhythms. - Applying the experimental method. Learning through visualisation, experimentation and manipulation. - Using group work for co-operative and collaborative learning. - To raise awareness of what is being learnt, encourage learning based on concrete situations that are close to the students. - Using new technologies to learn about and consolidate content. | ||||||||||||||||||||||||||||||||||||||||||||||||||||
| Interdisciplinary connections |
Mother tongue - oral skills in order to interact appropriately in the context and for various purposes (namely, explaining knowledge, presenting narratives, arguing based on points of view). Artistic expressions - interpretation and communication - the aim is, in a systematic, organised and comprehensive way, to develop apprehension and interpretation skills in contact with different visual universes (...) and to develop strategies for building relationships between looking, seeing and doing. | ||||||||||||||||||||||||||||||||||||||||||||||||||||
| Resource teacher or other specialists activities | This lesson favours the step-by-step method, with short, clear instructions. The role of the special education teacher or support teacher is to supervise and help, when necessary, in carrying out some of the tasks or steps (for example, the rotation of the compass can be difficult and the teacher needs to help with this). The teacher can sit next to the student(s) and clearly repeat words or reinforce directions when they are not understood. | ||||||||||||||||||||||||||||||||||||||||||||||||||||
| New vocabulary | Circle, circumference, centre, radius and diameter; | ||||||||||||||||||||||||||||||||||||||||||||||||||||
| Work Flow | 1st Step - Large group Introducing the topic. Explain that in the lesson students will learn to distinguish between a circle and a circumference and learn more about this geometric shape. We will also see how artists use geometric shapes to create art. 2nd step - identifying circles and circumferences The teacher asks the students to look around and name objects in the classroom where they can identify circles and circumferences: glue sticks, pencil cases or other details on their rucksacks. Students can also name other objects in their daily lives. Let all the students name their discoveries. Recall geometric shapes and solids, focussing on the circle made during the initial game - energizer. Distinguish between the line made by the students (circumference) and the space inside that line (circle). You could also show short videos on how to draw circles on the internet. 3rd Step - Individual "Shall we find the centre of the circle?" Task 1: The teacher distributes a square of paper to each student. He then asks the students to use their compasses and with the ruler measure the opening of the compass at 5 cm. Each student draws a circle. The students cut out the figure. At this point, the teacher shows the students a larger cardboard circle, which they can place in a visible place for all the students and use as a model for the following tasks. Task 2: The teacher explains the following folding sequence step by step. First, he folds the circle into 4 equal parts, first in half and then in half again, always aligning the line of the circle. Discuss what they observe. The students repeat the procedure, step by step, at the same time as the teacher. Unfold the sequence and look at it. Here they can count how many parts the circle has been divided into, how many lines they can see and where they join. *Here you can talk about fractions of the circle (reviews ½; ¼ ). Task 4: Identify the names and cover the lines in the picture with the colours assigned in a stipulated code. The teacher does it on the model and the students repeat it on their picture. (Appendix 2) Example: - centre: 1 blue dot - circumference: green - circle: yellow - diameter: orange - radius: red Task 5: This work can be pasted into the student's individual notebook, or it can be displayed on the board. 3rd Step - Large group Conclusion Circles and circumferences in art and life. Art: The teacher shows the first two slides from Appendix 3: Geometry and Art Powerpoint. He explains that the images are paintings by Kandinsky and Miró and that they used the circle and the circumference in their art. Geometric shapes in life: The teacher shows the following slides with images of different objects where the circle and circumference appear in everyday life: bicycle wheel, basketball hoop, pizza, monuments... 4th Step - Suggested activity Encourage the students to put themselves in the place of the artists. They can use the compass to create their works of art. They can also use toilet roll or kitchen roll and paint to make a picture with different coloured circles. It could be suggested that the class continue to discover different objects at home that resemble the new geometric shapes. If the school has tablets, allow the students to research more about the circle in monuments or other constructions... | ||||||||||||||||||||||||||||||||||||||||||||||||||||
| Reflection | The teacher can ask the students: - "What do you think you learnt that was important today?" - "What did you enjoy learning the most?" - "Which activity did you enjoy the most? - Relaxation activity - Group dynamics - Game - Large group activities - Individual activities The teacher helps to summarise the information by asking the students to consult the poster on the board whenever necessary. | ||||||||||||||||||||||||||||||||||||||||||||||||||||
| Notes | |||||||||||||||||||||||||||||||||||||||||||||||||||||
| Digital Resource | Appendix 1: https://sen-power.eu/atividades/pdf/765_Appendix 1.pdf Appendix 2: https://sen-power.eu/atividades/pdf/765_Appendix 2.pdf Appendix 3: https://sen-power.eu/atividades/digital/765/Appendix 3.pptx | ||||||||||||||||||||||||||||||||||||||||||||||||||||
| 71 | |||||||||||||||||||||||||||||||||||||||||||||||||||||
| | |||||||||||||||||||||||||||||||||||||||||||||||||||||
| 9 |  Grade 4 / Measurement: Problem Solving - money Grade 4 / Measurement: Problem Solving - money | ||||||||||||||||||||||||||||||||||||||||||||||||||||
| Developed by | AECE - Escola Básica da Zona Verde | ||||||||||||||||||||||||||||||||||||||||||||||||||||
| Grade | 4 | ||||||||||||||||||||||||||||||||||||||||||||||||||||
| Duration | 60 | ||||||||||||||||||||||||||||||||||||||||||||||||||||
| Energizers | 42 - My aunt went to ... Location: Classroom No. of participants: All students Organisation: Students sitting in a circle Description of the game: The first person starts "My aunt went to Spain and bought, for example, a hat" (or any object). The next person says "My aunt went to Spain and bought a hat and a suitcase" (i.e. repeats what the previous person said and adds their own object) and so on. Whoever gets it wrong leaves the game. To increase the difficulty: Each object can be ordered in alphabetical order. A - Apple; B – Ball; C- Car; D - Cards; H-Hat; S- Shopping Bag, … | ||||||||||||||||||||||||||||||||||||||||||||||||||||
| Relaxing Exercises | 15 - Moving like a toy The teacher uses a magic word to change the students into many string-loaded (wind-up) toys. At the teacher’s signal, the toys start to move across the class, as many robots, to get their sits. They have to move more quickly at the beginning and then gradually more and more slowly, because their charge is finishing. Some of them will be frozen in the middle of the room, and the teacher has to give their cranks one more turn to help them reach their seats | ||||||||||||||||||||||||||||||||||||||||||||||||||||
| Objectives |
In the end of the lesson should be able to:
| ||||||||||||||||||||||||||||||||||||||||||||||||||||
| Preparation | Resources - computer and video projector - scratching material - empty packets (cereals, biscuits, milk, butter...) - fruit (real, plastic or cut out) - labels with product prices, kilogram or litre prices, promotions ("take 2 pay 1", for example) - file with problem situations (how much money they have, what they need to buy and whether they need more products) - paper notes and coins to print out - supermarket leaflets Preparation: 1. preparing packages or empty product packaging 2. cut out labels with prices and promotions 3. print some paper notes and coins 4. print a problem file 5. create a "sales stall" visible to all the students | ||||||||||||||||||||||||||||||||||||||||||||||||||||
| Introduction | Using money is part of our daily lives. We need it to buy what we eat, wear, put on and also for leisure activities. In this lesson, we'll learn how to identify notes and coins. We'll also see how to make the right choices that allow us to save, make change and even apply discount percentages, based on representations of real situations. | ||||||||||||||||||||||||||||||||||||||||||||||||||||
| Teaching and learning methods | Learning in small steps, reinforcing instructions in smaller chunks that provide for students' different starting points and learning rhythms. Applying the experimental method. Learning through visualisation, experimentation and manipulation. Using group work for co-operative and collaborative learning. - To raise awareness of what is being learnt, encourage learning based on concrete situations that are close to the students; Using new technologies to learn about and consolidate content. | ||||||||||||||||||||||||||||||||||||||||||||||||||||
| Interdisciplinary connections | Mother tongue- Oral skills (comprehension and expression) with a view to interacting appropriately in the context and for various purposes (namely, explaining knowledge, presenting narratives, arguing on the basis of points of view). Citizenship and development - Financial education. | ||||||||||||||||||||||||||||||||||||||||||||||||||||
| Resource teacher or other specialists activities | All the steps in the lesson are understandable for most students with special needs. The lesson doesn't include long written explanations and there aren't many long instructions that are difficult for students in the target group (TGSt). The role of the special needs teacher or assistant teacher is to check that the student is able to understand the stages of the simulation of real situations and to help organise their thinking in order to carry out the calculations. | ||||||||||||||||||||||||||||||||||||||||||||||||||||
| New vocabulary | Discount percentage, change, promotion. | ||||||||||||||||||||||||||||||||||||||||||||||||||||
| Work Flow | 1st step - large group Introduction to the topic The teacher begins the lesson by explaining that the students will be simulating everyday situations involving the buying and selling of products. Before starting the simulation, the teacher introduces the notes and coins, mentions their value and can also show equivalences in value by showing the students the coins and notes one by one. (Appendix 1) on printed paper and powerpoint presentation). 2nd step - Pair Work The teacher asks the students to pair up with the classmate next to them or the one closest to them, and hands out a set of notes and coins which the students cut out and manipulate (Appendix 1A), experimenting with the equivalence between notes and coins. The teacher asks questions to explain and to challenge the class. 3rd step - Small groups work Practical activity The students get into groups of 4 or 5. The teacher introduces the ‘stall’, a table prepared in advance with boxes, empty packaging and clippings from supermarket leaflets and various price tags (appendix 2) (including discounts: 50% / take 2 pay 1...). Each group is invited to look at the ‘stall’ and make a shopping list on a white sheet of paper according to what is on display. Then two members of each group get up and go shopping, collecting what's on the list from the stall. With the participation of all the members of the group, they do the calculations to pay the teacher, who is the owner of the supermarket and who will collect the money. For the groups that have finished, the teacher can provide a problem situation from Appendix 3. 4th step - Individual Proposal to solve an individual mini formative test (appendix 4) | ||||||||||||||||||||||||||||||||||||||||||||||||||||
| Reflection | The teacher summarises the information given in class and helps students to think about the best option to take in a real-life situation, for example when shopping with their parents. As a family activity, the teacher can ask the class to make a visit to a market or shopping centre where they can take part, see and reflect on smart and more economical options. At the end of the lesson the teacher can ask the students: "What do you think was the most important thing you learnt today?" "Which activity did you enjoy the most? "How do you think what you learnt today could be useful in your day-to-day life?" | ||||||||||||||||||||||||||||||||||||||||||||||||||||
| Notes | |||||||||||||||||||||||||||||||||||||||||||||||||||||
| Digital Resource | Appendix 1: https://sen-power.eu/atividades/digital/766/Appendix 1.pptx Appendix 1A: https://sen-power.eu/atividades/pdf/766_Appendix 1A.pdf Appendix 2: https://sen-power.eu/atividades/pdf/766_Appendix 2.pdf Appendix 3: https://sen-power.eu/atividades/pdf/766_Appendix 3.pdf Appendix 4: https://sen-power.eu/atividades/pdf/766_Appendix 4.pdf | ||||||||||||||||||||||||||||||||||||||||||||||||||||
| 72 | |||||||||||||||||||||||||||||||||||||||||||||||||||||
| | |||||||||||||||||||||||||||||||||||||||||||||||||||||
| 10 |  Grade 4 / Real-Life Math Challenges Grade 4 / Real-Life Math Challenges | ||||||||||||||||||||||||||||||||||||||||||||||||||||
| Developed by | Antalya Directorate Of Education | ||||||||||||||||||||||||||||||||||||||||||||||||||||
| Grade | 4 | ||||||||||||||||||||||||||||||||||||||||||||||||||||
| Duration | 60 | ||||||||||||||||||||||||||||||||||||||||||||||||||||
| Energizers | 2 - Moo!!! The teacher assigns randomly in a piece of paper (turned upside down on their desks) each student with farm animal, i.e. ‘cow’, ‘horse’, ‘sheep’, ‘rooster’, etc. Once the students are informed of their animal role, they are instructed to walk around the room acting like the animal they are assigned (i.e. making its sound), in order to find their kind. | ||||||||||||||||||||||||||||||||||||||||||||||||||||
| Relaxing Exercises | 33 - I am a tree This game consists of students acting like a growing tree. With relaxing music in the background and low lighting, Imagine you are a seed in the soil which grows into a large tree. Start in a kneeling position with your heads tilted downwards. Then you squat and gradually start rising up and stretching your arms upwards as if they were large branches. This relaxing exercise can be repeated a few times explaining that the wind blows the seeds away and the grow into new trees. | ||||||||||||||||||||||||||||||||||||||||||||||||||||
| Objectives |
| ||||||||||||||||||||||||||||||||||||||||||||||||||||
| Preparation | Materials:
| ||||||||||||||||||||||||||||||||||||||||||||||||||||
| Introduction | Begin by asking students to share when they have seen adults use math in their daily lives. Introduce the concept of math as a problem-solving tool that is used in various real-life situations.. | ||||||||||||||||||||||||||||||||||||||||||||||||||||
| Teaching and learning methods | Activity-Based Learning: Students will rotate through stations that each feature a different real-life math problem (e.g., grocery shopping, planning a trip, budgeting an allowance). Group Discussions: After completing activities, students will discuss the challenges and solutions in small groups. Reflection: Students will write a brief reflection on what they learned about the practical uses of math. | ||||||||||||||||||||||||||||||||||||||||||||||||||||
| Interdisciplinary connections | Financial Literacy: Understanding money, budgeting, and the concept of value. Practical Life Skills: Measuring, estimating, and making informed decisions based on data. | ||||||||||||||||||||||||||||||||||||||||||||||||||||
| Resource teacher or other specialists activities | The resource teacher can guide students with learning challenges by providing additional examples or simpler problem scenarios. One-on-one support can be provided for students who need help with basic math operations or understanding the problem statements. | ||||||||||||||||||||||||||||||||||||||||||||||||||||
| New vocabulary | Budget, Expense, Revenue, Profit, Loss, Measurement, Estimate, Percentage, Discount, Interest. | ||||||||||||||||||||||||||||||||||||||||||||||||||||
| Work Flow | Step 1: Introduction to Real-Life Math (5 min):
Step 2: Exploring Math Stations (30 min): Setup and Group Organization (5 min):
Grocery Store Budgeting Station (10 min): Aim: Enhance skills in budgeting and arithmetic by planning a meal purchase within a fixed budget. Students learn to prioritize essential items over luxury items to stay within budget. Travel Planning Station (10 min): Aim: Develop planning and calculation skills by organizing a trip within a set budget. This station teaches students to calculate distances, travel times, and costs associated with transportation and activities. Saving for a Toy Station (10 min): Aim: Understand savings concepts and time value of money. Students calculate how long it will take to save for a desired item based on a fixed weekly allowance. Yard Sale Profit Calculation Station (optional, if you'd like to add more stations): Aim: Apply addition and subtraction to calculate total earnings from a yard sale and understand profit and loss. Students decide on prices for items and calculate total income versus expected goals. School Supplies Division Station (optional, for additional practice): Aim: Practice division and fair distribution by dividing supplies among a group. This station teaches the importance of equal sharing and introduces basic division concepts. Picnic Party Budgeting Station: Aim: Students will use budgeting skills to plan a picnic within a specific budget. They will select items and quantities that fit within their budget, practicing addition and subtraction to ensure they do not exceed the set amount. Birthday Party Budget Station: Aim: Encourage financial literacy by having students plan a birthday party with a fixed budget. They will allocate funds for various party necessities, learning to prioritize spending and manage money effectively. Planting a Garden Station: Aim: Introduce students to budgeting and planning for a project by creating a garden. They will calculate the cost of plants, soil, and tools within a budget, applying addition and multiplication to determine total costs
Groups rotate after a set time to ensure that each group experiences all the stations. Facilitate smooth transitions between stations, ensuring each group understands the task at hand before beginning.
Step 3: Class Discussion and Recap (5 min): Bring the class together to discuss the reflections.
Conclude by reiterating the value of math in everyday life and encourage students to share any additional thoughts. | ||||||||||||||||||||||||||||||||||||||||||||||||||||
| Reflection |
| ||||||||||||||||||||||||||||||||||||||||||||||||||||
| Notes | |||||||||||||||||||||||||||||||||||||||||||||||||||||
| Digital Resource | |||||||||||||||||||||||||||||||||||||||||||||||||||||
| 73 | |||||||||||||||||||||||||||||||||||||||||||||||||||||
| | |||||||||||||||||||||||||||||||||||||||||||||||||||||
| 11 |  Grade 4 / Visualising Fractions: Art Gallery Maths Grade 4 / Visualising Fractions: Art Gallery Maths | ||||||||||||||||||||||||||||||||||||||||||||||||||||
| Developed by | Antalya Directorate Of Education | ||||||||||||||||||||||||||||||||||||||||||||||||||||
| Grade | 4 | ||||||||||||||||||||||||||||||||||||||||||||||||||||
| Duration | 60 | ||||||||||||||||||||||||||||||||||||||||||||||||||||
| Energizers | 7 - Connecting eyes Participants stand in a circle. Each person makes eye contact with another person across the circle. The two walk across the circle and exchange positions, while maintaining eye contact. Many pairs can exchange at the same time, and the group should try to make sure that everyone in the circle is included in the exchange. Tip: Begin by trying this in silence and then exchange greetings in the middle of the circle. Variations: If the teacher considers, knowing the class atmosphere, that some students might be left not participating, i.e. they try to make eye contact but nobody responds to them and they have no chance to move from their initial position, the moderator could divide the class in 2 groups and introduce a competitive element – after the activity each group will be marked on the ‘team spirit thermometer’ (which could be printed on a A4 paper and the teacher marks the degrees with a marker). The more people you have left not participating in the ‘eye contact’ activity – the lower the degrees to be marked on the thermometer. | ||||||||||||||||||||||||||||||||||||||||||||||||||||
| Relaxing Exercises | 11 - Breathing exercise Teacher asks students to make a circle and do the following exercises, repeating each one few times and alternate them. Teacher can also add new ones. Breathing in raise your arms above your head and say “Elevator Up!” Breathing out, float your arms back down to your sides, saying “Elevator Down.” Repeat. Take three quick breaths in while wiggling your nose. Wiggle your nose on each breath in. Then wiggle your nose on each breath out. Hold your hand in front of your nose and hiss hiss hiss while breathing out. | ||||||||||||||||||||||||||||||||||||||||||||||||||||
| Objectives |
| ||||||||||||||||||||||||||||||||||||||||||||||||||||
| Preparation | Material Preparation: Ensure all necessary materials are prepared and accessible before the lesson begins. This helps avoid disruptions and ensures a smooth flow of the activity.
| ||||||||||||||||||||||||||||||||||||||||||||||||||||
| Introduction |
| ||||||||||||||||||||||||||||||||||||||||||||||||||||
| Teaching and learning methods |
| ||||||||||||||||||||||||||||||||||||||||||||||||||||
| Interdisciplinary connections |
| ||||||||||||||||||||||||||||||||||||||||||||||||||||
| Resource teacher or other specialists activities |
| ||||||||||||||||||||||||||||||||||||||||||||||||||||
| New vocabulary | Fraction, Numerator, Denominator, Equivalent Fractions, Unit Fraction: Use visual aids and actual fraction pieces to demonstrate these concepts during the introduction. | ||||||||||||||||||||||||||||||||||||||||||||||||||||
| Work Flow | Step 1: Introduction to Fractions (10 minutes): Objective: Engage students by discussing what fractions are and how they represent parts of a whole. Activity: Use real-life examples like dividing pizzas or pies to introduce the concept of fractions. Step 2: Interactive Demonstration of Tracing (5 minutes): Objective: Demonstrate how to trace and fold circles to create different fractions. Activity: Show tracing and folding techniques using plastic cups or compasses on colored paper, preparing for the art project. Step 3: Trace, Fold, Cut, and Arrange - students’ activity (35 minutes): Objective: Students create their own fraction art pieces. Activity Breakdown: Tracing & Cutting: Students trace and cut circles into fractions (½, ¼, ⅛, 1/16). Arranging & Gluing: Students arrange these fractions on black cardstock and glue them to create unique art designs. Peer Interaction: Encourage students to discuss their choices and the fraction concepts used during the creation process. Step 4: Gallery Walk and Peer Discussion (5 minutes): Objective: Share and critique artworks to understand diverse ways fractions can be visually represented. Activity: Students walk around the room, view peers' artwork, and discuss the fraction concepts displayed. Step 5: Application of Concepts Using "Pizza Fraction Quiz" (10 minutes): Objective: Reinforce fraction concepts through practical application. Activity:
Discuss why certain divisions (e.g., into thirds, fourths, fifths) are used for different numbers of people sharing a pizza. | ||||||||||||||||||||||||||||||||||||||||||||||||||||
| Reflection |
| ||||||||||||||||||||||||||||||||||||||||||||||||||||
| Notes | Instruction Readiness: Be prepared to provide extra guidance for students who may find the concepts challenging. Have additional simple examples and hands-on demonstrations ready to help these students grasp the concepts more clearly. Adaptability: Be mindful of the students' comprehension levels and adapt the complexity of the fraction tasks accordingly. This might involve simplifying or complicating the fractions used based on the group's overall or individual readiness. | ||||||||||||||||||||||||||||||||||||||||||||||||||||
| Digital Resource | |||||||||||||||||||||||||||||||||||||||||||||||||||||
| 74 | |||||||||||||||||||||||||||||||||||||||||||||||||||||
| | |||||||||||||||||||||||||||||||||||||||||||||||||||||
| 12 |  Grade 4 / Multiplication of multi-digit number by 1-digit number without carrying Grade 4 / Multiplication of multi-digit number by 1-digit number without carrying | ||||||||||||||||||||||||||||||||||||||||||||||||||||
| Developed by | Prosveta-Sofia Foundation | ||||||||||||||||||||||||||||||||||||||||||||||||||||
| Grade | 4 | ||||||||||||||||||||||||||||||||||||||||||||||||||||
| Duration | 50 | ||||||||||||||||||||||||||||||||||||||||||||||||||||
| Energizers | 20 - Chief of clan Everyone stands in a circle. One participant closes his/her eyes or steps out of the room. He/She will have to guess who is the chief of the clan. One participant volunteers to be the secret Chief (quietly, so the "guesser" can't hear anything). The chief begins an action such as snapping fingers, patting the tummy, or slapping knees, and everyone in the circle imitates him/her. The guesser returns to the room and tries to figure out who the chief is. As the guesser looks around, the chief changes the action avoiding being detected. | ||||||||||||||||||||||||||||||||||||||||||||||||||||
| Relaxing Exercises | 20 - Holding legs Participants work in pairs. And you can put a quiet and relaxing music (or sounds like water falling down, sea waves, etc.). Half of the participants are asked to lie down face up, eyes closed, with their left leg extended on the floor and their right leg elevated. Another participant stands up and loops a towel around the heel of the other’s right foot and holds the ends of the towel in his/her hands, and makes soft and gentle movements (upwards and downwards, and sidewards) while the other totally relaxes his/her leg. Then they repeat the same process with the left leg. Then the participants switch roles. | ||||||||||||||||||||||||||||||||||||||||||||||||||||
| Objectives | Students will: • learn how to do oral calculations; • master the written algorithm for multiplying a multi-digit number by1-digit number without carrying; • calculate and compare values of numerical expressions; • solve text problems; • gain confidence in their capabilities. | ||||||||||||||||||||||||||||||||||||||||||||||||||||
| Preparation | Materials Markers/coloured pencils/crayons Glue Scissors Equipment Laptop and projector Preparation 1. Make colour copies of Handout 1 for each desk/table. 2. Make colour copies of Handout 2 for each student. 3. Make colour copies of Handout 4 for each student. | ||||||||||||||||||||||||||||||||||||||||||||||||||||
| Introduction | You already know the numbers bigger than 1000 and how to do addition and subtraction with them, but do you know how you can multiply multi-digit numbers? In this lesson you will take the next step on the path of knowledge. You will learn how to multiply a multi-digit number by a single-digit number without carrying. | ||||||||||||||||||||||||||||||||||||||||||||||||||||
| Teaching and learning methods | Learning in small steps Using visualization and manipulatives. | ||||||||||||||||||||||||||||||||||||||||||||||||||||
| Interdisciplinary connections | Mother tongue – oral communication. Physical education | ||||||||||||||||||||||||||||||||||||||||||||||||||||
| Resource teacher or other specialists activities | The steps in the lesson are comprehensible to most students with special needs who have well-preserved cognitive abilities. The text and instructions of the tasks are short and clear. The role of the support teacher is to help students if they don’t understand the instructions. | ||||||||||||||||||||||||||||||||||||||||||||||||||||
| New vocabulary | There is no new vocabulary in the lesson. | ||||||||||||||||||||||||||||||||||||||||||||||||||||
| Work Flow | 1. The lesson begins with updating students' knowledge and skills for multiplying numbers similar to: 3x4, 3x40, 3x400 and 3x4000. The teacher distributes Handout 1 to each desk/table. He/she may have cut the circles from page 2 or leave this activity to the students. In each column of the provided tables, students should stick the correct number of circles in order to present the second multiplier in the products (the first multiplier equals to the number of columns of the tables). For example, to visualize the product 3 x 4, in each column of table (a) there should be glued 4 circles with number. After that, students calculate/count the number of ones, tens, hundreds and thousands in each table and fill in the missing numbers in the products. Students could play the online games: https://wordwall.net/resource/70937847 and https://wordwall.net/resource/70938027 . When doing the second game, the teacher can name a student to report the answer and then turn over the card to check the given answer. In case of a mistake, a comment is made and the teacher explains how to get the correct answer. (10 min)
In task 1, in each column of the corresponding table, students have to colour as many circles as the number of specified ordinal units in the first multiplier of the product. After that, they fill in the entry the table below and calculate using the distributive property of multiplication linked to addition. In task 2, students again use the distributive property of multiplication linked to addition by writing in the cells the result of the multiplication element by element (multiplying the ones, after that – the ten, after that – the hundreds, etc) and then, all the products are added together. (10 min) 3. The teacher opens the presentation from Annex 3 and sets the task from slide 2. The students read it and suggest ways of solving it. It is concluded that in order to solve the problem, one has to calculate the product of the numbers 1242 and 2. The teacher shows how you can easily calculate mentally the product of a multi-digit number with a single-digit number without carrying (slide 3). Slide 4 presents the written algorithm for calculating products. Remember students to start the multiplication starts from the ones (Step 1). (5 min) 4. The teacher distributes Handout 4 to each student. In task 1 students have to calculate the products. In task 2 they have to calculate the expressions. In task 3 students have to calculate the expressions and compare their values. Problems 4 and 5 are word problems where they have to use multiplication. (10 min) 5. The teacher summarizes the algorithm presented in the lesson. (2 min) | ||||||||||||||||||||||||||||||||||||||||||||||||||||
| Reflection | Discuss the questions in the plenary:
| ||||||||||||||||||||||||||||||||||||||||||||||||||||
| Notes | |||||||||||||||||||||||||||||||||||||||||||||||||||||
| Digital Resource | |||||||||||||||||||||||||||||||||||||||||||||||||||||
| 75 | |||||||||||||||||||||||||||||||||||||||||||||||||||||
| | |||||||||||||||||||||||||||||||||||||||||||||||||||||
| 13 |  Grade 4 / Word problems based on data from tables, diagrams, charts using multiplication of a multi-digit number by a two-digit number. Grade 4 / Word problems based on data from tables, diagrams, charts using multiplication of a multi-digit number by a two-digit number. | ||||||||||||||||||||||||||||||||||||||||||||||||||||
| Developed by | Prosveta-Sofia Foundation | ||||||||||||||||||||||||||||||||||||||||||||||||||||
| Grade | 4 | ||||||||||||||||||||||||||||||||||||||||||||||||||||
| Duration | 60 | ||||||||||||||||||||||||||||||||||||||||||||||||||||
| Energizers | 19 - Grab the finger In a circle, place right finger on next person s left palm. Try to grab a finger before yours gets grabbed. After doing several times switch; place left finger on next person s right palm and repeat the process for a few times. | ||||||||||||||||||||||||||||||||||||||||||||||||||||
| Relaxing Exercises | 18 - Making room Participants are asked to raise their arms with palms facing up, imagining that they are pushing up the ceiling and are asked do a lot of strength in that direction to increase the space of the room where they are. Then they are asked to turn the arms down with palms facing down thinking that they are pushing down the floor. They are asked to push away the walls turning their left arm and palm to the wall on their left and their right arm and palm to the wall that’s on their right. | ||||||||||||||||||||||||||||||||||||||||||||||||||||
| Objectives | Students will: • strengthen their skills for multiplying a multi-digit number by a two-digit number; • improve their skills for retrieving information presented in a pictorial way (tables, sketches, drawings, charts); • strengthen their skills for composing word problems based on data presented in a pictorial way; • understand better the practical applications of mathematics; • gain confidence in their abilities. | ||||||||||||||||||||||||||||||||||||||||||||||||||||
| Preparation | Materials Markers/coloured pencils/crayons Equipment Laptop and projector Preparation 1. Make colour copies of Handout 1 for each student. 2. Make colour copies of Handout 3 for each student. 3. Print Handout 4 for each desk/table. 4. Print Handout 5 in several copies and cut the pictures from the table separately. | ||||||||||||||||||||||||||||||||||||||||||||||||||||
| Introduction | Information can be presented in different ways. It can be illustrated with pictures, described in words, presented schematically or by using art. This is reflected in Mathematics. Data can be presented with diagrams, drawings, sketches and charts. For easier perception and understanding of information, it is presented with tables or illustrated with charts. Therefore, it is important to be able to extract data from different sources, understand them correctly and use them to solve different tasks. | ||||||||||||||||||||||||||||||||||||||||||||||||||||
| Teaching and learning methods | Learning in small steps Using of technology and visualization Group work/pair work Demonstration | ||||||||||||||||||||||||||||||||||||||||||||||||||||
| Interdisciplinary connections | Mother tongue Science Art | ||||||||||||||||||||||||||||||||||||||||||||||||||||
| Resource teacher or other specialists activities | Using manipulatives:
| ||||||||||||||||||||||||||||||||||||||||||||||||||||
| New vocabulary | |||||||||||||||||||||||||||||||||||||||||||||||||||||
| Work Flow |
The teacher distributes Handout 1 for individual work. If necessary, the multiplication algorithm is remembered to the class by having a student to demonstrate it on the board and providing relevant explanations by the teacher. In task 1 students have to complete the intermediate products by writing the missing numbers. In task 2 they have to calculate the products, find the answer among the provided numbers and color the box with the problem in the same colour as the box with the result. In task 3 they calculate the products, compare the result with the number 100,000, and match it to correct one. Various e-games and resources can be used to launch the lesson, e.g. https://www.mathgames.com/skill/4.120-multiply-a-2-digit-number-by-a-2-digit-number or https://wordwall.net/resource/36987646/math/2-digit-by-2-digit-multiplication (10 min) 2. The teacher explains that information can be presented in different ways - with drawings, diagrams, charts, tables, etc. This is demonstrated with the presentation from Annex 2. At the discretion of the teacher, some of the tasks given as examples may be solved. (5 min) 3. The teacher distributes Handout 3 to students and opens the handout on the screen. The tasks are solved as a whole-class activity with the corresponding comments being made; students record the solutions on their worksheets. (10 min) 4. The teacher distributes Handout 4 to each desk/table. Students use the provided pictorial information and do the tasks. In task 1 they have to extract information represented in the pictures and represent it using a pie chart. In task 2 students have to extract information from a pie chart and fill in the missing numbers in the text. In task 3 they have to extract information from a table and present it using a block graph. In task 4 students have to compose a word problem using the information from the pictures, and solve the problem. Pairs volunteer to read the word problems they have created for the rest of the class solve them. (10 min) | ||||||||||||||||||||||||||||||||||||||||||||||||||||
| Reflection | The teacher could collect feedback about the different ways of presenting information and, at the same time, sum them up, by the following questions and activities:
| ||||||||||||||||||||||||||||||||||||||||||||||||||||
| Notes | |||||||||||||||||||||||||||||||||||||||||||||||||||||
| Digital Resource | |||||||||||||||||||||||||||||||||||||||||||||||||||||
| 76 | ||
| | ||
| Interdisciplinary Lessons
| ||
| 77 | |||||||||||||||||||||||||||||||||||||||||||||||||||||
| | |||||||||||||||||||||||||||||||||||||||||||||||||||||
| 1 |  Interdisciplinary lessons / Water Interdisciplinary lessons / Water | ||||||||||||||||||||||||||||||||||||||||||||||||||||
| Developed by | IPSantarem - Bento Cavadas e Nelson Mestrinho | ||||||||||||||||||||||||||||||||||||||||||||||||||||
| Grade | 3 | ||||||||||||||||||||||||||||||||||||||||||||||||||||
| Duration | 50 | ||||||||||||||||||||||||||||||||||||||||||||||||||||
| Energizers | 28 - Water cycle Explain to the kids the process of the water cycle (evaporation, condensation, precipitation) in simple terms. Play some music and have the kids dance around the play area. When the music stops, call out one of the water cycle stages. When a stage is called out, the kids must quickly freeze in place, acting out the corresponding stage (e.g., spinning to represent evaporation or forming a group to mimic precipitation). Continue playing the music and calling out stages intermittently. | ||||||||||||||||||||||||||||||||||||||||||||||||||||
| Relaxing Exercises | 26 - Raindrops Close your eyes and imagine that you are a water drop that falls in the ocean when it is raining. Imagine how you can return to the cloud due to the water cycle process. | ||||||||||||||||||||||||||||||||||||||||||||||||||||
| Objectives | Students will:
| ||||||||||||||||||||||||||||||||||||||||||||||||||||
| Preparation | Materials 1 tray Tubes Water bottles Equipment Laptop and projector Digital resources YouTube® educational videos Preparation for the lesson
| ||||||||||||||||||||||||||||||||||||||||||||||||||||
| Introduction | For the teacher: This interdisciplinary lesson plan aims that students explore the quantity used to measure precipitation by doing hand-on experiments. When primary school students are asked about how to measure the rain falling from the clouds, many of them would answer that volume is the proper quantity to measure it. However, volume does not allow comparisons between the quantities of rain that fall in different regions, whereas millimetres do. The lesson plan follows the inquiry-based learning approach. | ||||||||||||||||||||||||||||||||||||||||||||||||||||
| Teaching and learning methods | Inquiry-Based learning Collaborative learning | ||||||||||||||||||||||||||||||||||||||||||||||||||||
| Interdisciplinary connections | Mathematics: reasoning skills Science: Water | ||||||||||||||||||||||||||||||||||||||||||||||||||||
| Resource teacher or other specialists activities | Almost all the steps of the lesson are comprehensible to most special needs students who have well-preserved cognitive abilities. The lesson does not comprise long written explanations. The role of the special needs teacher or the assistant teacher is to help target group students in case they are not able to cope with some of the tasks or steps. | ||||||||||||||||||||||||||||||||||||||||||||||||||||
| New vocabulary | flood, water, water cycle, prevention, damage | ||||||||||||||||||||||||||||||||||||||||||||||||||||
| Work Flow |
Start the lesson by asking students what they know about water and the water cycle. Explain the water cycle (evaporation, condensation, precipitation) in simple terms and using visuals. Educational resource for kids about the water cycle: https://youtu.be/ncORPosDrjI Part II | Measuring precipitation Start the Part II by presenting the news from Annex 1 to students. Then ask the question: How is rainfall measured? Collect their initial ideas. They might say that volume is a good idea to measure rainfall. At this stage you accept all answers. Next, engage students in the following experiment. What you need:
Observation: Some bottles must have a round cross section while others should have other shapes (Figure 1).
Figure 1. Plastic bottles with different shapes (Source: Freepik). Instructions:
Figure 2. Model of the experiment.
Discussion:
Conclusion The main observation from this experience is that volume is not a good measure for rainfall because volume varies according to the area of the cross section of the plastic bottles. The height of the columns of water does not vary between the recipients, and that is the reason why millimetres of column of water is a better measure for rainfall. Moreover, millimetres of the column of water allows comparison of precipitation between different zones. 5 min | ||||||||||||||||||||||||||||||||||||||||||||||||||||
| Reflection | Guided discussion:
| ||||||||||||||||||||||||||||||||||||||||||||||||||||
| Notes | |||||||||||||||||||||||||||||||||||||||||||||||||||||
| Digital Resource | Annex 1 https://sen-power.ipsantarem.pt/atividades1/pdf/656_Annex1.pdf | ||||||||||||||||||||||||||||||||||||||||||||||||||||
| 78 | |||||||||||||||||||||||||||||||||||||||||||||||||||||
| | |||||||||||||||||||||||||||||||||||||||||||||||||||||
| 2 |  Interdisciplinary lessons / Water: Flooding in urban environment Interdisciplinary lessons / Water: Flooding in urban environment | ||||||||||||||||||||||||||||||||||||||||||||||||||||
| Developed by | IPSantarem - Bento Cavadas e Nelson Mestrinho | ||||||||||||||||||||||||||||||||||||||||||||||||||||
| Grade | 3 | ||||||||||||||||||||||||||||||||||||||||||||||||||||
| Duration | 50 | ||||||||||||||||||||||||||||||||||||||||||||||||||||
| Energizers | 28 - Water cycle Explain to the kids the process of the water cycle (evaporation, condensation, precipitation) in simple terms. Play some music and have the kids dance around the play area. When the music stops, call out one of the water cycle stages. When a stage is called out, the kids must quickly freeze in place, acting out the corresponding stage (e.g., spinning to represent evaporation or forming a group to mimic precipitation). Continue playing the music and calling out stages intermittently. | ||||||||||||||||||||||||||||||||||||||||||||||||||||
| Relaxing Exercises | 26 - Raindrops Close your eyes and imagine that you are a water drop that falls in the ocean when it is raining. Imagine how you can return to the cloud due to the water cycle process. | ||||||||||||||||||||||||||||||||||||||||||||||||||||
| Objectives | Students will:
| ||||||||||||||||||||||||||||||||||||||||||||||||||||
| Preparation | Materials 1 tray Lego® Tubes Water bottles Equipment Laptop and projector Digital resources YouTube® educational videos Preparation for the lesson
| ||||||||||||||||||||||||||||||||||||||||||||||||||||
| Introduction | Climate change consequences, such as flooding, are a major problem for many European cities. Flooding typically occurs when prolonged rain falls over several days, when intense rain falls over a short period of time, or when an ice or debris jam causes a river or stream to overflow onto the surrounding area. Flooding can also result from the failure of a water control structure, such as a levee or dam. The most common cause of flooding is water due to rain and/or snowmelt that accumulates faster than soils can absorb it or rivers can carry it away (National Weather Service). According to the Federal Emergency Management Agency (FEMA), urban flooding is “the inundation of property in a built environment, particularly in more densely populated areas, caused by rain falling on increased amounts of impervious surfaces and overwhelming the capacity of drainage systems.” In this lesson you are going to explore urban flooding causes and consequences with primary school students. | ||||||||||||||||||||||||||||||||||||||||||||||||||||
| Teaching and learning methods | Inquiry-Based learning Collaborative learning | ||||||||||||||||||||||||||||||||||||||||||||||||||||
| Interdisciplinary connections | Mathematics: reasoning skills Science: Water Arts: creating a city with Lego® | ||||||||||||||||||||||||||||||||||||||||||||||||||||
| Resource teacher or other specialists activities | Almost all the steps of the lesson are comprehensible to most special needs students who have well-preserved cognitive abilities. The lesson does not comprise long written explanations. The role of the special needs teacher or the assistant teacher is to help target group students in case they are not able to cope with some of the tasks or steps. | ||||||||||||||||||||||||||||||||||||||||||||||||||||
| New vocabulary | flood, water, water cycle, prevention, damage | ||||||||||||||||||||||||||||||||||||||||||||||||||||
| Work Flow |
Part II | Rainfall and urban flooding
Phase 1 | Simulation of rainwater drainage in a city, without rainwater blockage
Figure 1. Model of the experiment. 3. After the drain water falls into the plastic bottle or the measuring cup, the students should count the time in order to mark on the plastic bottle or measuring cup (e.g. using a marker), the amount of water that drained during the first minute, then during the second minute, and so on, until no more drain water flows. 4. Ask students to measure the amount of water inside the plastic bottle, or if they use a measuring cup – to calculate the amount of water, identifying the amount corresponding to each minute. The data can be registered in the table (Annex 1):
Phase 2 | Simulation of blockage on rain water drains
Phase 3 | Simulation of heavy rain Simulation of normal rain:
Simulation of heavy rain:
30 min Discussion:
Example of a hypothetical graphical representation. 20 min Conclusion The main idea of this experiment is that students understand better the causes of urban flooding. One cause is the blockage of rainwater drains. Another cause is heavy rain in a short period of time. At the same time, students will have the opportunity to use mathematical language to quantitatively represent, describe and interpret phenomena arising from the experimental environment, with obvious connections to the subject under study - urban flooding. | ||||||||||||||||||||||||||||||||||||||||||||||||||||
| Reflection | Guided discussion (5 min):
Pedagogical suggestion:
| ||||||||||||||||||||||||||||||||||||||||||||||||||||
| Notes | |||||||||||||||||||||||||||||||||||||||||||||||||||||
| Digital Resource | Annex 1 https://sen-power.ipsantarem.pt/atividades1/pdf/657_Annex1.pdf | ||||||||||||||||||||||||||||||||||||||||||||||||||||
| 79 | |||||||||||||||||||||||||||||||||||||||||||||||||||||
| | |||||||||||||||||||||||||||||||||||||||||||||||||||||
| 3 |  Interdisciplinary lessons / Measuring human footprints Interdisciplinary lessons / Measuring human footprints | ||||||||||||||||||||||||||||||||||||||||||||||||||||
| Developed by | IPSantarem - Bento Cavadas e Nelson Mestrinho | ||||||||||||||||||||||||||||||||||||||||||||||||||||
| Grade | 3 | ||||||||||||||||||||||||||||||||||||||||||||||||||||
| Duration | 30 | ||||||||||||||||||||||||||||||||||||||||||||||||||||
| Energizers | 48 - Movement Part I The teacher asks the students to form pairs and gives each pair a piece of paper and a pencil. Then, each student should trace their right footprint on the paper and write their name next to it. Afterward, they should observe both footprints and identify which one is larger. Part II Teacher says to the students: “So today, let’s walk, run, or jump with energy!”. Students should move around, walking, running or jumping at the sound of a previous music chosen by the teacher. | ||||||||||||||||||||||||||||||||||||||||||||||||||||
| Relaxing Exercises | 31 - Triangle of friendship Students work in pairs to draw a triangle to represent their friendship. Before starting the work, the teacher demonstrates the steps with one of the children. The two persons in the pair place their hands down with the palms facing the surface of the paper sheet; student 1 uses his/her right hand, and student 2 uses his/her left hand. They join the tips of the thumbs and the forefingers of the left hand of one of the pair with the tips of their thumbs and forefingers and outline the shape of the triangle between the fingers. After that, they can draw eyes, a nose, a mouth and whatever they want to, in order to design a personal symbol of their relationship. | ||||||||||||||||||||||||||||||||||||||||||||||||||||
| Objectives | Students will:
| ||||||||||||||||||||||||||||||||||||||||||||||||||||
| Preparation | Materials Paper (A4) and markers Ruler (to measure footprints) Measuring tape (to measure the height of the student) | ||||||||||||||||||||||||||||||||||||||||||||||||||||
| Introduction | Human footprints are more than just traces left behind in the ground. They are a symbol of our existence and interaction with the world. From ancient times to the present, footprints have represented our journey, movement, and impact on the environment. In a literal sense, they are physical marks that record our presence, whether on a sandy beach, muddy path, or snowy terrain. On a broader scale, human footprints also represent our "footprint" on the planet. This includes our contributions to climate change, deforestation, and biodiversity loss, as well as the cultural and historical traces we leave in art, architecture, and innovation. Understanding human footprints, in both their physical and metaphorical forms, helps us reflect on our relationship with nature, the consequences of our actions, and the paths we carve for future generations. This is a mathematics and science interdisciplinary activity because it connects measurement with the human body. 5 min | ||||||||||||||||||||||||||||||||||||||||||||||||||||
| Teaching and learning methods | Inquiry-Based learning Collaborative learning | ||||||||||||||||||||||||||||||||||||||||||||||||||||
| Interdisciplinary connections | Mathematics: reasoning and measuring skills Arts: drawing footprints Sports: practical activity (energizer) | ||||||||||||||||||||||||||||||||||||||||||||||||||||
| Resource teacher or other specialists activities | Almost all the steps of the lesson are comprehensible to most special needs students who have well-preserved cognitive abilities. The lesson does not comprise long written explanations. The role of the special needs teacher or the assistant teacher is to help target group students in case they are not able to cope with some of the tasks or steps. | ||||||||||||||||||||||||||||||||||||||||||||||||||||
| New vocabulary | Footprint | ||||||||||||||||||||||||||||||||||||||||||||||||||||
| Work Flow | Part I | Measuring footprints
Figure 1. Information that each student should write in the footprint. Part II | Footprint sequence
Figure 2. Example of a sequence of footprints arranged by increasing size. 20 min | ||||||||||||||||||||||||||||||||||||||||||||||||||||
| Reflection | Guided discussion:
10 min | ||||||||||||||||||||||||||||||||||||||||||||||||||||
| Notes | |||||||||||||||||||||||||||||||||||||||||||||||||||||
| Digital Resource | |||||||||||||||||||||||||||||||||||||||||||||||||||||
| 80 | |||||||||||||||||||||||||||||||||||||||||||||||||||||
| | |||||||||||||||||||||||||||||||||||||||||||||||||||||
| 4 |  Interdisciplinary lessons / Dinosaur locomotion Interdisciplinary lessons / Dinosaur locomotion | ||||||||||||||||||||||||||||||||||||||||||||||||||||
| Developed by | IPSantarem - Bento Cavadas e Nelson Mestrinho | ||||||||||||||||||||||||||||||||||||||||||||||||||||
| Grade | 3 | ||||||||||||||||||||||||||||||||||||||||||||||||||||
| Duration | 2h30 | ||||||||||||||||||||||||||||||||||||||||||||||||||||
| Energizers | 45 - The dinosaur energizer Ask each student to think of their favourite dinosaur and be ready to share it with the class. Then, organize the students in a straight line, standing side by side. Now, each student should imitate the dinosaur movement following these steps:
After everyone has had a turn, gather the students for a brief discussion. Ask them to share what they noticed about the different types of dinosaur movements. Discuss how the structure and size of each dinosaur might have influenced its way of moving. As an alternative: If the school has a large enough sandpit, a short activity could be organised to make students realise the relationship between the way humans move and the marks registered on the ground. This activity would consist of asking students to freely produce footprints in the sand as a result of walking (A) or running (B) (Figure 3). Figure 3. Walking and running footprints. The aim of this exploration would be to realise that the higher the speed of movement, the further apart the footprints tend to be arranged on the track, as well as more aligned (B), as opposed to walking, where consecutive footprints tend to be closer together and more side by side (A). Some engaging questions are:
At this stage the teacher can organise a more structured demonstration, with a chosen student, to compare the two situations. | ||||||||||||||||||||||||||||||||||||||||||||||||||||
| Relaxing Exercises | 40 - Guided fantasy with dinosaurs Close your eyes and take a deep breath in. Slowly exhale and feel your body relax. Imagine that you are in a lush, green prehistoric landscape filled with tall trees, colourful plants, and the distant sounds of gentle dinosaur calls. In your mind, picture a gentle, friendly dinosaur, like a Brachiosaurus or a Triceratops, peacefully grazing or moving through the landscape. Notice the dinosaur’s size, shape, and the way it moves slowly and gracefully. Imagine the texture of its skin and the calm look in its eyes. Relax the most during this exercise. | ||||||||||||||||||||||||||||||||||||||||||||||||||||
| Objectives | Students will:
| ||||||||||||||||||||||||||||||||||||||||||||||||||||
| Preparation | Materials Dinosaur (theropod) footprints (Appendix 1) Equipment Laptop and projector or interactive board Preparation for the lesson
Figure 1. Dinosaur footprint track.
Figure 2. Foot length, pace length and stride length. For a footprint length which is between 22 and 24 cm (don’t exceed 25 cm), you can use a stride length of about 2,50 m. Watch this video to learn more about dinosaur footprints: https://youtu.be/RTMAe9TSdZQ | ||||||||||||||||||||||||||||||||||||||||||||||||||||
| Introduction | Dinosaurs are among the main focuses of young students’ conceptual interest. Studying dinosaur footprints and tracks can raise their awareness of ancient animals and the causes of their extinction. Although the approach to the study of dinosaur tracks proposed in this work is simple, it must be done with great rigor, bearing in mind that measuring correctly the footprints is a must. 5 min | ||||||||||||||||||||||||||||||||||||||||||||||||||||
| Teaching and learning methods | Inquiry-Based learning Collaborative learning | ||||||||||||||||||||||||||||||||||||||||||||||||||||
| Interdisciplinary connections | Mathematics: reasoning and measuring skills Arts: drawing dinosaur footprints | ||||||||||||||||||||||||||||||||||||||||||||||||||||
| Resource teacher or other specialists activities | Almost all the steps of the lesson are comprehensible to most special needs students who have well-preserved cognitive abilities. The lesson does not comprise long written explanations. The role of the special needs teacher or the assistant teacher is to help target group students in case they are not able to cope with some of the tasks or steps. | ||||||||||||||||||||||||||||||||||||||||||||||||||||
| New vocabulary | Dinosaur Footprints Tracks | ||||||||||||||||||||||||||||||||||||||||||||||||||||
| Work Flow | Part I | Dinosaur extinction Start the lesson asking students what they know about dinosaur extinction. Ask them to explore the following online pages:
Then, ask students to identify if their initial ideas are similar to the reason for dinosaur extinction proposed by science. To promote discussion, the teacher can ask students some of the following questions:
Part II | Dinosaur size and dynamics Step 1: Get to know the footprint track - Appendix 1 Students are taken to the site where the footprint tracks were created. They are told that the trackway is a record of dinosaur's activity in the distant past and that we can extract information from it about the dinosaur's characteristics and behaviour. The simulated track is similar to real tracks that can be found around the world (Figure 4). Figure 4. Dinosaur footprint in Alcanede, Portugal. The tridactyl footprints indicate that they were produced by a theropod dinosaur. At this stage it makes sense to ask the students what additional information this track can provide. What characteristics of the track can be measured? For example, the length of the footprint, which gives us information about the size of the animal, can be measured. Students are asked to organise themselves in pairs to measure and record the length of the footprint. Here are some aspects to take into consideration by the teacher:
Figure 5. Foot length. Students can use a ruler to measure, as it is a short length. They can also use a tape measure, which they will need later to measure the other parameters of the track.
After measuring and recording the foot length, the working pairs should recognise two other parameters of the track, namely the pace length and the stride length, according to the following diagram (Figure 6). Figure 6. Foot length, pace length and stride length. Students are also required to measure and record these two elements of track data. The pace length should be understood as the distance between two consecutive footprints, measured from heel to heel; stride length as the distance between two consecutive footsteps of the same foot, also measured between two corresponding points (as before, for example, from heel to heel). Again, it’s important to realise that:
At this stage of the work, students will have the opportunity to obtain simple but relevant additional information about the theropod dinosaur from the data collected, just by using simple mathematical models. The size of the footprint gives us an idea of the size of the dinosaur that produced it. An important parameter is the size of the leg, usually referred to as the hip height, is an indicator of the size of the dinosaur (Figure 7) Figure 7. Hip height (H). For a small theropod (with a foot length of less than 25 cm), the hip height can be estimated by multiplying the footprint length by 4.5. Students must now multiply their measurement for the foot length by 4.5 to determine the hip height of the dinosaur. Stride length tells us whether the dinosaur moved faster or more slowly: the longer the stride, the faster it moved. However, this is relative, depending on the size of the leg, which in this context we call hip height. This means that a certain stride length could mean faster displacement for a dinosaur with shorter legs, or a slower locomotion for a dinosaur with longer legs. For this reason, discovering the type of dinosaur locomotion responsible for the trackway involves assessing the stride length in relation to the hip height. So, students must divide the value of the stride length (measured on the track) by the hip height (determined in the previous step). If this ratio is found to be:
In this case, as a reference with a stride length of 250 cm, for a footprint of 24 cm, the hip height would be: Hip height=4,5 × foot lenght=4,5×24=108 cm After obtaining this value, the students can use a tape measure to represent what this dinosaur's hip height would be and imagine how tall the dinosaur was. Then, they should calculate the dinosaur locomotion, as in the following example: Dinosaur locomotion=Stride length : Hip height= 250 : 108=2.3 (Dinosaur was trotting) To carry out the division, the teacher can authorise students, if considered appropriate, to use a calculator or, alternatively, engage in “pencil and paper” calculation (algorithm) or use any other calculation strategies, according to the level of the students. It is not important to achieve an exact result, but only an approximation that allows the ratio to be compared with the reference values provided (2 and 2.9). Additional information about dinosaur tracks in: Wright, J.L., & Breithaupt, B. H. (2002). Walking in their footsteps and what they left us: dinosaur tracks and traces. In J. Scotchmoor, D.A. Springer, B.H. Breithaupt & A.R. Fiorillo (Rds.), Dinosaurs—The Science behind the Stories (pp. 117–126). American Geological Institute. | ||||||||||||||||||||||||||||||||||||||||||||||||||||
| Reflection | Guided discussion:
5 min | ||||||||||||||||||||||||||||||||||||||||||||||||||||
| Notes | |||||||||||||||||||||||||||||||||||||||||||||||||||||
| Digital Resource | |||||||||||||||||||||||||||||||||||||||||||||||||||||
| 81 | ||
| | ||
Bibliography
| ||
| | ||
| Indice | Page | |
| Credits | 3 | |
| Acknowledgements | 4 | |
| Preface | 5 | |
| Introduction | 6 | |
| Instruction to teachers | 7 | |
| Class preparation | 8 | |
| Non Formal Education | 11 | |
| Use of Digital Tools | 13 | |
| Evaluation | 14 | |
| Energizers | 15 | |
| Relaxing Exercises | 21 | |
| 1 - Grade 1 / Addition and subtraction | 29 | |
| 2 - Grade 1 / Programs; presenting data sets with pictograms | 30 | |
| 3 - Grade 1 / Number of objects in a collection of up to 20 object | 31 | |
| 4 - Grade 1 / Units and tens: Meaning of digits according to their position in the record of a number | 32 | |
| 5 - Grade 1 / DATA - Statistical questions, data collection and organisation | 33 | |
| 6 - Grade 1 / Measurement: Length | 34 | |
| 7 - Grade 1 / Geometrical shapes | 35 | |
| 8 - Grade 1 / Addition of natural numbers up to 20. | 36 | |
| 9 - Grade 1 / Addition and subtraction of numbers up to 20 with carrying; word problems | 37 | |
| 10 - Grade 1 / Addition with carrying: Adding number 9 to a single digit number | 38 | |
| 1 - Grade 2 / Multiplication. Multiplier. Product. | 40 | |
| 2 - Grade 2 / Measurement and comparison of objects: weight measures | 41 | |
| 3 - Grade 2 / The commutative and associative property of addition | 42 | |
| 4 - Grade 2 / Problem with four operations | 43 | |
| 5 - Grade 2 / A two-digit number as the sum of tens and units | 44 | |
| 6 - Grade 2 / Оrder of units and order of tens in a two-digit number | 45 | |
| 7 - Grade 2 / Types of triangles based on the length of their sides; perimeter of a triangle. | 46 | |
| 8 - Grade 2 / Spatial Location | 47 | |
| 9 - Grade 2 / Numbers and Operations: Division | 48 | |
| 10 - Grade 2 / Units of measurement for length: decimetre and metre | 49 | |
| 11 - Grade 2 / Symmetrical shapes | 50 | |
| 12 - Grade 2 / Numeric pattern | 51 | |
| 1 - Grade 3 / Parts of a whole: a half, a third, a fourth, a tenth | 53 | |
| 2 - Grade 3 / Figure operations; reflection | 54 | |
| 3 - Grade 3 / Exploring Whole, Half, and Quarter Fractions | 55 | |
| 4 - Grade 3 / Word problems: inverse variation (addition and subtraction) | 56 | |
| | ||
| 5 - Grade 3 / Figure operations: Rotation | 57 | |
| 6 - Grade 3 / Mathematical Connections: External connections | 58 | |
| 7 - Grade 3 / Money: Uses of money | 59 | |
| 8 - Grade 3 / Problems with Division | 60 | |
| 9 - Grade 3 / Dividend - Quotient - Divisor - Remainder | 61 | |
| 1 - Grade 4 / Area of a rectangle | 63 | |
| 2 - Grade 4 / Data presentation and interpretation; probability | 64 | |
| 3 - Grade 4 / Geometric shapes | 65 | |
| 4 - Grade 4 / Mathematical reasoning | 66 | |
| 5 - Grade 4 / Determining the value of the variable in an equation | 67 | |
| 6 - Grade 4 / Probability | 68 | |
| 7 - Grade 4 / Measuring and drawing angles | 69 | |
| 8 - Grade 4 / Geometric shapes - circle and circumference | 70 | |
| 9 - Grade 4 / Measurement: Problem Solving - money | 71 | |
| 10 - Grade 4 / Real-Life Math Challenges | 72 | |
| 11 - Grade 4 / Visualising Fractions: Art Gallery Maths | 73 | |
| 12 - Grade 4 / Multiplication of multi-digit number by 1-digit number without carrying | 74 | |
| 13 - Grade 4 / Word problems based on data from tables, diagrams, charts using multiplication of a multi-digit number by a two-digit number. | 75 | |
| 1 - Interdisciplinary lessons / Water | 77 | |
| 2 - Interdisciplinary lessons / Water: Flooding in urban environment | 78 | |
| 3 - Interdisciplinary lessons / Measuring human footprints | 79 | |
| 4 - Interdisciplinary lessons / Dinosaur locomotion | 80 | |
| Bibliography | 81 | |


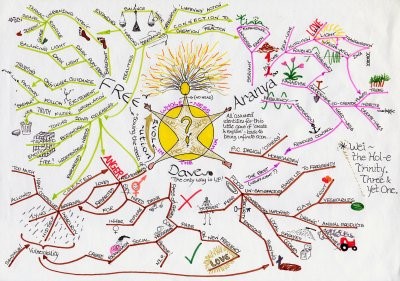


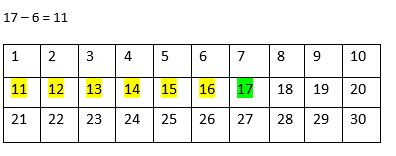
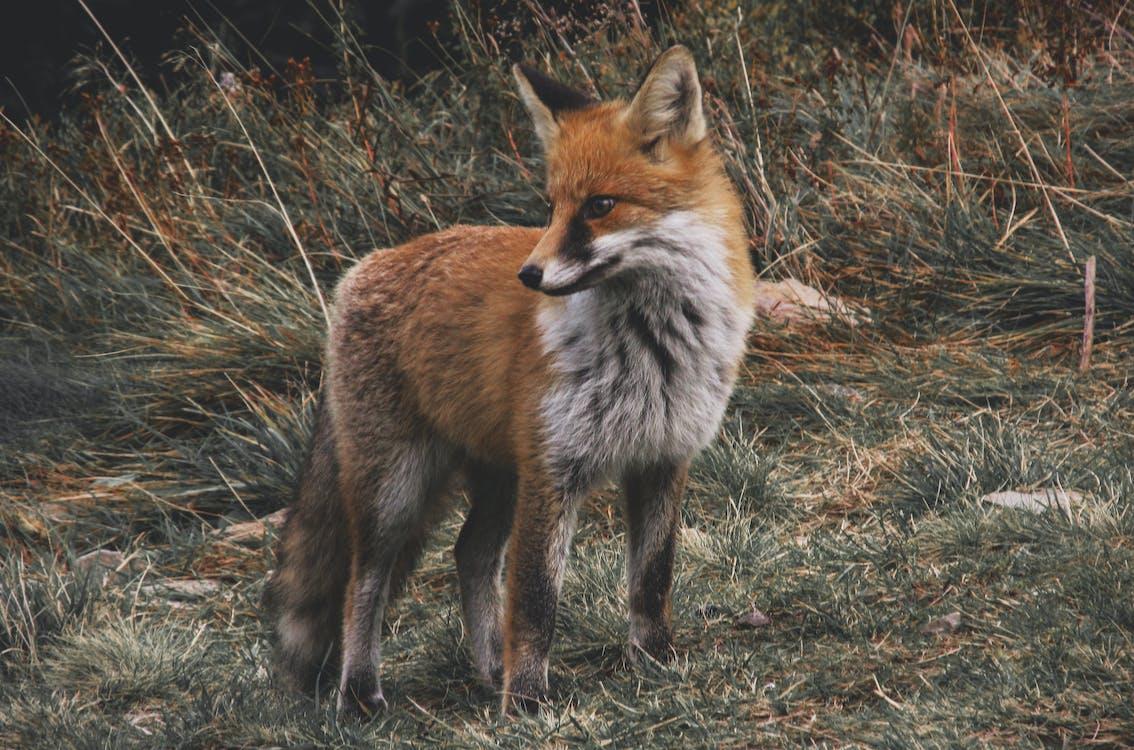
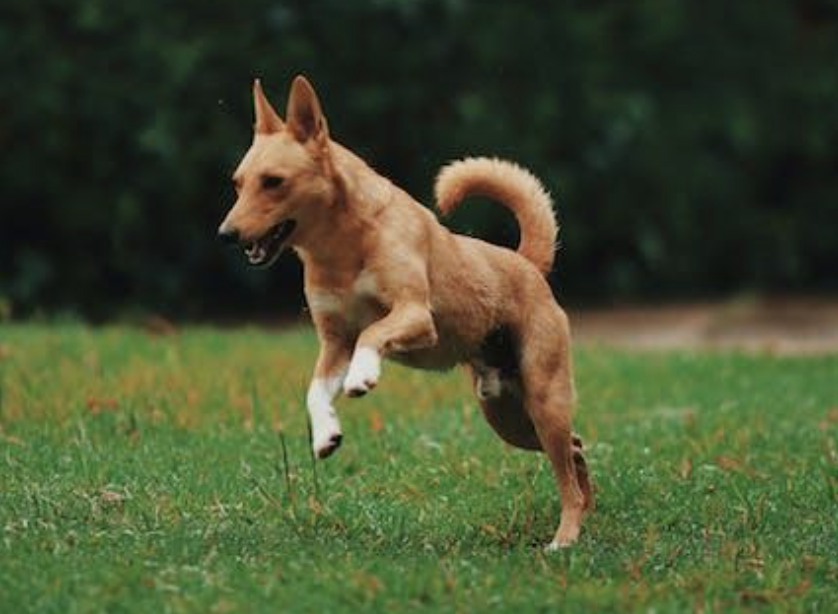

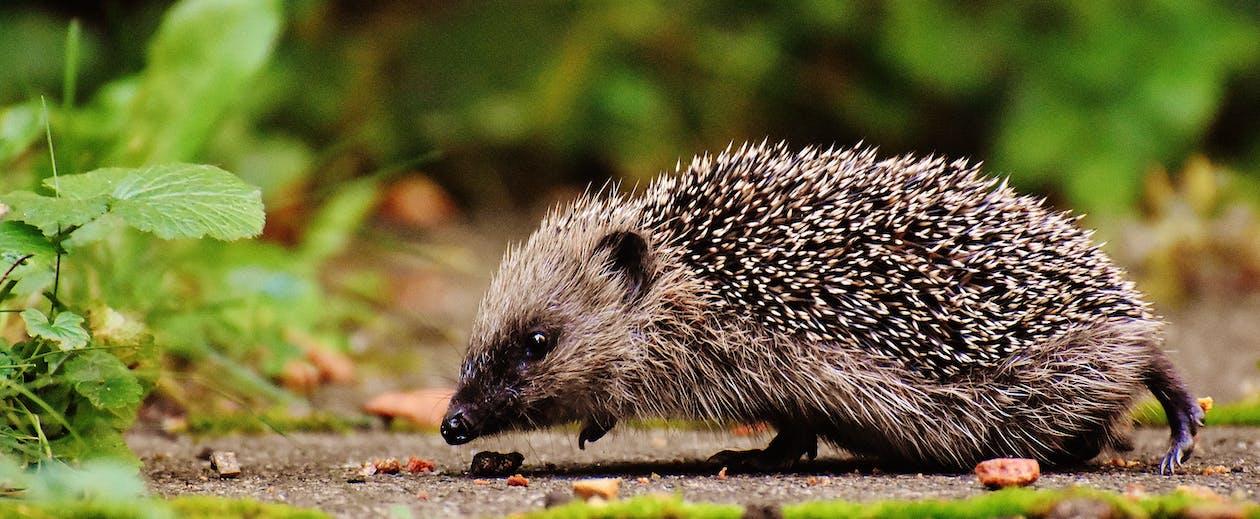
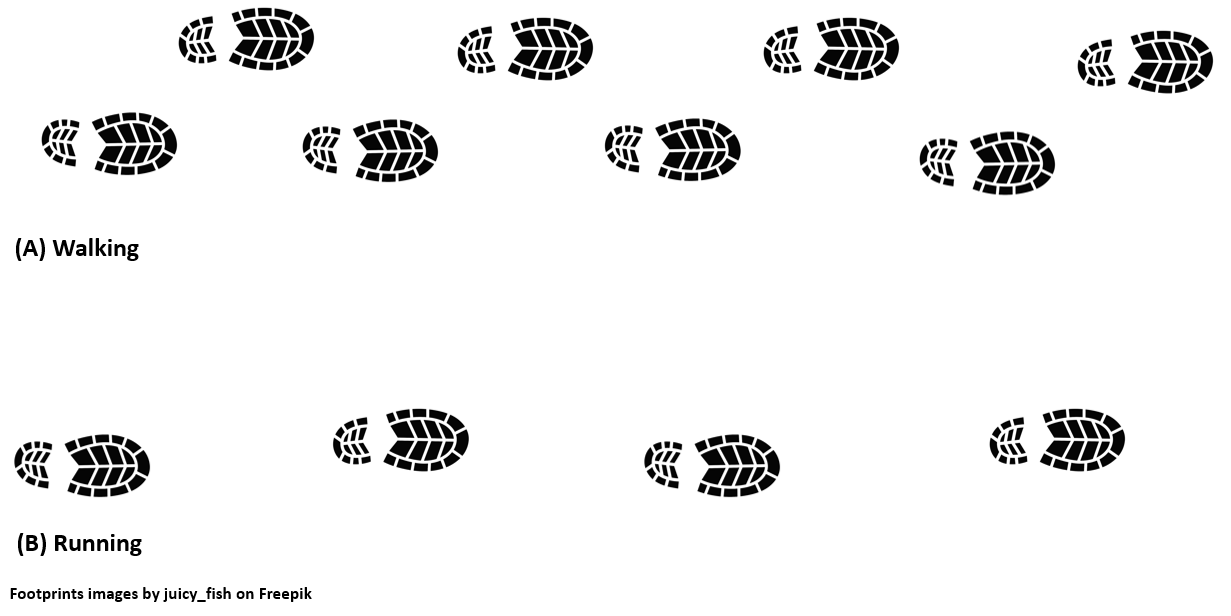
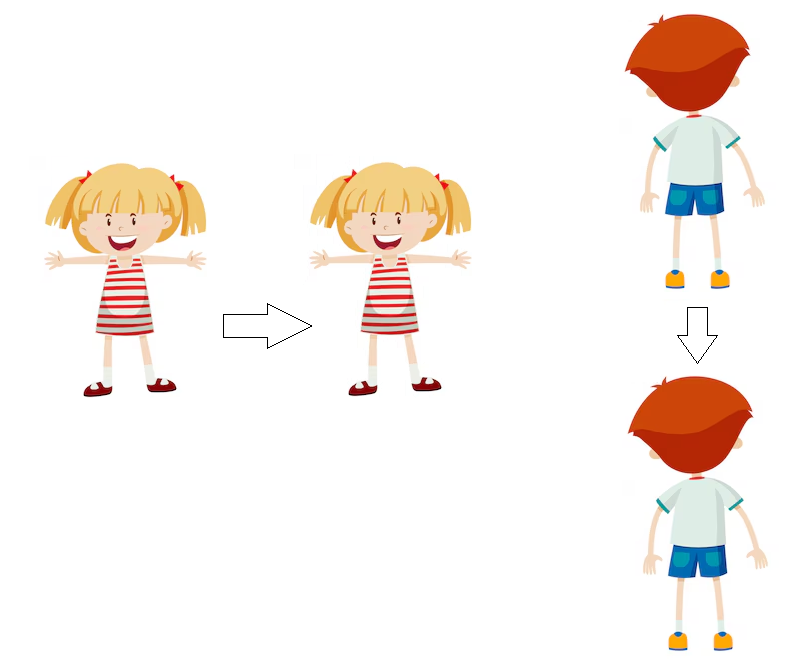
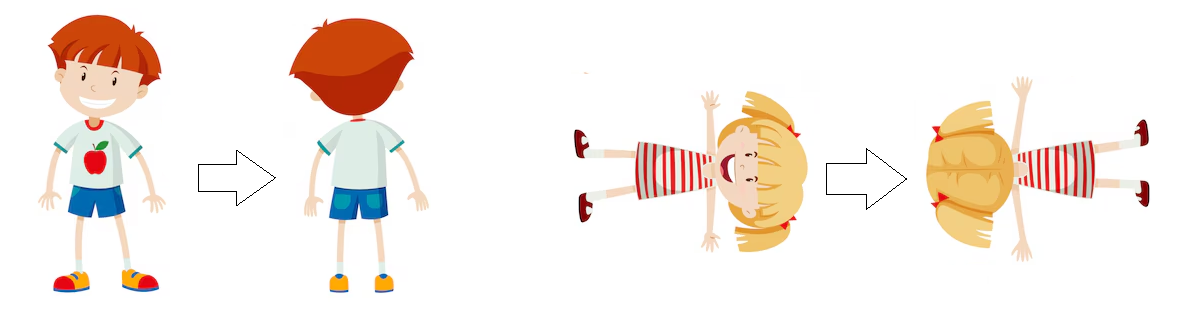


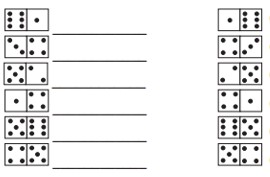
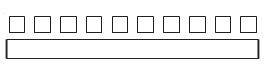
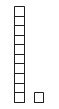
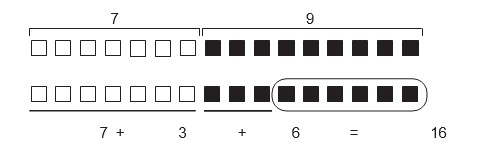

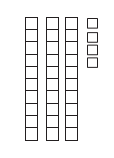

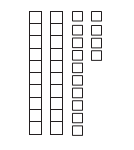
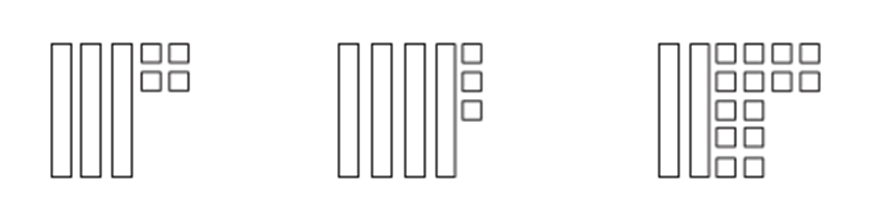


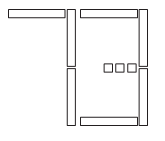


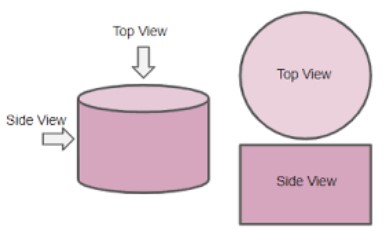

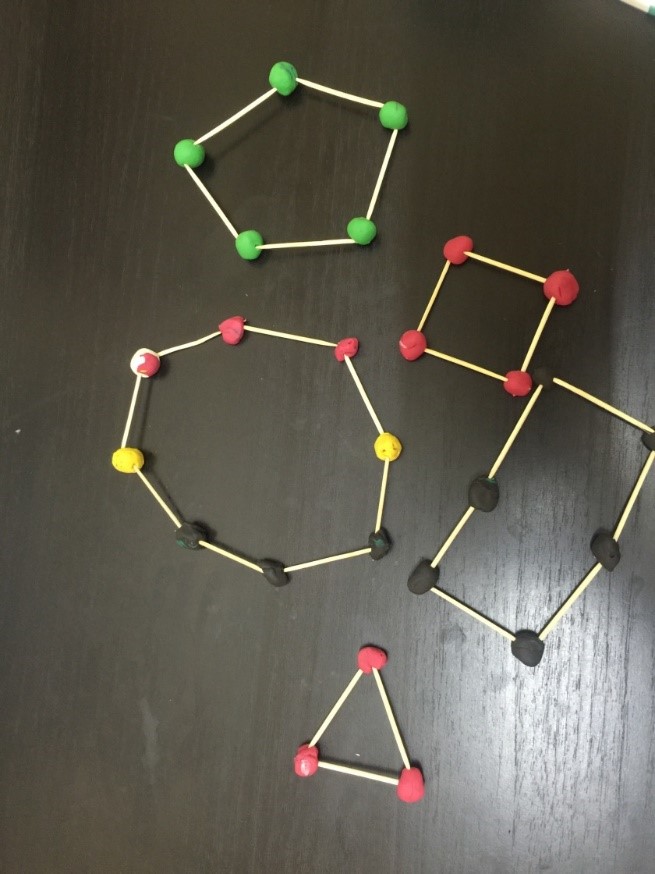
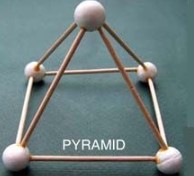
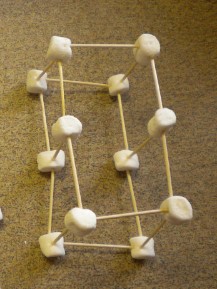
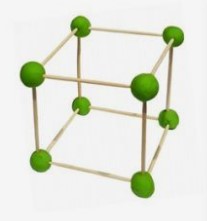
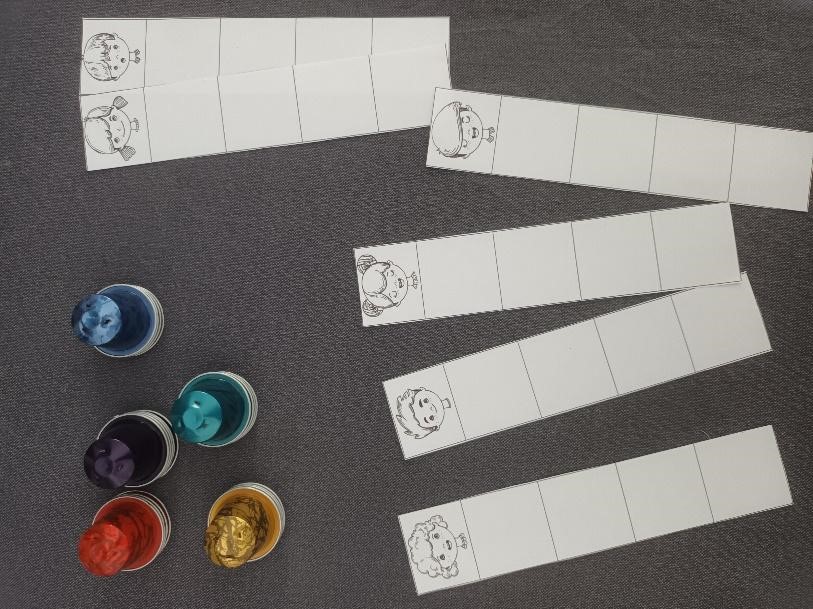 Figure 1. Characters cards and coffee capsules with different colours.
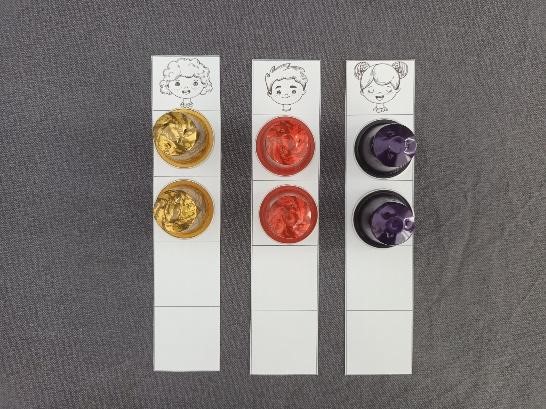
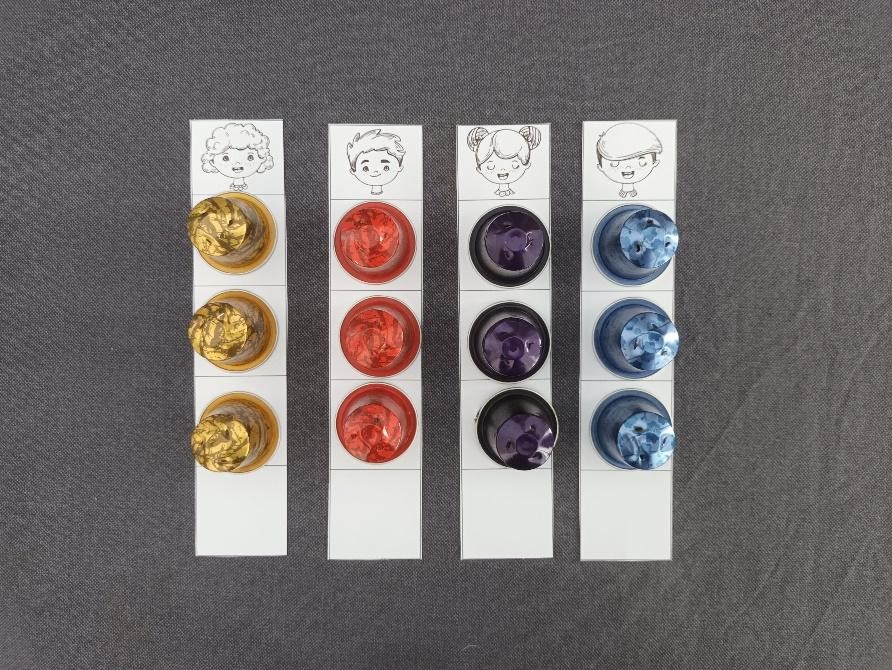
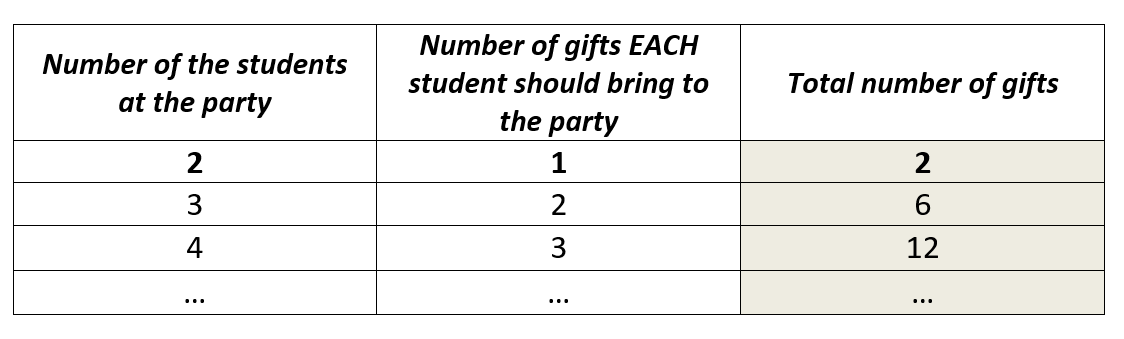
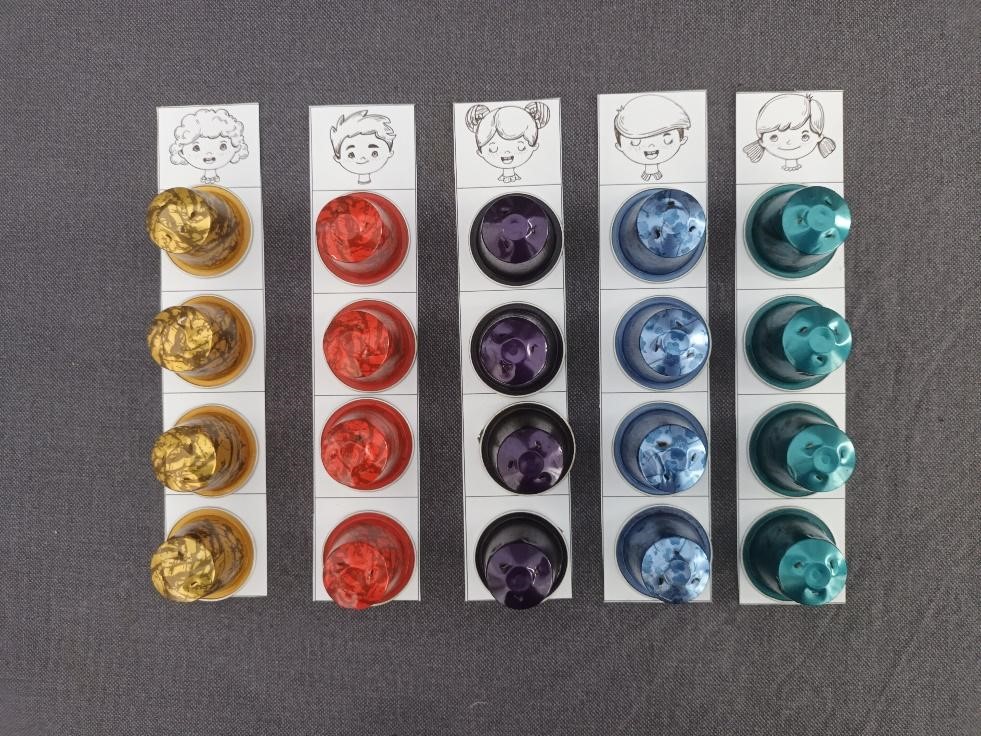
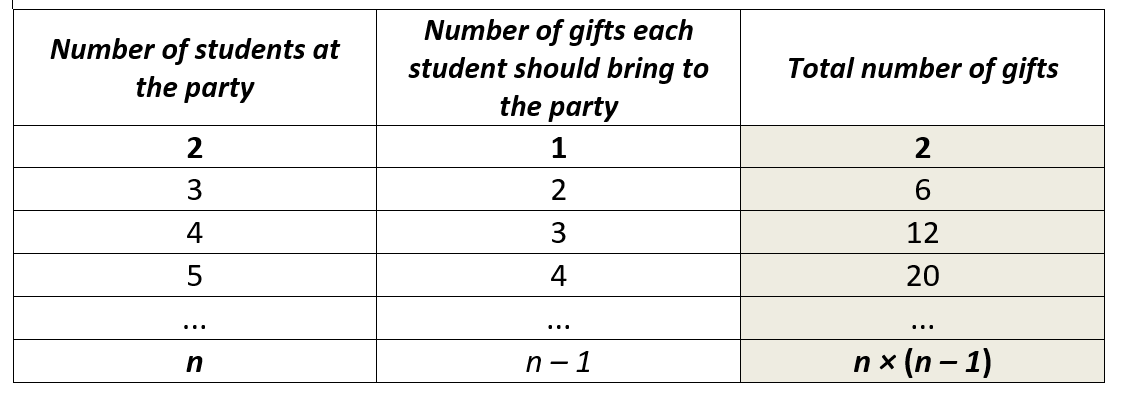


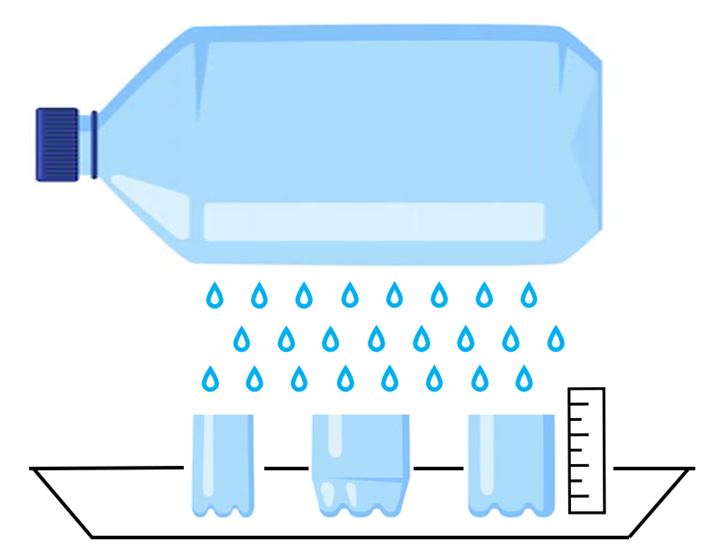
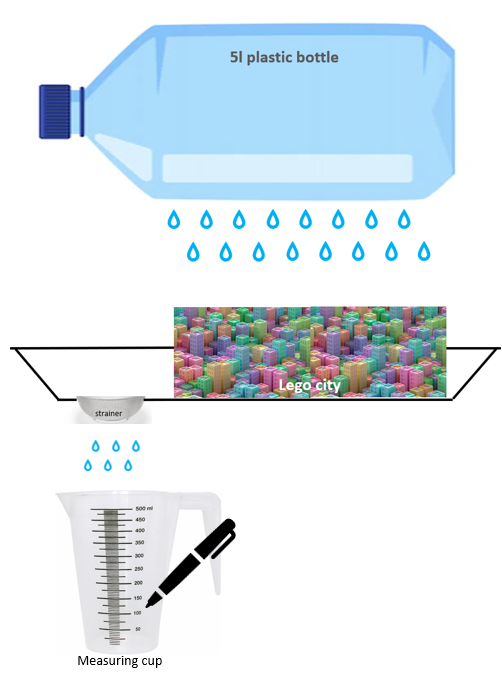
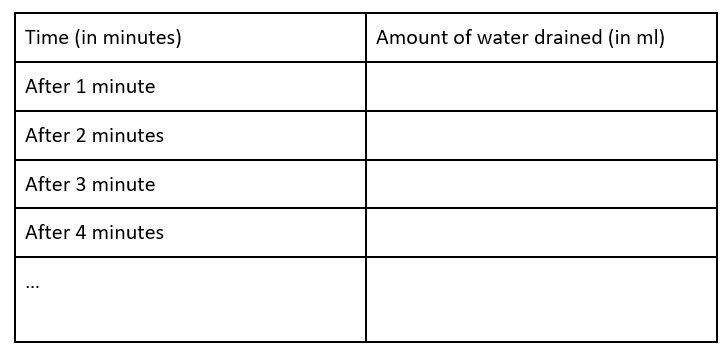
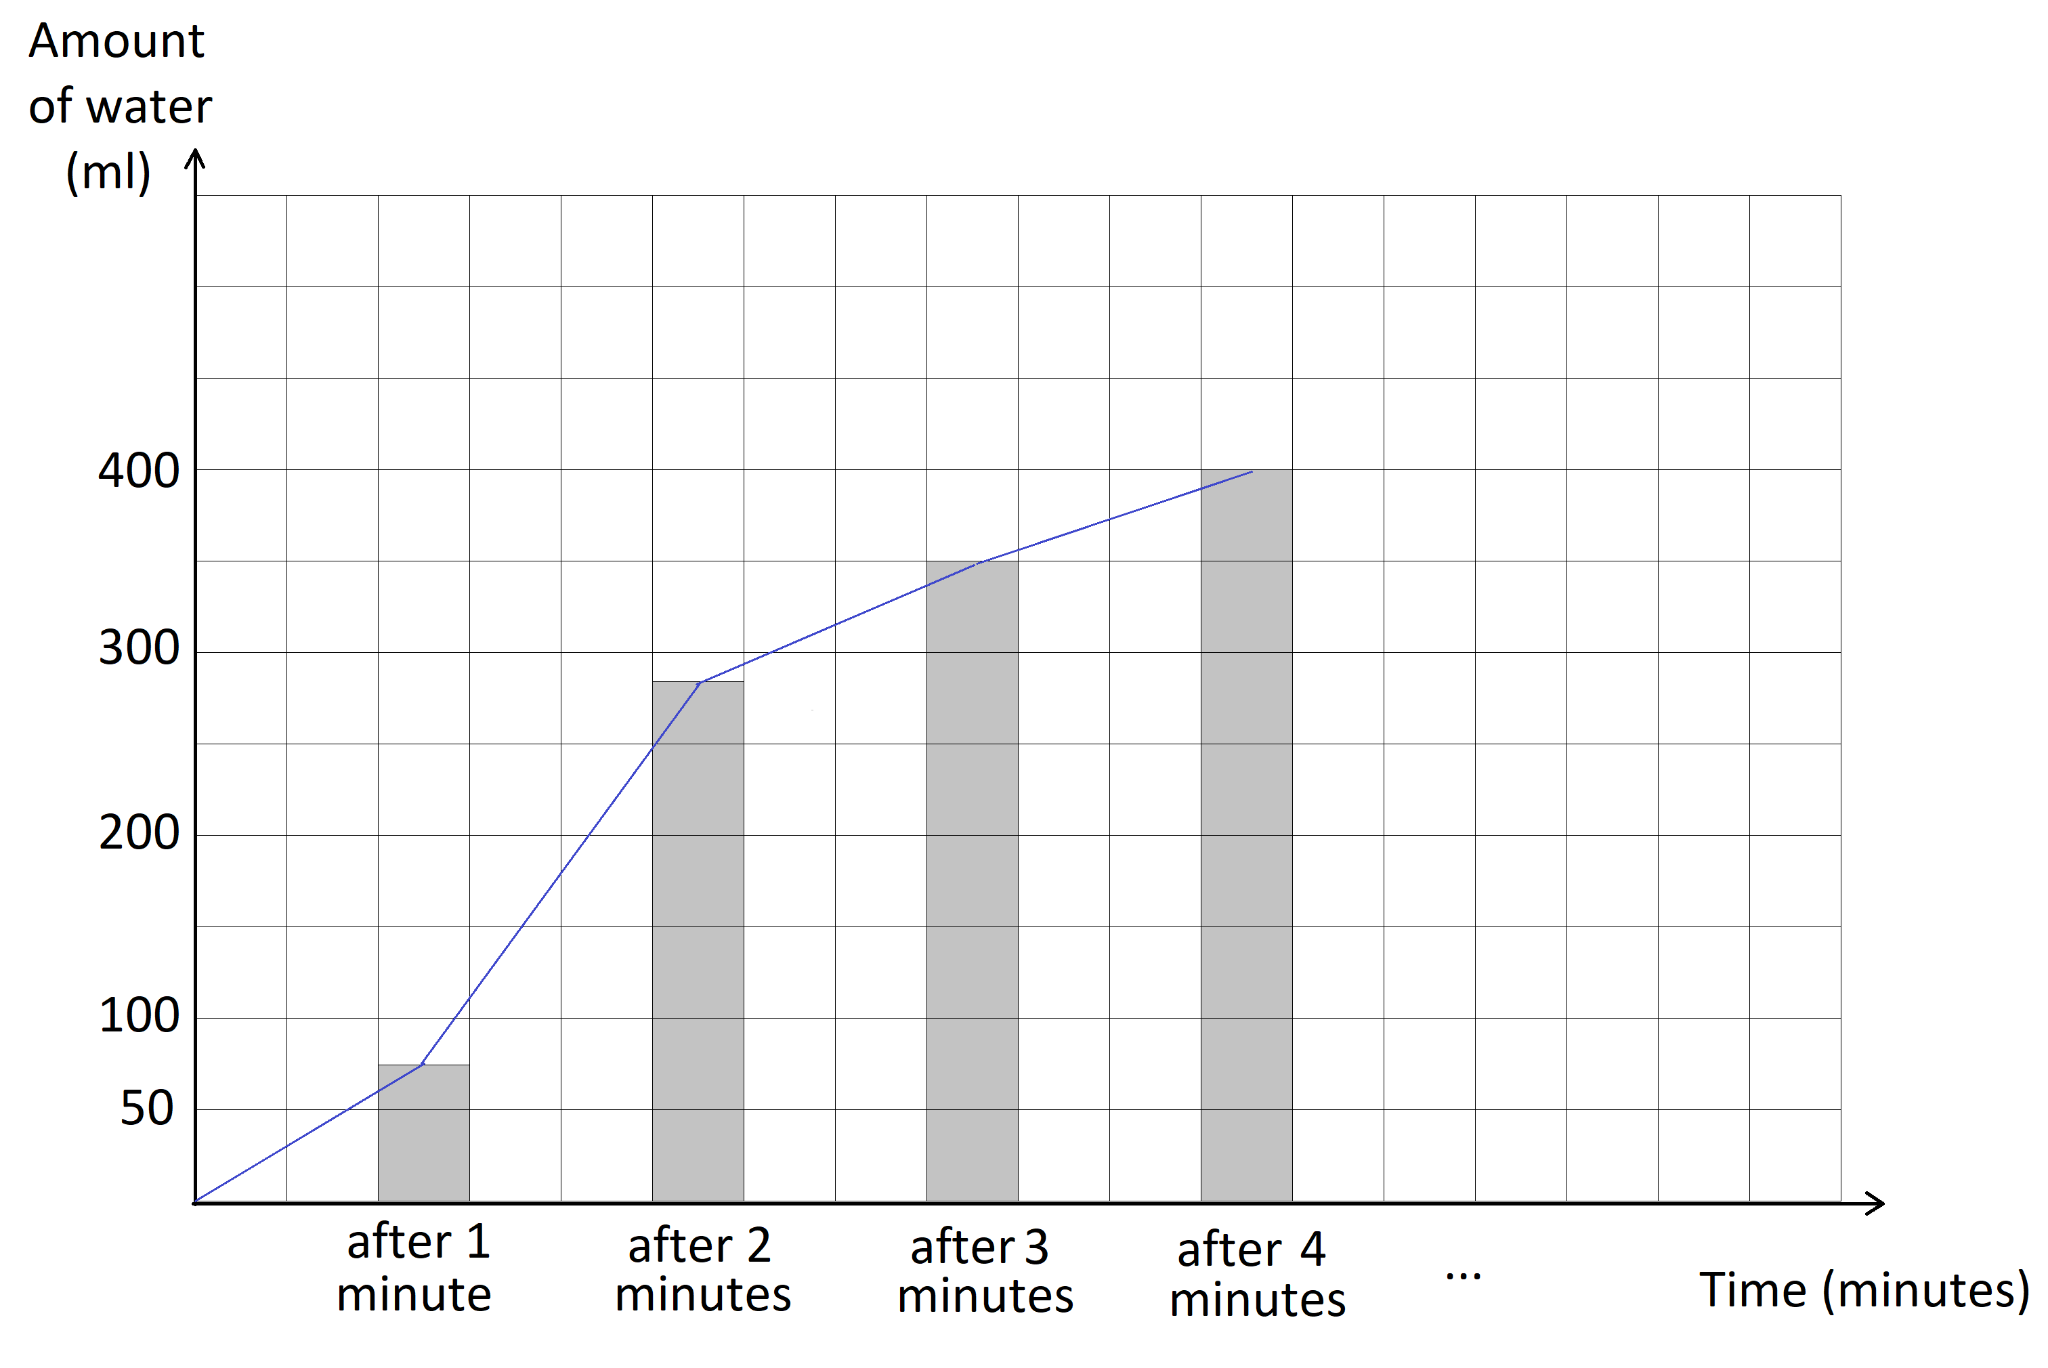


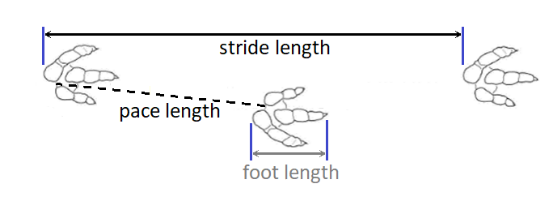

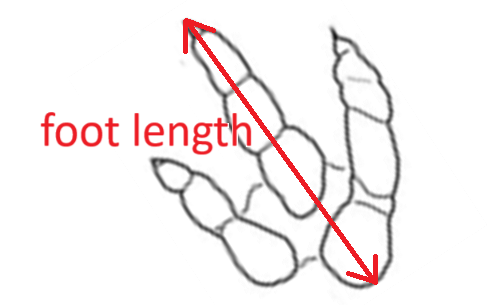

